
How to Store Garden Vegetables So They Stay Fresh Longer

Fresh garden vegetables can go from crisp to tired fast if they’re handled the wrong way. The good news is that most of the fix is simple: sort them correctly, keep them dry, and match each vegetable to the right storage spot. If you do that, you’ll waste less, prep faster, and get more meals out of each harvest.
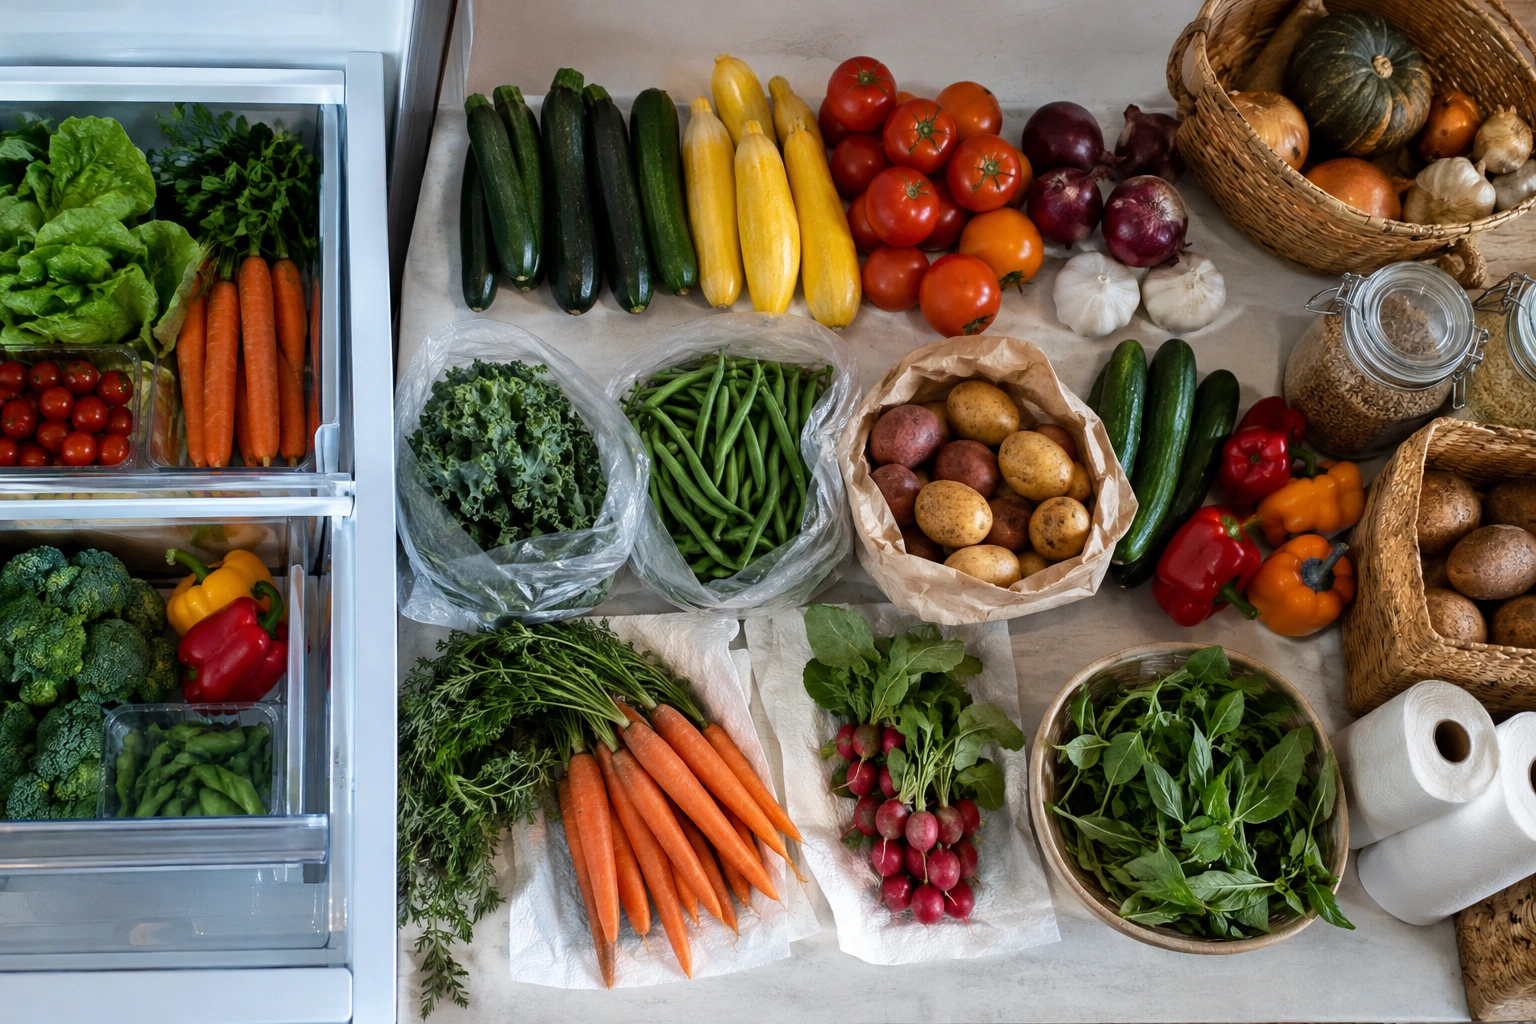
Here’s the fastest way to think about it: tender vegetables usually want the fridge, dry-storage crops want cool airflow, and anything bruised or overripe should be used first or frozen. Onions, garlic, potatoes, and winter squash often benefit from curing before longer storage, while leafy greens need moisture control without trapped condensation.
Quick Answer: Sort Your Harvest by Storage Method
Use this decision framework when you come in from the garden:
- Refrigerate soon: leafy greens, lettuce, herbs, broccoli, cucumbers, zucchini, green beans, carrots, beets, radishes
- Keep on the counter or in a cool pantry: tomatoes, onions, garlic, potatoes, winter squash
- Cure first, then store dry: onions, garlic, potatoes, winter squash
- Freeze if you won’t use it soon: extra zucchini, beans, chopped peppers, blanched greens, and other surplus harvests
A practical rule is to cool or process most vegetables soon after harvest, but the exact timing depends on the crop, its condition, and the weather when it was picked. Harvesting in the cool part of the morning also helps preserve freshness. That matters because field heat speeds moisture loss and softening. Harvesting and storing vegetables guidance
What You Need Before You Store Anything
You do not need a special setup, but a few basics make storage much easier:
- clean paper towels
- breathable produce bags or perforated bags
- shallow bins or baskets
- a refrigerator crisper drawer
- a soft brush for dry dirt
- clean containers for cut or trimmed produce
- a cool, dry, dark place for pantry crops
Think of these as tools for controlling three things: moisture, airflow, and temperature. Those are the main storage factors that determine whether produce stays crisp or turns slimy.
If your refrigerator tends to run very dry, paper towels and breathable bags can help protect tender produce. If your pantry is humid, dry-storage crops may do better somewhere cooler and drier, such as a basement shelf or a well-ventilated closet.
Step 1: Sort the Harvest by Vegetable Type and Condition
Before you wash or trim anything, separate the harvest into groups:
Tender vegetables
These are the ones that wilt, soften, or lose quality quickly:
– lettuce and other leafy greens
– herbs
– broccoli
– cucumbers
– zucchini
– green beans
Hardy storage vegetables
These tolerate longer keeping if handled properly:
– carrots
– beets
– radishes
– onions
– garlic
– potatoes
– winter squash
Use-first vegetables
Set aside anything that is:
– bruised
– cracked
– overripe
– soft at the stem end
– showing insect damage
– nicked by the harvest tool
Damaged produce does not store like healthy produce. One soft spot can turn into a mold problem fast, especially if the item sits in a closed container with other vegetables.
Step 2: Decide Whether to Wash, Brush Off, or Leave Soil On
This is where many home gardeners shorten shelf life without meaning to.
If you wash before storage, dry the produce thoroughly with a clean paper towel. That guidance is important because surface moisture is one of the fastest ways to invite mold or slime. The University of Connecticut food-safety guidance also notes that if you store produce unwashed, you should shake, rub, or brush off garden dirt while still outside. UConn food safety guidance
A practical rule:
- Leafy greens and herbs: rinse if needed, then dry very well
- Root vegetables: brush off loose soil first; wash only if you can dry completely
- Tomatoes: usually wipe off dirt rather than washing for storage
- Berries: do not wash until ready to eat
For garden produce, “clean enough to store” is usually better than “scrubbed spotless.” The cleaner goal is to remove dirt without leaving water behind.
Step 3: Dry, Trim, and Prep Vegetables for Storage
A few minutes of prep can add days or weeks of useful life.
Do this for most vegetables:
- Remove damaged pieces. Cut away anything bruised, split, or slimy.
- Trim tops only when needed. For root crops, leave a short stub rather than removing part of the root itself.
- Keep produce whole when possible. Whole vegetables generally keep better than chopped ones.
- Dry thoroughly. Even a little trapped moisture can cause trouble in a bag or drawer.
- Sort by urgency. The most tender or damaged items go first.
For root vegetables dug from the garden, trim the greens short and save them for cooking if they’re still usable. That step helps the roots hold moisture better in storage and keeps the tops from drawing resources away from the root.
Step 4: Store Refrigerated Vegetables the Right Way
The refrigerator crisper drawer is the best home for many garden vegetables because it gives you cooler temperatures and, in many fridges, more controlled humidity.
Leafy greens and lettuce
Wrap dry greens loosely in paper towels and place them in a breathable bag or container. The paper towel helps catch condensation before it turns the leaves limp. High humidity helps greens stay crisp, but standing water does the opposite.
Herbs
Soft herbs such as parsley, coriander, and mint can be stored by trimming the stems, placing them in water, covering the leaves with a bag, and refrigerating them. Change the water every 2 to 3 days. Basil is usually better kept at room temperature as a countertop herb, since refrigeration can darken or damage the leaves. Hardier herbs such as rosemary, dill, sage, thyme, chives, and oregano do well loosely wrapped in a damp paper towel and sealed in a container or reusable bag in the fridge.
Broccoli, cucumbers, zucchini, and green beans
These are best refrigerated soon after harvest. Keep them dry and uncrushed. A breathable bag or container helps reduce dehydration without trapping too much moisture.
Carrots, beets, and radishes
These root vegetables usually keep well in the fridge, especially in the crisper drawer. Trim the tops first, because the greens pull moisture from the roots. If the roots are washed, dry them thoroughly before storing. If they are unwashed, brush off the soil and refrigerate them in a bag or container.
For these vegetables, the storage goal is a balance: enough humidity to prevent shriveling, but not so much trapped moisture that they soften or rot. That’s why the crisper drawer and a breathable bag are often a better fit than a sealed container.
Step 5: Store Counter- and Pantry-Friendly Vegetables
Some vegetables lose flavor or texture if you chill them too soon.
Tomatoes
Keep tomatoes on the counter at room temperature for the best eating quality. Refrigeration can dull flavor and change texture. If a tomato is already very ripe and you need to slow it down, the fridge is a short-term backup, but the counter is the better first choice.
Onions and garlic
These prefer a cool, dry, airy place. Do not trap them in plastic. A basket, mesh bag, or open bin works better because airflow helps keep them dry.
Potatoes
Potatoes need a cool, dark, dry place with airflow. Avoid warm pantry shelves near appliances and avoid storing them in sealed bags where moisture can collect.
Winter squash
Winter squash stores best after curing and then holding it in a cool, dry place. Treat it like a dry-storage crop, not a fridge vegetable.
If you have a root cellar, that’s ideal for several of these crops. If you do not, a basement shelf, garage area that stays above freezing, or a cool closet can still work if the space stays dry and ventilated.
Step 6: Cure Vegetables That Need It Before Long Storage
Curing is the step that toughens skins and helps some crops store longer. It is especially useful for onions, garlic, potatoes, and winter squash.
The basic idea is simple: let the surface dry and firm up before moving the crop into longer storage. That reduces the chance of rot and helps slow moisture loss.
Use this as a practical rule:
- Do not cure damp produce in a closed bin
- Do not rush cured crops into storage if the skins are still soft
- Do store them where air can move around them
For carrots, beets, rutabaga, parsnips, and turnips, a better approach is usually to trim the tops, brush off soil, and store them cold rather than curing them like onions or squash. Some gardeners leave these root vegetables in the ground as long as possible, using straw or leaves as mulch to help insulate the soil. When you do dig them, use the greens if they’re still tender enough to cook. That approach can buy you time before you need indoor storage. How to store garden vegetables for winter
Step 7: Choose the Right Container, Bag, or Wrapping Method
The container matters because it shapes humidity and airflow.
Best matches by storage need:
- Breathable produce bags: good for greens, broccoli, beans, and some root crops
- Paper towels inside a bag or container: useful when you need to absorb extra moisture
- Open baskets or mesh bags: best for onions, garlic, and dry pantry crops
- Loose storage in a crisper drawer: works for sturdy vegetables that need some humidity but not a sealed environment
- Airtight containers: useful for cut produce or to prevent contamination, but they can trap moisture if the vegetable is still wet
If you are choosing between airtight and breathable, ask one question: Does this vegetable need to stay moist, or does it need to stay dry? That question usually points you to the right packaging.
Step 8: Store Vegetables Together Without Speeding Spoilage
Not every vegetable gets along in storage.
The biggest issue is ethylene, a natural gas that speeds ripening in some produce and can shorten shelf life in others. Tomatoes are a common example of a crop that can affect nearby produce more than people expect.
A practical sorting rule:
– keep tomatoes away from delicate greens
– keep damaged produce separate from healthy produce
– do not pile damp vegetables on top of dry-storage crops
– check stored vegetables regularly and remove anything soft or moldy
This is one of those small habits that saves the most food. A single spoiled item can affect the whole container if you leave it mixed in.
Step 9: Freeze Extra Vegetables When Fresh Storage Won’t Be Enough
Freezing is the right move when the harvest is larger than your short-term storage space or when the vegetable is past its best fresh-eating window.
Good freezer candidates include:
– extra zucchini
– green beans
– chopped peppers
– blanched greens
– many surplus cooking vegetables
Freezing changes texture, so it is usually a better choice for soups, sautés, and casseroles than for raw snacking. But it is often the best way to stop waste when the garden produces faster than your fridge can handle.
How Long Common Garden Vegetables Usually Last
Exact storage time varies with variety, condition, and your storage space, so treat these as approximate planning ranges rather than guarantees:
- Leafy greens: about 2 to 7 days
- Herbs: a few days to about 2 weeks, depending on type and storage method
- Broccoli: about 3 to 7 days
- Cucumbers and zucchini: about 3 to 7 days
- Green beans: about 5 to 10 days
- Carrots and beets: about 2 to 4 weeks in the fridge, and longer in cold storage if conditions are right
- Onions and garlic: often several weeks to a few months when cured and stored dry
- Potatoes and winter squash: often several weeks to a few months in proper dry storage
For a broader comparison of fresh storage, root-cellar style storage, and freezing, one useful summary from a vegetable storage guide notes that root-cellar storage can run for months, while freezer quality is usually best in the first several months of storage. Use that as a planning idea, not a promise, because your conditions matter. Vegetable storage methods compared
Common Mistakes That Make Vegetables Spoil Faster
These are the failures I see most often:
- storing wet produce
- washing everything and not drying it fully
- using airtight storage for vegetables that need airflow
- refrigerating tomatoes too soon
- keeping onions, garlic, or potatoes in humid rooms
- storing bruised produce with healthy produce
- chopping vegetables too early
- ignoring spoiled items in the drawer
Most of these mistakes are really moisture mistakes. Too much water in the wrong place turns crisp produce soft and dry-storage crops moldy.
Troubleshooting: Fixing Wilt, Mold, Softness, and Flavor Loss
If leafy greens wilt
Add a dry paper towel, reduce excess air in the bag, and keep them in the crisper drawer.
If vegetables get slimy
They were likely too wet, too warm, or packed too tightly. Remove the spoiled pieces, dry the rest if still usable, and switch to a drier setup.
If onions or garlic sprout or soften
The storage area is probably too warm, too humid, or too bright.
If roots go rubbery
They are losing moisture. A slightly more humid fridge setup may help, but do not trap them in standing water.
If tomatoes lose flavor
They were likely chilled too soon. Keep future tomatoes on the counter until they are fully ripe.
Signs a Stored Vegetable Should Be Tossed
Discard produce with:
– visible mold
– slime
– bad odor
– severe softness
– leaking liquid
– deep rot
– extensive discoloration
If one item in a container is clearly spoiled, inspect the rest carefully. When in doubt, err on the side of safety.
Practical Storage Examples for a Mixed Garden Harvest
Picture a weekend harvest with lettuce, parsley, carrots, radishes, tomatoes, zucchini, and onions.
Here’s a workable setup:
– Lettuce and parsley: washed if needed, dried well, wrapped with paper towels, refrigerated
– Carrots and radishes: tops trimmed, brushed clean, refrigerated in a breathable bag
– Tomatoes: left on the counter
– Zucchini: refrigerated and used soon, or frozen if there’s too much
– Onions: cured and moved to a dry basket in a pantry or basement shelf
That kind of sorting takes only a few minutes, but it protects flavor, reduces waste, and keeps your kitchen from becoming a produce rescue operation later in the week.
When to Ask a Food Safety Expert
Ask for expert guidance if you are unsure whether a vegetable is safe after freezing damage, mold, or major softening, or if you are storing large amounts in an unusual space such as an unheated garage or basement. If you have a food-safety concern, it is better to get a clear answer than to guess.
FAQ
Should I wash garden vegetables before storing them?
Only if you can dry them thoroughly afterward. If you store them unwashed, brush off dirt first while they are still outside.
Can I store tomatoes in the fridge?
Only if they are very ripe and you need to slow them down briefly. For best flavor and texture, keep them on the counter.
What is the best place for carrots and beets?
The refrigerator crisper drawer is a reliable choice. Trim the tops and keep them dry.
Why do onions and garlic need dry storage?
They store better with airflow and low humidity. Moisture encourages sprouting and rot.
Can I keep leafy greens in airtight containers?
You can, but only if they are dry and you manage moisture carefully. Breathable storage with paper towels often works better.
When should I freeze vegetables instead of refrigerating them?
Freeze them when the harvest is larger than you can use before quality drops, or when the vegetable is better suited to cooking than fresh eating.
