Hydrogen peroxide and baking soda can help with light stain removal, odor control, and surface cleaning in baking spaces. They work best on nonporous surfaces and should be rinsed off well, but they are not a substitute for disinfectants or heavy-duty cleaners.
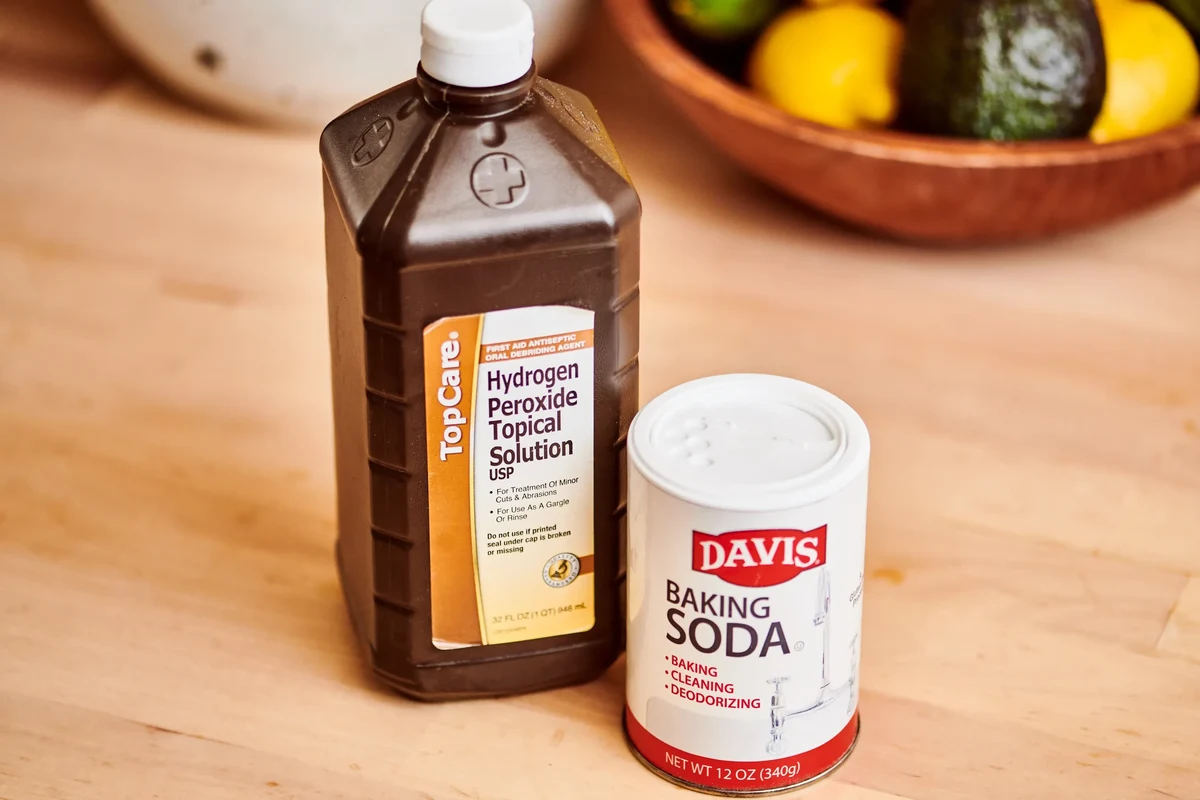
Hydrogen peroxide and baking soda are common household staples, and together they can be useful for light cleaning jobs around a baking-focused kitchen. Used the right way, they can help loosen residue, lift stains, and reduce lingering odors on many nonporous surfaces.
- Best use: Light cleaning, deodorizing, and stain lifting on nonporous kitchen surfaces.
- Main limit: It is not a disinfectant replacement and is weak on heavy grease or carbon.
- Safety rule: Never mix it with bleach or other unknown cleaners.
- Surface care: Spot-test delicate finishes and rinse food-contact areas thoroughly.
What Hydrogen Peroxide and Baking Soda Are Used For in Home Care and Baking Spaces
People often search for hydrogen peroxide and baking soda because they want a simple, low-cost cleaner for kitchen messes. The combination shows up in stain-removal and deodorizing searches because it can soften dried-on buildup without the strong smell of some commercial products.
In a baking space, the most practical uses are on countertops, sheet pans, mixing bowls, storage bins, and the outside of tools that pick up grease or batter. It is especially handy after baking projects that leave behind sugar syrup, cocoa dust, coffee drips, or oily smears that feel sticky even after a quick wipe.
Why this combination shows up in cleaning, deodorizing, and stain-removal searches
Hydrogen peroxide acts as a mild oxidizer, which means it can help break down some colored stains and organic residue. Baking soda adds gentle abrasion and helps absorb odors, so the two together are often used as a paste or spot treatment.
This does not make them a cure-all. They are best for surface cleaning and freshening, not for heavy sanitation or deep restoration.
Where it belongs in a baking-focused home: countertops, tools, storage areas, and spills
In a home baking setup, this mixture makes the most sense where you have nonporous, rinseable surfaces. Think stainless steel tools, glazed ceramic, sealed counters, fridge shelves, and plastic storage containers that need odor help after holding vanilla, spices, or onions.
It can also be useful for quick cleanup after spills from cocoa, jam, or frosting. If you keep a small cleaning kit near your baking station, it can be one of several options alongside dish soap, microfiber cloths, and a soft scrub brush.
For baking messes, start with the gentlest cleaner that can do the job. Dish soap and warm water often remove fresh grease faster than any paste, while hydrogen peroxide and baking soda are better for residue that has already dried on.
How Hydrogen Peroxide and Baking Soda Work Together
The mixture works because each ingredient does something different. Hydrogen peroxide helps loosen discoloration and break up some organic material, while baking soda adds body to the paste and gives a mild scrubbing effect.
The basic chemistry behind lifting stains, loosening residue, and reducing odors
When you combine them, the result is usually a paste that clings to vertical or curved surfaces better than liquid alone. That cling time matters because it gives the peroxide more contact with the stain and gives the baking soda time to absorb some odor and grime.
The action is helpful on coffee marks, tea stains, and dull film on counters or tools. It is less effective on burnt-on carbon, thick grease layers, or stains that have fully set into porous materials.
Why concentration matters: 3% peroxide, food-safe assumptions, and baking soda ratios
For home cleaning, many people use standard 3% hydrogen peroxide, which is the common consumer strength sold in pharmacies and grocery stores. Stronger concentrations are not a casual kitchen cleaner and should be handled with more caution and label reading.
Do not assume that a cleaning mixture is food-safe just because the ingredients are common. If it touches a food-contact surface, the surface should be thoroughly rinsed and dried before use, and you should follow the product label and manufacturer guidance when applicable.
Baking soda is mildly abrasive, which helps it scrub without the harshness of many scouring powders. That is why it can be useful on stainless steel and glazed surfaces, but still needs a careful hand on delicate finishes.
What the mixture can and cannot do compared with soap, vinegar, or bleach
Compared with soap, this mixture is less effective at cutting through fresh grease, because soap is made to lift oily soil and rinse it away. Compared with vinegar, it has a different cleaning profile and is often better for odor and stain work than for mineral deposits.
Compared with bleach, it is much milder and should not be treated as a disinfectant replacement. If you need true sanitizing or disinfecting, follow recognized guidance such as USDA or FDA recommendations and use a product made for that purpose.
- Good for light stain lifting and deodorizing
- Useful on many nonporous kitchen surfaces
- Easy to mix in small batches
- Not a substitute for disinfectant
- Can be too abrasive for delicate finishes
- Less effective on heavy grease or baked-on carbon
Best Uses for Hydrogen Peroxide and Baking Soda Around the Kitchen
In a baking kitchen, this mixture is best used as a targeted cleaner, not a whole-room solution. It shines when you need to spot-treat a problem area after baking, especially where batter, icing, cocoa, or coffee left a visible mark.
Cleaning sheet pans, mixing bowls, silicone mats, and stainless-steel tools
Sheet pans often collect a mix of grease and browned sugar, and a paste can help loosen what soap leaves behind. For mixing bowls and stainless-steel tools, it can reduce dull film and make the surface look cleaner after a normal wash.
Silicone mats need extra care. They can hold onto odors and stains, but you should check the manufacturer’s care instructions first because some finishes and coatings react differently to peroxide or scrubbing.
Tackling baked-on grease, coffee marks, and dull residue on nonporous surfaces
Baked-on grease is usually easier to remove if you let the paste sit briefly before wiping. Coffee and tea marks often respond well because the oxidizing action helps lighten the stain while the baking soda provides gentle abrasion.
On countertops and fridge shelves, the goal is usually to remove the visible mark and the smell, not to soak the surface. A damp cloth, a short dwell time, and a clean rinse are usually enough for routine use.
Deodorizing trash bins, fridge shelves, and storage containers used for ingredients
Trash bins and ingredient containers can hold onto odors from flour, sugar syrups, citrus peel, or spent parchment. A light application can help freshen the surface after normal washing, especially in plastic containers that trap smells.
For fridge shelves, use caution around food and packaging. Remove food first, clean the surface, rinse well, and dry completely before putting ingredients back.
How to Mix and Apply It Safely
The safest approach is to mix only what you need for one cleaning session. A fresh paste is usually more effective than a batch that sits around for days.
Common measurement ranges and paste consistency for cleaning applications
A common starting point is enough baking soda to make a spreadable paste with a small amount of 3% hydrogen peroxide. The exact ratio depends on how thick you want it, but the goal is a texture that sticks without running.
If the paste is too dry, it will not spread evenly. If it is too wet, it may drip off the surface before it has time to work.
- Read the peroxide label and any surface-care instructions
- Confirm the surface is nonporous and safe for light scrubbing
- Move food, utensils, and ingredients out of the area
- Open a window or run ventilation if the space is closed in
Step-by-step surface application, dwell time, and rinse guidance
Wipe away crumbs, grease, or dust so the paste can work on the stain instead of on top of dirt.
Spread the paste over the problem area with a soft cloth or sponge, using light pressure rather than hard scrubbing.
Allow short contact time so the mixture can loosen residue. Do not let it dry out completely on a sensitive surface.
Remove the paste with clean water, then dry the surface fully before food or utensils return to the area.
Keep the mixture away from eyes, and avoid touching your face while cleaning. If you use gloves, choose a type that gives a secure grip on wet surfaces, and wash your hands after you finish.
When to spot-test first and when not to use it at all
Spot-test first on painted, coated, colored, or specialty surfaces. Even a mild cleaner can dull a finish, lighten a stain unevenly, or leave a mark if the material is sensitive.
Do not use it on surfaces where the manufacturer says to avoid peroxide or abrasives. That caution matters for some laminates, sealed woods, decorative coatings, and specialty cookware finishes.
Common Mistakes That Reduce Effectiveness or Create Risk
Most problems come from using the mixture where it does not belong, or expecting it to do a stronger job than it can. A careful approach saves time and helps protect your tools.
Using it on porous, coated, or delicate finishes without checking compatibility
Porous materials can absorb liquid and hold onto residue, which makes cleanup uneven. Coated finishes can also react badly to scrubbing, especially if the surface is already worn or scratched.
That is why a quick compatibility check matters before you use the paste on a favorite tray, a decorative bowl, or a specialty board.
Expecting it to sanitize like a commercial disinfectant
This mixture can help clean visible grime, but cleaning is not the same as disinfecting. If you need a surface to be sanitized for food safety reasons, use a product and method that are labeled for that task and follow the directions exactly.
For home bakers, that distinction matters most after raw egg handling, raw flour spills, or contact with potentially contaminated tools.
Mixing it with vinegar, bleach, or other cleaners
Do not combine hydrogen peroxide with bleach. That can create dangerous reactions and is not safe for casual kitchen use.
Mixing it with vinegar is also not a good idea for routine cleaning. Keep cleaners separate, use one product at a time, and rinse between products if you switch methods.
Never mix peroxide with bleach or other unknown cleaners. If a surface needs a stronger treatment, stop and choose a single product made for that purpose instead of improvising a blend.
Safety, Storage, and Handling Tips for Home Bakers
Good kitchen cleaning habits are part of good baking habits. The same care you use with oven heat, sharp tools, and allergen cross-contact should also apply to cleaning products.
Skin, eye, and ventilation precautions during use
Hydrogen peroxide can irritate skin and eyes, especially if you handle it often or use stronger-than-standard concentrations. If you are cleaning for a long session, keep the area ventilated and avoid leaning directly over the paste.
If product splashes into the eyes or onto irritated skin, follow the label instructions and seek medical guidance if needed. Serious exposure concerns should be handled promptly rather than waiting for symptoms to pass.
Proper storage of peroxide and baking soda in a baking pantry or utility cabinet
Store peroxide in its original container with the cap closed, away from heat and light. Baking soda keeps well in a dry pantry or utility cabinet, but it should stay sealed so it does not absorb odors from nearby ingredients.
If your baking storage area is crowded, keep cleaning products separate from flour, sugar, and extracts. That reduces the risk of confusion and helps prevent accidental contamination.
Keeping the mixture away from food-contact surfaces unless fully rinsed and dried
Never leave the paste on a food-contact surface and then use that surface without rinsing. Even if the ingredients seem harmless, leftover cleaner residue does not belong on prep areas, utensils, or storage containers.
This is especially important for rolling pins, cutting boards, and bowls that will hold batter or dough soon after cleaning. When in doubt, rinse twice and dry completely.
If a tool has a manufacturer care label, follow that first. Cleaning advice for stainless steel, silicone, enamel, and coated bakeware can vary more than people expect.
When to Choose Another Cleaning Method Instead
Sometimes the best answer is not hydrogen peroxide and baking soda. Choosing the right cleaner often saves more effort and protects your equipment better.
Situations that call for dish soap, enzyme cleaners, or specialty degreasers
Fresh grease usually responds best to dish soap and warm water. Enzyme cleaners can be useful for certain food residues and odors, while specialty degreasers are often better for heavy kitchen buildup than a homemade paste.
If the mess is oily but not stained, start with soap. If the mess is sticky, dried, or colored, the peroxide-and-baking-soda approach may be more helpful.
Materials and finishes that may be damaged by peroxide or abrasives
Delicate finishes, decorative coatings, and some plastics may not tolerate the combination well. Baking soda’s mild grit can still dull a surface if you scrub too hard, even though it is gentler than harsher powders.
That is why testing matters on anything valuable, vintage, or manufacturer-sensitive.
Practical examples of better alternatives for ovens, cast iron, and wood tools
For ovens, follow the appliance manual and use the cleaner it recommends, because heating elements, seals, and coatings can be damaged by the wrong product. For cast iron, avoid soaking and use methods suited to seasoning, since moisture and abrasives can strip the surface.
For wood tools, use minimal water and a cleaner that will not raise the grain or leave the wood overly damp. In many cases, a quick wipe, dry brush, or gentle soap solution is safer than a paste.
- Use it on nonporous surfaces with light to moderate residue
- Rinse and dry after cleaning food-contact areas
- Check labels and spot-test first on sensitive materials
- Using it as a disinfectant substitute
- Mixing it with bleach or other cleaners
- Scrubbing delicate finishes without testing first
Final Recommendation: Where Hydrogen Peroxide and Baking Soda Fit in a Baking-School-Style Home Toolkit
For a baking-school-style home toolkit, hydrogen peroxide and baking soda are best viewed as a targeted cleanup option. They are helpful for stains, odors, and light residue on nonporous kitchen surfaces, but they are not the right answer for every mess.
If you want a simple rule, use them when you need gentle stain lifting or deodorizing, use soap when you need fast grease removal, and skip the mixture when a surface is delicate, porous, or manufacturer-restricted. That approach keeps your kitchen cleaner while protecting the tools you rely on for baking.
Hydrogen peroxide and baking soda are useful for light kitchen cleaning, especially on sheet pans, bowls, containers, and counters that need stain or odor help. Use them carefully, rinse well, and choose a different cleaner whenever the surface, soil type, or safety label calls for it.
If you are building a practical baking pantry, this combo can earn a small place on the shelf next to dish soap and microfiber cloths. The smartest use is not to replace every cleaner, but to know exactly when this one is the right tool.
Frequently Asked Questions
It is commonly used for light cleaning, stain lifting, and deodorizing on nonporous kitchen surfaces. It works best on sheet pans, bowls, counters, and storage containers with dried residue.
Yes, but only if you rinse and dry the surface thoroughly afterward. Do not assume the mixture is food-safe just because the ingredients are common.
No, it should not be treated as a disinfectant replacement. If you need sanitizing or disinfecting, use a product labeled for that purpose and follow official guidance.
A common approach is to add enough baking soda to make a spreadable paste with 3% hydrogen peroxide. The exact amount depends on the job and the surface, so start small and adjust as needed.
No, do not mix it with bleach, and avoid combining it with vinegar for routine cleaning. Use one cleaner at a time and rinse between products if needed.
Choose dish soap for fresh grease, enzyme cleaners for certain food residues, and specialty degreasers for heavy buildup. Avoid the mixture on delicate, porous, or manufacturer-sensitive surfaces.
