
No-Knead vs Kneaded Bread: How to Choose the Right Method for Better Loaves

If you’ve ever wondered whether kneading is truly necessary, you’re asking one of the most useful questions in bread baking. The short answer is that both methods can make excellent bread—but they do it in different ways, and they suit different goals.
If you want the shortest answer: no-knead is usually easier in terms of effort, while kneaded dough is often easier to control. For beginners, no-knead is often the better starting point if you want a rustic loaf and don’t mind waiting. Kneaded dough is usually the better choice when you want more predictable shaping, a finer crumb, or a loaf that needs stronger structure.
As Ethan Baker, I like to think of this comparison as a choice between hands-on control and time-based development. Kneaded dough gives you more immediate structure through physical work. No-knead dough leans on hydration, fermentation, and rest to build strength more gradually. That means the final loaf can look, feel, and bake differently even when the ingredient list seems nearly identical.
For home bakers and culinary students, the real question is not “Which method is better?” It’s “Which method gives me the bread I want, with the time and tools I have?”
What No-Knead Bread and Kneaded Bread Mean
In bread baking terms, kneaded bread is dough that is worked by hand or machine until gluten develops enough to give the dough strength, elasticity, and shape. The kneading action aligns and tightens the gluten network, which helps the dough hold gas and rise with more structure.
No-knead bread usually means the dough is mixed just until combined, then left to develop over time with little or no kneading. The dough gains strength through long fermentation, hydration, and often a few folds during the rise.
That definition matters because “no-knead” does not mean “no gluten development.” It means gluten is developed differently.
How Kneading Changes Dough Structure
Kneading does two big jobs.
First, it helps gluten form faster. Flour proteins absorb water and begin linking into an elastic network, and kneading speeds that process along. Second, it organizes that network so the dough becomes smoother, stronger, and easier to shape.
That’s why kneaded dough usually feels different in your hands. At the beginning, it may be rough, sticky, or shaggy. After enough kneading, it becomes more cohesive, springy, and less likely to tear when stretched.
For a baker, that extra strength is valuable when the bread needs:
- a tight, uniform crumb
- a neat loaf shape
- a dough that can be shaped confidently
- better support for rolls, sandwich loaves, or enriched doughs
Kneading also gives you more control. If the dough feels weak, you can keep working it. If it feels too tight, you can pause and let it rest. That predictability is one reason many bakers still rely on it.
How No-Knead Dough Develops Strength Without Kneading
No-knead dough works because time becomes part of the mixing system.
When flour, water, yeast, and salt sit together for a long fermentation, gluten continues developing on its own. Hydration helps proteins move and connect, fermentation produces gas, and the dough slowly gains extensibility and strength without being aggressively worked.
In plain language, the dough is changing in a few important ways at once:
- The flour hydrates fully, so proteins can link more easily.
- Yeast activity produces gas, which inflates the dough and stretches the gluten network.
- Enzymes keep softening and reorganizing the dough, which helps it become more extensible over time.
- Folds, if used, gently realign the dough without the friction of full kneading.
This is why many no-knead doughs are wetter than traditional doughs. A higher-hydration dough is easier to mix with minimal effort, and it can often produce a more open crumb if the rest of the formula supports it. In practice, that means the dough may look slack at first, but it often firms up after rest and a few folds.
The trade-off is control. Because fermentation is doing much of the work, the dough can be more variable if the timing, room temperature, or hydration is off.
So no-knead bread succeeds not because gluten is skipped, but because gluten is allowed to develop slowly.
No-Knead vs Kneaded Bread: Texture, Crumb, Crust, and Rise
Here’s the practical comparison most bakers want.
| Feature | No-Knead Bread | Kneaded Bread |
|---|---|---|
| Hands-on effort | Very low | Moderate to high |
| Total time | Usually longer | Often shorter overall |
| Gluten development | Through rest, hydration, and fermentation | Through physical kneading |
| Crumb | Often more open and rustic | Often tighter and more even |
| Chew | Can be slightly softer or more irregular | Usually more uniform and structured |
| Crust | Often thick and crackly in artisan-style loaves | Can be softer or thinner depending on recipe |
| Shape control | Less immediate control, more dependent on fermentation | More predictable shaping |
| Best fit | Rustic loaves, long-fermented breads | Sandwich bread, rolls, shaped doughs |
In texture terms, no-knead bread often leans rustic. You may get larger holes, a more irregular crumb, and a crust that feels hearty. Kneaded bread usually gives a more even crumb and a loaf that slices neatly.
Flavor is where the difference can be more subtle, but still meaningful. No-knead bread often tastes a little more developed because the longer fermentation gives the dough more time to build aroma and depth. That can translate into a slightly more fermented, wheaty, or complex flavor profile, depending on the recipe and timing. Kneaded bread can still have excellent flavor, but kneading itself does not create flavor directly. Instead, it can support flavor indirectly by helping the dough reach the right structure sooner or by making it easier to manage a longer fermentation if the recipe calls for one.
So the flavor difference is less about “kneaded tastes better” and more about how much fermentation time the method allows. A kneaded dough that ferments slowly can still taste deep and complex. A no-knead dough that is rushed may taste flatter than expected.
That said, the difference is not always dramatic. The bigger differences often show up in shape, crumb openness, and how much control the baker had during mixing and fermentation.
What about rise?
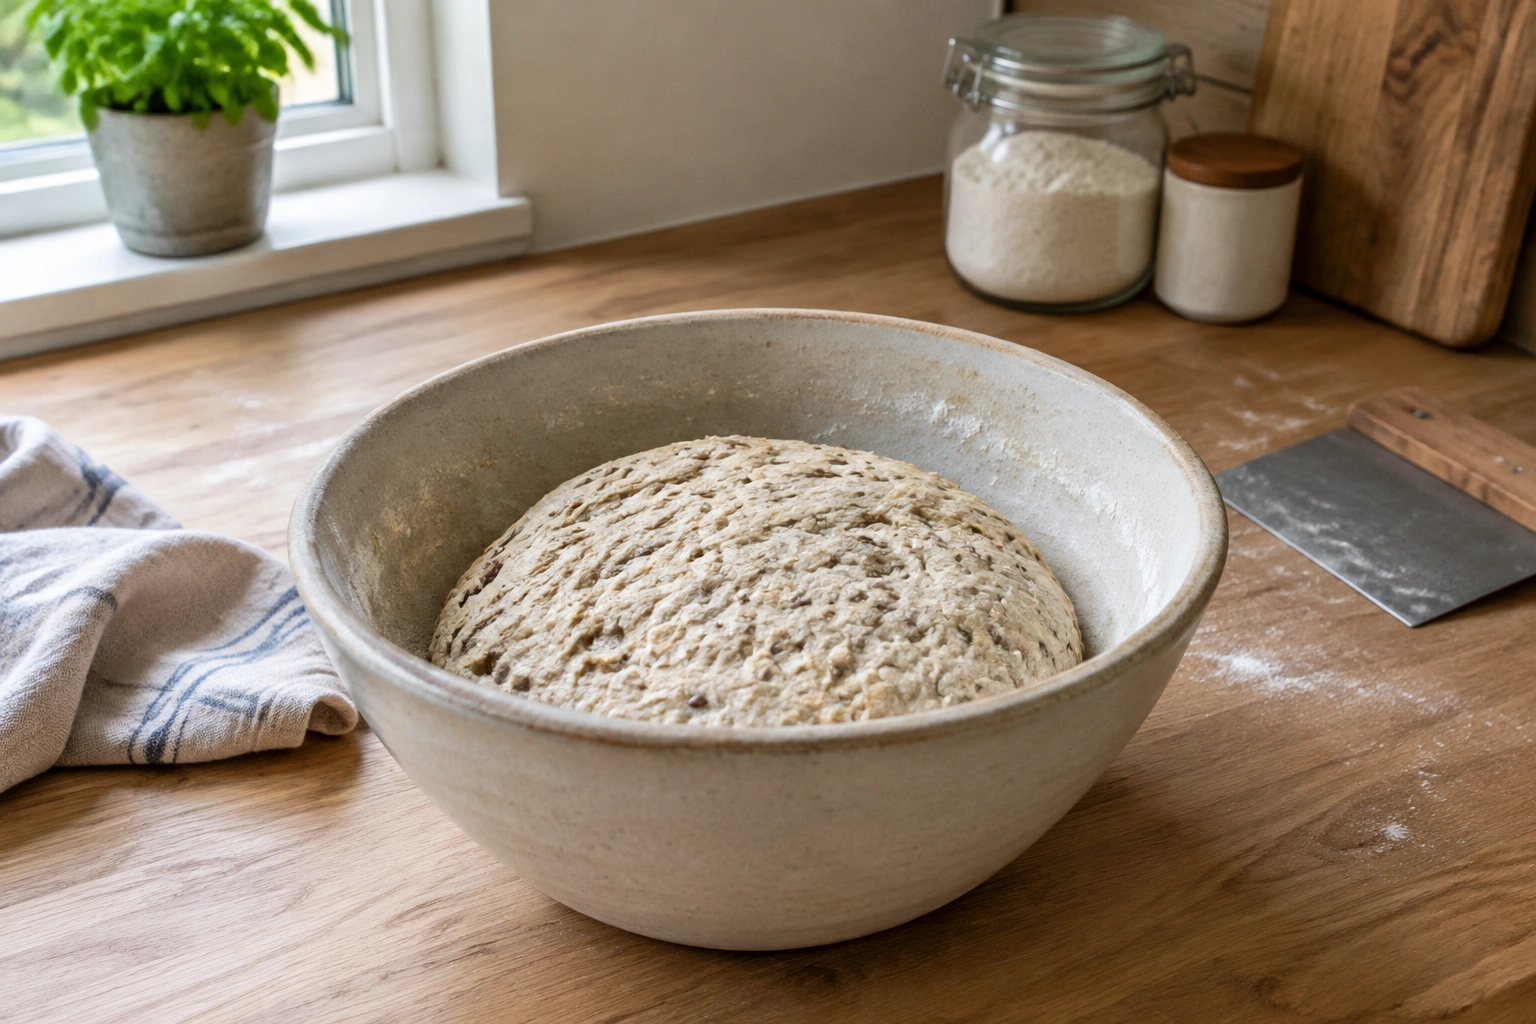
A well-made no-knead dough can rise beautifully. But because it is less actively strengthened, it may spread more if the flour, hydration, or fermentation timing are not balanced well. Kneaded dough usually gives you a firmer structure for oven spring and a more upright loaf shape.
In practice, that means no-knead bread can get good oven spring, especially in a hot Dutch oven, but it often depends more on timing and dough strength at the end of fermentation. Kneaded dough usually gives a more reliable upward rise because the gluten network is already stronger before baking.
If you want a tall, tidy sandwich loaf, kneading usually helps. If you want a rustic boule with a more open interior, no-knead can be a strong choice.
Time, Effort, and Skill Level: Which Method Is Easier?
This is where many bakers get tripped up. “Easier” can mean two different things:
- less active work
- less risk of making a mistake
No-knead bread is easier in the first sense. You mix, wait, fold if needed, and bake. That makes it appealing for beginners, busy home bakers, and students who want a simpler workflow.
For beginners, my practical recommendation is this: start with no-knead if you want a rustic loaf and a lower-effort process; start with kneaded dough if you want to learn shaping, dough feel, and structure control sooner. No-knead is often more approachable, but kneaded dough can be easier to understand once you want more direct feedback from the dough.
But easier does not always mean more forgiving. Because the dough depends heavily on fermentation, you still need to watch for overproofing, underproofing, and temperature swings.
Kneaded dough asks for more physical effort, but it often gives clearer cues. You can feel when the dough becomes smoother and more elastic. For many bakers, that tactile feedback makes kneading feel more predictable.
A simple rule of thumb
- Choose no-knead if you want the lowest hands-on effort and are comfortable waiting.
- Choose kneaded dough if you want more control over dough strength and shaping.
If you are teaching bread-making, this is a useful lesson: no-knead is not automatically “beginner proof,” and kneading is not automatically “hard.” They simply reward different kinds of attention.
Best Uses for Each Method
Different bread goals favor different methods.
No-knead works especially well for:
- rustic artisan loaves
- Dutch oven breads
- high-hydration breads
- breads where an open, irregular crumb is welcome
- recipes built around long fermentation
A no-knead method can be a very good fit for a country loaf baked in a Dutch oven, where steam and high heat help the crust and oven spring.
Kneading often works better for:
- sandwich bread
- dinner rolls
- enriched doughs
- pizza dough
- breads that need precise shaping and a finer crumb
If you’re making dinner rolls, for example, you usually want uniformity: similar size, even rise, and a soft, structured interior. Kneading supports that goal better than a purely passive method.
Quick decision format
- Artisan bread: usually no-knead or hybrid
- Dinner rolls: usually kneaded
- Sandwich bread: usually kneaded
- Rustic Dutch oven loaf: usually no-knead
- Pizza dough: often kneaded or lightly kneaded
- Enriched doughs: usually kneaded
If the finished bread must slice neatly and hold a shape, lean kneaded.
If the finished bread should feel rustic and artisan-style, lean no-knead.
When kneading is still necessary
No-knead is not the best choice for every dough. Kneading is still important when you want:
- very fine-crumb breads, such as many sandwich loaves or softer pan breads
- enriched doughs like brioche, challah, or cinnamon-roll dough, where butter, eggs, and sugar can slow gluten development
- bagels or pretzels, which need strong dough and good shape retention
- highly structured doughs that must hold a tight shape during shaping and baking
- doughs with a very specific texture goal, where a controlled gluten network matters more than rustic openness
In those cases, no-knead can work against the texture you’re trying to achieve.
Tools and Ingredients You Need
The ingredients overlap a lot, but the equipment and handling can differ.
For both methods
- flour
- water
- yeast
- salt
- a large mixing bowl
- a scale, if you want better consistency
Helpful for no-knead bread
- a Dutch oven or covered baking vessel
- a bench scraper
- a proofing basket or bowl lined with a towel, if shaping
- a long fermentation window
Helpful for kneaded bread
- a clean work surface
- your hands or a stand mixer with a dough hook
- enough flour for light dusting, not heavy dumping
- a timer, so you can track kneading and proofing
Hydration matters in both methods, but especially in no-knead dough. Higher hydration can help create a more open crumb, while lower hydration usually makes a dough easier to shape. The challenge is that wetter doughs can feel sticky and slack before they fully develop, so patience matters.
If you want a deeper look at the traditional method, see how to knead bread dough for better texture.
How to Choose the Right Method for Your Bread Goal
Use this quick framework.
Choose no-knead if:
- you have time for a long rise
- you want minimal hands-on work
- you’re baking a rustic loaf
- you’re comfortable with a slightly less controlled crumb
- you’re using a recipe designed for higher hydration and long fermentation
Choose kneading if:
- you need stronger dough structure
- you want a finer, more even crumb
- you’re making sandwich bread or rolls
- you want more reliable shaping
- the recipe depends on a tighter gluten network
Choose a hybrid if:
- you want some control without a full kneading session
- you have time for a short knead plus a longer fermentation
- you want a middle ground between convenience and structure

That hybrid approach is often a smart compromise. It lets you build a little dough strength early, then let time finish the job.
Step-by-Step: Making No-Knead Bread
Here’s the basic workflow.
-
Mix the dough until no dry flour remains.
Don’t chase smoothness here. A shaggy dough is normal. -
Cover and rest for bulk fermentation.
This is where the dough develops strength. Depending on the recipe, you may fold it once or twice during the rise. -
Watch for volume and texture changes.
The dough should look puffier, more aerated, and less dense. It may also feel more elastic when you lift it. -
Shape gently.
Use enough flour to prevent sticking, but avoid deflating the dough too much. -
Proof until ready.
A properly proofed dough usually looks relaxed and slightly expanded. If it springs back immediately when touched, it likely needs more time. -
Bake with good heat and steam.
A Dutch oven works especially well because it traps moisture and supports oven spring.
Readiness cues for no-knead dough
Look for a combination of signs, not just one cue:
- Surface bubbles: small bubbles on the surface or around the edges are a good sign of active fermentation.
- Volume increase: the dough should look noticeably puffier, even if it does not double exactly.
- Elasticity: when lifted or folded, it should feel more stretchy and less like a dense paste.
- Jiggly, airy feel: the dough should hold some gas and wobble slightly instead of feeling heavy and tight.
Signs of overfermentation
No-knead dough can go too far. Watch for these warning signs:
- the dough looks very loose and flat
- it has a strong fermented smell that seems overly sharp or boozy
- it loses strength and spreads quickly after shaping
- it feels fragile instead of elastic
- it may collapse rather than hold a rounded shape
If you see those signs, the dough may still bake into something edible, but the structure and oven spring will likely suffer.
Step-by-Step: Making Kneaded Bread
Now the traditional route.
-
Combine the ingredients.
Mix until the dough comes together. -
Knead until the dough becomes smoother and more elastic.
By hand, this may take several minutes of steady work. In a mixer, use moderate speed and stop before the dough overheats. -
Check the dough’s feel.
It should become stronger, less ragged, and easier to stretch without tearing. -
Let it bulk rise.
The dough should increase in volume and feel lighter. -
Shape with intention.
Kneaded dough usually responds well to tighter shaping because it has more structure. -
Proof, then bake.
Bake when the dough is puffy and responsive, not collapsed or overly slack.
Readiness cue
A properly kneaded dough usually feels elastic enough to stretch, but strong enough to hold together without immediately tearing.
Signs the kneaded dough is still underdeveloped
If the dough is still rough, tears easily, or feels weak and slack even after kneading, it likely needs more gluten development. It may also spread too much during shaping.
For a more detailed technique guide, you may also find stand mixer kneading methods useful.
Hybrid Methods: When a Short Knead Plus Long Fermentation Works Best
This middle path is underrated.
A short knead can give dough an early boost in strength, while long fermentation finishes gluten development and improves flavor. Bakers often use this approach when they want:
- better structure than a fully no-knead dough
- less labor than a fully kneaded dough
- a more balanced crumb
- a recipe that benefits from overnight fermentation
This can be especially useful for home bakers who want artisan-style bread without relying entirely on passive development. It also gives you a bit more control if your kitchen is warm and fermentation is moving quickly.
Think of it as a practical compromise, not a shortcut. You are still managing gluten, hydration, and fermentation deliberately.
Common Mistakes to Avoid
A few errors show up again and again.
With no-knead dough
- leaving it too long and letting it overferment
- using too little water for the method
- shaping too aggressively and knocking out too much gas
- assuming it will behave like a stiff, kneaded dough
With kneaded dough
- stopping before gluten is developed enough
- adding too much flour during kneading
- kneading so hard or so long that the dough becomes unpleasant to handle
- expecting a tight crumb from an underdeveloped dough
A common misconception is that no-knead bread is always inferior. It isn’t. Another is that kneading is outdated. It isn’t either. The real issue is whether the method matches the bread you want.
Troubleshooting: Dense Loaf, Weak Structure, or Poor Rise
If the loaf bakes up dense, the cause is often one of three things: weak gluten, poor fermentation, or too little shaping support.
If the bread is dense:
- the dough may have been under-kneaded
- the no-knead dough may not have fermented long enough
- the dough may have been too dry to develop well
If the structure is weak:
- the dough may have been overproofed
- the hydration may have been too high for the flour used
- the shaping may have been too loose
If the rise is poor:
- the yeast may have been inactive
- the dough may have been underdeveloped
- the proof may have gone too far and collapsed the dough
A useful fix for the next bake is to change only one variable at a time. If you shorten fermentation, don’t also change flour type and hydration at the same time. That makes it much easier to learn what actually improved the loaf.
Practical Examples: Which Method to Use in Real Baking Scenarios
Rustic Dutch oven loaf
Choose no-knead if your goal is a crusty, artisan-style loaf with a more open crumb and you can plan ahead for a long rise.
Sandwich bread
Choose kneaded dough if you want a sliceable loaf with a fine, even crumb and reliable shape.
Dinner rolls
Choose kneading, especially if you want uniform rolls that rise evenly and bake into a soft, structured crumb.
Pizza dough
A short knead is often the most practical choice. You want enough strength for stretching and handling, but not such a tight dough that it fights you.
Weekend artisan loaf
A hybrid method can work beautifully: a short knead, then a long fermentation for flavor and better structure.
Quick Takeaway: Which Bread Method Should You Choose?
If you want the simplest hands-on process and you’re baking a rustic loaf, no-knead bread is a strong choice. If you need more structure, tighter shaping, or a finer crumb, kneaded bread is usually the better tool.
In plain terms:
- Choose no-knead for convenience, long fermentation, and rustic texture.
- Choose kneaded for control, structure, and more uniform results.
- Choose hybrid when you want both a little convenience and a little more dough strength.
Once you understand what each method is doing to gluten, fermentation, and crumb structure, the choice becomes much easier. You’re not just picking a recipe style—you’re choosing the kind of bread experience you want from the first mix to the final slice.
FAQ
Is no-knead bread easier for beginners?
Usually, yes—if “easier” means less active work. It’s a good beginner option for rustic loaves because it reduces kneading and relies more on time. If you want to learn shaping and dough strength faster, kneaded dough can be a better teaching tool.
Does no-knead bread taste more fermented?
It can, especially when the dough ferments for a long time. The flavor is often a little deeper, more wheaty, or more complex than a rushed dough. But the exact taste depends on the recipe, fermentation time, and temperature.
Can you convert a kneaded recipe to no-knead?
Sometimes, but not always. It works best when the recipe is already fairly simple and the dough is not overly enriched or tightly structured. It’s usually not a good conversion for brioche, challah, bagels, or breads that depend on a very fine, controlled crumb.
How do I know when no-knead dough is ready?
Look for surface bubbles, a noticeable increase in volume, and a dough that feels airy and elastic rather than dense and flat. If it spreads too much, feels fragile, or smells overly sharp and boozy, it may be overfermented.
Which method is better for sandwich bread?
Kneaded dough is usually better because sandwich bread benefits from stronger structure, tighter shaping, and a finer crumb.