
How to Knead Dough in a Stand Mixer for Better Bread Every Time

If you’ve ever watched bread dough swirl around a stand mixer and wondered whether it’s actually being kneaded or just being tossed around, you’re in the right place. A stand mixer can do excellent work with bread dough, but only if you use the right attachment, the right speed, and the right stopping point.
The big advantage of mixer kneading is consistency. The downside is that you lose some of the tactile feedback you get from hand kneading, so you have to learn to read the dough instead of the clock. That’s the real skill here: not simply running the machine, but knowing when the dough is developed enough to move on.
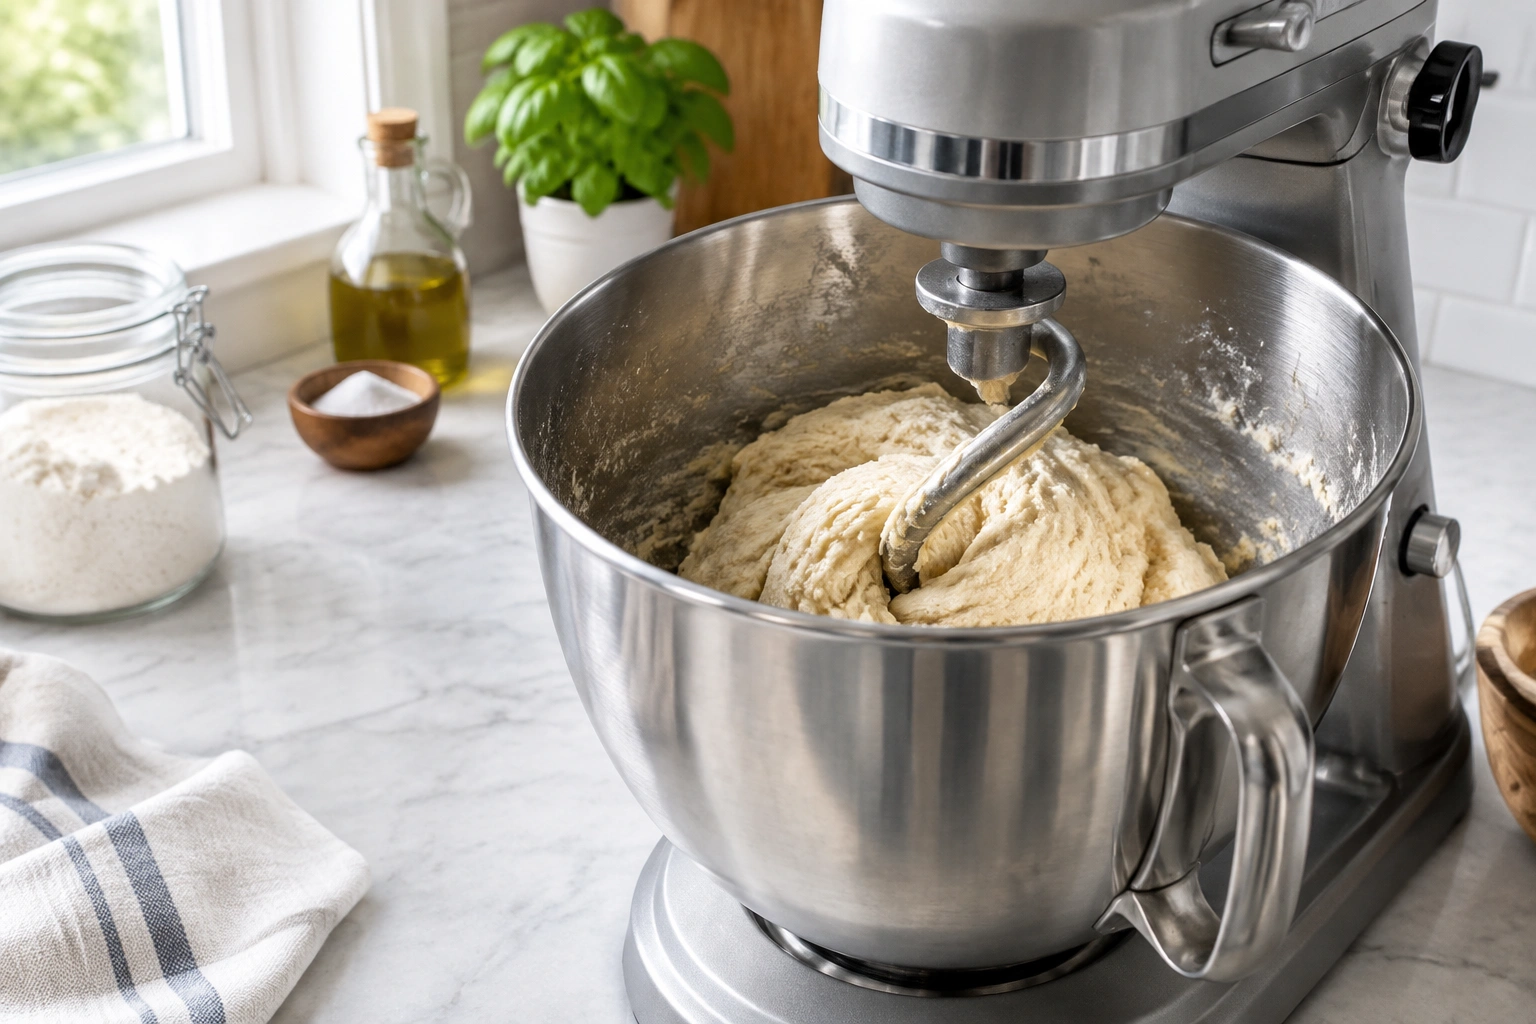
What You Need Before You Start
Before the mixer goes on, make sure the dough is actually a good candidate for machine kneading. Most standard yeast breads, sandwich loaves, rolls, enriched doughs, and many whole wheat doughs can be kneaded this way. Very stiff doughs can strain the motor, while extremely wet doughs may not behave like a neat ball at all and can be harder to judge in a stand mixer.
A good decision rule is simple: if the dough is so stiff that the mixer struggles immediately, or so large a batch that the motor starts sounding strained, it’s probably not a good stand-mixer job. The same goes for doughs that are so wet they smear, climb, or never really gather around the hook. In those cases, hand kneading, stretch-and-folds, or a different batch size may be a better choice.
You’ll also want the right bowl size. A small mixer bowl can make the dough climb the hook faster, and overfilling the bowl makes it harder for the hook to grab and stretch the dough properly. If your batch is near the upper limit for your mixer, treat that as a sign to reduce the load rather than push through and hope for the best.
A few ingredients matter more than people expect:
- Flour: Bread flour generally develops stronger gluten than all-purpose flour, though both can work.
- Water or other liquid: Hydration affects how quickly the dough comes together.
- Salt: Helps strengthen gluten and regulate fermentation.
- Yeast: Needed for rise, but it doesn’t replace proper kneading.
- Fat and sugar: These enrich the dough and can slow gluten development.
If you want a deeper refresher on how dough structure works before you mix, this guide on bread dough hydration is a useful companion.
Choose the Right Attachment and Speed
For bread dough, the attachment you want is the dough hook. That’s the tool designed to stretch and fold dough against the bowl wall. The paddle attachment is useful only for brief initial mixing, such as combining ingredients before switching to the hook. If you try to knead bread dough with the paddle, you’ll usually end up with a smeared, inefficient mess rather than proper gluten development.
For a tilt-head stand mixer, KitchenAid’s guidance is straightforward: tilt the head back, slip the dough hook onto the shaft, and press it upward as far as it will go. That secure fit matters because a loose hook won’t knead evenly and can rattle around under load.
As for speed, use low speed unless your mixer manual says otherwise. Many stand mixer manuals and help pages recommend a low setting for yeast doughs, but the exact maximum speed depends on the brand and model. The key point is the same across mixers: dough is heavy, and high speed can strain the motor, heat the dough, and make the mixer walk across the counter. Low speed is slower, but it’s safer and usually produces better dough structure.
Here’s the trade-off in plain terms:
- Lower speed: gentler on the machine, less heat, more control; may take a little longer.
- Higher speed: faster development in theory, but more wear, more heat, and a bigger risk of overmixing or damaging the mixer.
How to Knead Dough in a Stand Mixer: Step by Step
1. Combine the ingredients first
Add your liquid ingredients to the bowl first, then the dry ingredients on top, unless your recipe specifically says otherwise. This helps the flour hydrate more evenly and reduces the chance of dry pockets hiding at the bottom of the bowl.
If you’re using instant yeast, it can usually go in with the dry ingredients. If you’re using active dry yeast, follow the recipe’s blooming instructions. Don’t guess here; yeast handling affects the dough before kneading even begins.
2. Mix briefly before kneading
Use the paddle or the dough hook on the lowest setting just long enough to bring the ingredients together. At this stage, the goal is not gluten development yet. You’re simply making sure there are no dry flour streaks and that the dough has formed a rough mass.
This is the point where many bakers panic because the dough looks shaggy or uneven. That’s normal. Bread dough usually looks rough before it looks smooth.
3. Switch to the dough hook
Once the ingredients are combined, attach the dough hook if you haven’t already. Let the hook work the dough against the side of the bowl. You should see the dough stretching, folding, and gathering rather than just spinning in place.
If the dough is just riding around the hook without being stretched, stop and scrape it down. The hook has to actually engage the dough to build structure.
4. Knead on low speed
Set the mixer to low speed and let it knead. Keep an eye on the dough for the first minute or two. You’re looking for a dough that begins to clean the bowl somewhat and becomes more cohesive.
A useful rule: if the dough is slapping the bowl but still tearing apart, it probably needs more time. If it’s turning into a smooth mass that stretches when pulled, you’re on the right track.
5. Scrape the bowl if needed
It’s normal for some dough to cling to the sides or bottom of the bowl early on, especially with higher hydration doughs. Pause the mixer if needed and scrape down the bowl once or twice. That small interruption is often enough to bring the dough back into the hook’s path.
6. Check the dough, not just the timer
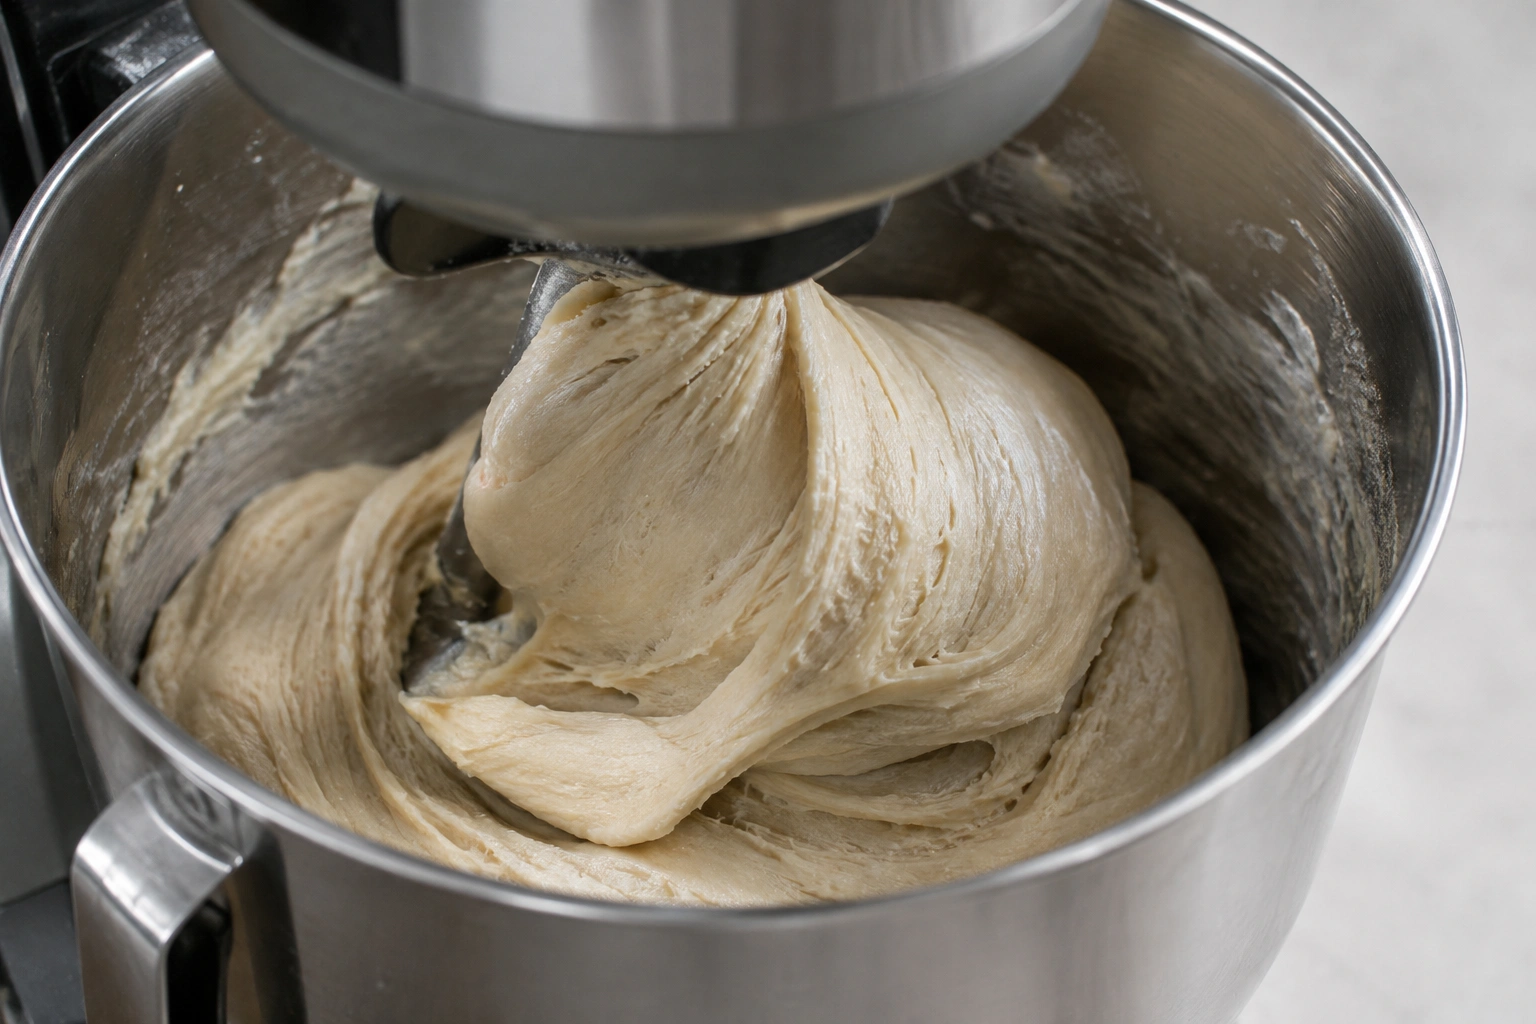
Time is a guide, not a verdict. Stop the mixer and check the dough’s texture. It should be smooth, elastic, and slightly tacky, not sticky. If you press it with a finger, it should spring back.
KitchenAid’s product help page describes properly kneaded dough in those general terms, but the useful takeaway is broader than one brand: smooth, elastic dough that springs back is the goal, no matter which stand mixer you use. Exact timing and feel can vary by mixer power, batch size, and dough temperature.
How Long to Knead Different Doughs
Kneading time depends on flour type, hydration, added ingredients, mixer power, batch size, and dough temperature. A stronger motor may develop dough faster, while a smaller or less powerful mixer may take longer or strain sooner. That’s why one universal number doesn’t work for every dough, and why time should be treated as a starting point rather than a guarantee.
Here’s a practical guide you can use as a starting point:
| Dough type | Typical mixer behavior | Practical kneading range | Readiness cue |
|---|---|---|---|
| Lean dough | Comes together fairly quickly, firms up predictably | About 5–8 minutes on low speed | Smooth, elastic, passes a light stretch test |
| Enriched dough | Develops more slowly because fat and sugar soften the dough | About 8–12 minutes, sometimes longer | Supple, cohesive, less greasy-looking |
| Whole wheat dough | Feels rougher and may need extra time or a rest | About 8–12 minutes, sometimes with an autolyse | Less shaggy, more elastic, improved stretch |
| High-hydration dough | May cling to the bowl and look slack before tightening | Variable; often shorter than expected once gluten starts developing | Stretchy, extensible, still tacky but structured |
A few practical notes:
- Lean doughs are the easiest to judge because they usually tighten up in a very obvious way.
- Enriched doughs take longer because butter, oil, eggs, and sugar interfere with gluten formation early on.
- Whole wheat doughs can benefit from a rest before kneading because the bran absorbs water and can make the dough feel rough at first.
- High-hydration doughs may never form a neat ball, and that’s okay. The goal is structure, not a dry-looking lump.
If you want a broader comparison of dough styles, this article on enriched dough vs. lean dough will help you predict how your dough should behave.
How to Tell When the Dough Is Properly Kneaded
This is the part that separates a useful baker from a timer-dependent one.
A properly kneaded dough usually shows three signs:
- It looks smoother than it did at the start.
- It feels elastic when you pull a piece away.
- It springs back when lightly pressed.
The windowpane test is the classic check. Pinch off a small piece of dough and gently stretch it between your fingers. If it stretches into a thin, translucent sheet without tearing right away, the gluten is well developed. If it tears quickly, it needs more kneading.
Here’s how the three stages usually look:
Underkneaded dough
- Rough, shaggy, or uneven
- Tears easily when stretched
- Feels loose or sticky without structure
- Often collapses instead of holding shape
Properly kneaded dough
- Smooth and cohesive
- Slightly tacky, not gluey
- Elastic and springy
- Passes at least a basic windowpane test
Overkneaded dough
- Can become very tight and resistant
- May feel hot, greasy, or oddly firm
- Becomes difficult to stretch and shape
- Can produce bread that feels tough or dense
KitchenAid warns that overkneading can make dough tough, tight, and difficult to work with. That’s one reason low speed and careful checking matter so much.
Common Mistakes to Avoid
The most common stand-mixer mistakes are usually not dramatic. They’re small decisions that quietly ruin the dough.
Using the wrong speed
High speed is the fastest way to make the mixer work harder than it should. It can also overheat the dough, which is not ideal for gluten structure or fermentation.
Adding too much flour too soon
A sticky dough often tempts bakers to dump in more flour. Resist that impulse. This is especially risky with high-hydration doughs, where stickiness can be normal and temporary early in kneading. A dough that feels slightly sticky at first may tighten as gluten develops. Too much flour can leave you with a dry, dense loaf.
Expecting the dough to look perfect immediately
Bread dough often looks messy before it becomes smooth. If you stop too early, you may never give the gluten time to organize.
Letting the dough climb the hook unchecked
Some doughs wrap themselves around the hook and ride upward. That means the hook is no longer kneading efficiently. Pause the mixer, push the dough down, and continue on low speed.
Overloading the mixer
A small or underpowered mixer can struggle with stiff dough or a large batch. If the motor sounds strained, that’s not a challenge to “push through.” It’s a warning.
Troubleshooting Sticky, Dry, or Unruly Dough
If the dough is too sticky
First, give it more time. Sticky dough is not automatically bad dough.
If it still seems unmanageable after a few minutes, add flour in very small amounts, a tablespoon at a time. The goal is to reduce excess stickiness, not turn the dough into a dry mass. If your recipe is a high-hydration formula, some tackiness is expected.
If the dough is too dry
Dry dough looks shaggy, tears instead of stretching, and often refuses to gather into a cohesive mass. Add water a teaspoon or tablespoon at a time, letting the mixer incorporate it fully before deciding whether to add more.
If the dough tears during the windowpane test
That usually means the gluten isn’t fully developed yet. Return it to the mixer for a short additional kneading period, then test again. Don’t keep adding flour just because the dough feels fragile.
If the dough keeps climbing the hook
Stop the mixer and scrape the dough down. You can also reduce the batch size next time or make sure the dough isn’t too stiff for the mixer. Very stiff doughs are especially prone to this behavior.
If the mixer sounds strained
This is the clearest sign to stop. A strained motor, excessive vibration, or a hot machine body means the dough may be too heavy, too stiff, or too large a batch for that mixer. Let the machine rest and reassess the dough.
Stand Mixer Limits and Safety Tips
A stand mixer is a tool, not a substitute for judgment.
Use it within the manufacturer’s recommended capacity. If the dough is so stiff that the mixer struggles from the first minute, that’s a sign the batch may be too large or the formula too tight for that machine.
A few safety habits are worth keeping every time:
- Secure the bowl and attachment before starting.
- Keep hands, utensils, and loose clothing away from the moving hook.
- Stay nearby while the mixer is kneading.
- Stop immediately if the motor sounds strained.
- Let the mixer cool if it has been working hard for a while.
Very wet doughs and very stiff doughs can both cause problems, but for different reasons. Wet doughs may be harder to manage and can climb or smear. Stiff doughs can overload the motor. In both cases, the answer is not more speed.
Practical Examples of Kneading in a Stand Mixer
Lean sandwich bread
This is the easiest category to learn on. The dough usually comes together within a few minutes, then smooths out as gluten develops. You’ll often see the bowl clean up and the dough become more elastic with steady low-speed kneading.
Enriched dough
Think of doughs with butter, eggs, sugar, or milk. These often need more time because the fat softens the dough and delays gluten formation. If the dough looks greasy or floppy at first, keep going patiently on low speed until it becomes supple and cohesive.
High-hydration dough
These doughs may look too wet at the beginning. Don’t overcorrect by adding too much flour. Instead, let the mixer work until the dough becomes stretchier and more organized. The finished dough may still be tacky, and that can be exactly right.
Whole wheat dough
Whole wheat dough often benefits from a short rest before kneading, especially if the flour is thirsty or the dough feels stiff at first. A brief autolyse can help the flour hydrate and make the dough easier to develop in the mixer.
When to Stop Kneading and Move to Proofing
Stop when the dough is smooth, elastic, and sufficiently developed for the bread you’re making. If it passes a windowpane test or nearly does, and it springs back when pressed, you’re ready to move on.
That said, not every dough needs to look identical. Some artisan-style doughs are intentionally softer and less tightly kneaded than a sandwich loaf. The real question is whether the dough has enough strength to hold gas during proofing and baking.
If the dough is still tearing, rough, or loose, give it a little more time. If it’s becoming tight, hot, or resistant, stop and move forward. Bread rewards observation more than obedience to the clock.
Quick Stand-Mixer Kneading Checklist
Use this final check before you walk away from the bowl:
- Attachment: Dough hook, not paddle, for actual kneading.
- Speed: Low speed unless your mixer manual says otherwise.
- Time: Start with the recipe range, but adjust for mixer power, batch size, and dough temperature.
- Doneness: Look for smooth, elastic dough that springs back and feels slightly tacky, not sticky.
- Flour adjustment: Only add flour if the dough is still excessively sticky after some kneading, and do it in very small amounts.
- When not to use the mixer: Very stiff doughs, oversized batches, or a mixer that strains quickly are better handled another way.
FAQs
Can you knead dough in any stand mixer?
Most stand mixers can knead moderate bread dough, but not all are equally suited to heavy or large batches. Check your model’s capacity and keep an eye on motor strain.
Why does my dough always stick to the bowl?
That often happens early in kneading, especially with higher hydration doughs. If it never improves, the dough may need more time, a small amount of flour, or a better hydration balance.
Should I use the paddle or dough hook first?
The paddle can help combine ingredients briefly, but the dough hook is the correct attachment for actual kneading.
Is hand kneading better than machine kneading?
Neither is automatically better. Hand kneading gives more tactile feedback; a stand mixer gives consistency and saves effort. The best method is the one that develops the dough properly without overheating or overworking it.
Can I overknead dough in a stand mixer?
Yes. Overkneading can make dough tough, tight, and difficult to work with. It’s less common than underkneading, but it does happen, especially at higher speeds or with long mixing times.
If you want to keep building your bread skills, this related guide on how to knead bread dough for better texture, rise, and crumb is a natural next step.
When should I add more flour?
Only if the dough is excessively sticky and not developing structure after some mixing time. Add flour in very small amounts so you don’t accidentally make the dough dense.
The best stand-mixer kneading isn’t about making the dough look perfect at minute three. It’s about giving the gluten enough time to organize, then stopping before the dough loses its balance. Learn those cues, and your mixer becomes a real bread-making advantage.