
How to Read the Poke Test for Bread Dough: A Baker’s Guide to Proofing with Confidence

If you’ve ever hovered over a proofing loaf wondering, “Is it ready yet?” the poke test is one of the simplest ways to get a real answer. Used at the final proof, it helps you judge whether bread dough has fermented enough to bake, not by guessing, but by how the dough responds to a gentle touch.
As a baker, I like the poke test because it gives you feedback from the dough itself. A well-proofed dough has a certain life under your finger: it should feel airy, elastic, and relaxed, not tight and resistant, and not so fragile that it collapses at the lightest touch. That said, the poke test is a guide, not a magic trick. It works best when you read it alongside the dough’s appearance, shape, and timing.
What the Poke Test Is and Why It Works
The poke test is exactly what it sounds like: you gently press your finger into proofing bread dough and watch how the indentation behaves.
The reason it works is tied to gluten structure and fermentation. During proofing, yeast produces gas that inflates the dough, while the gluten network stretches and gradually relaxes. If the dough still has plenty of strength and hasn’t fermented enough, it tends to spring back quickly. If it has fermented to the right point, the dough still has some resilience, but it rebounds slowly. If it has gone too far, the structure weakens and the indentation stays put.
That’s why the poke test is usually used as a final proof check, not as a bulk fermentation test. During bulk fermentation, dough is still developing, being folded, and gaining strength. At that stage, you’re usually watching rise, texture, and dough behavior in a broader sense. The poke test is most useful when the loaf is shaped and close to baking.
If you want a broader overview of how proofing fits into the full bread process, this guide on how to proof bread dough is a useful companion.
When to Use the Poke Test During Proofing
Use the poke test when the dough is in its final proof and you’re close to baking.
That usually means one of two situations:
- the dough is shaped and resting in a banneton or loaf pan
- the dough has already gone through bulk fermentation and shaping, and you’re checking whether the final rise is complete
The test is less useful early in fermentation because the dough is still changing too quickly. A dough that seems firm at the start of proofing may later relax beautifully. If you test too soon, you can get a false “underproofed” reading simply because the dough hasn’t had enough time to mature.
This is where timing helps, but timing should not be the only guide. A dough that has been proofing for the “usual” amount of time in a warm kitchen may be ready sooner than the same formula in a cool room. Temperature matters because yeast activity speeds up or slows down with the environment.
What You Need Before Testing Dough
You do not need special equipment to do the poke test well, but the setup matters.
Here’s what helps:
- clean hands
- a lightly floured finger or a lightly floured dough surface
- good lighting so you can see the indentation clearly
- a gentle touch
A light dusting of flour is useful because it prevents sticking and helps you avoid tearing the surface. That said, don’t cake flour onto the dough. Too much flour can make the surface look drier and stiffer than it really is, which can distort your judgment.
The most important “tool” is restraint. A poke test should be a gentle check, not a hard press.
How to Perform the Poke Test Step by Step
-
Wait until the dough is close to final proof.
The dough should already look puffier and more relaxed than it did right after shaping. -
Dust your finger lightly with flour.
Some bakers dust the dough surface instead. Either approach works if the touch stays gentle. -
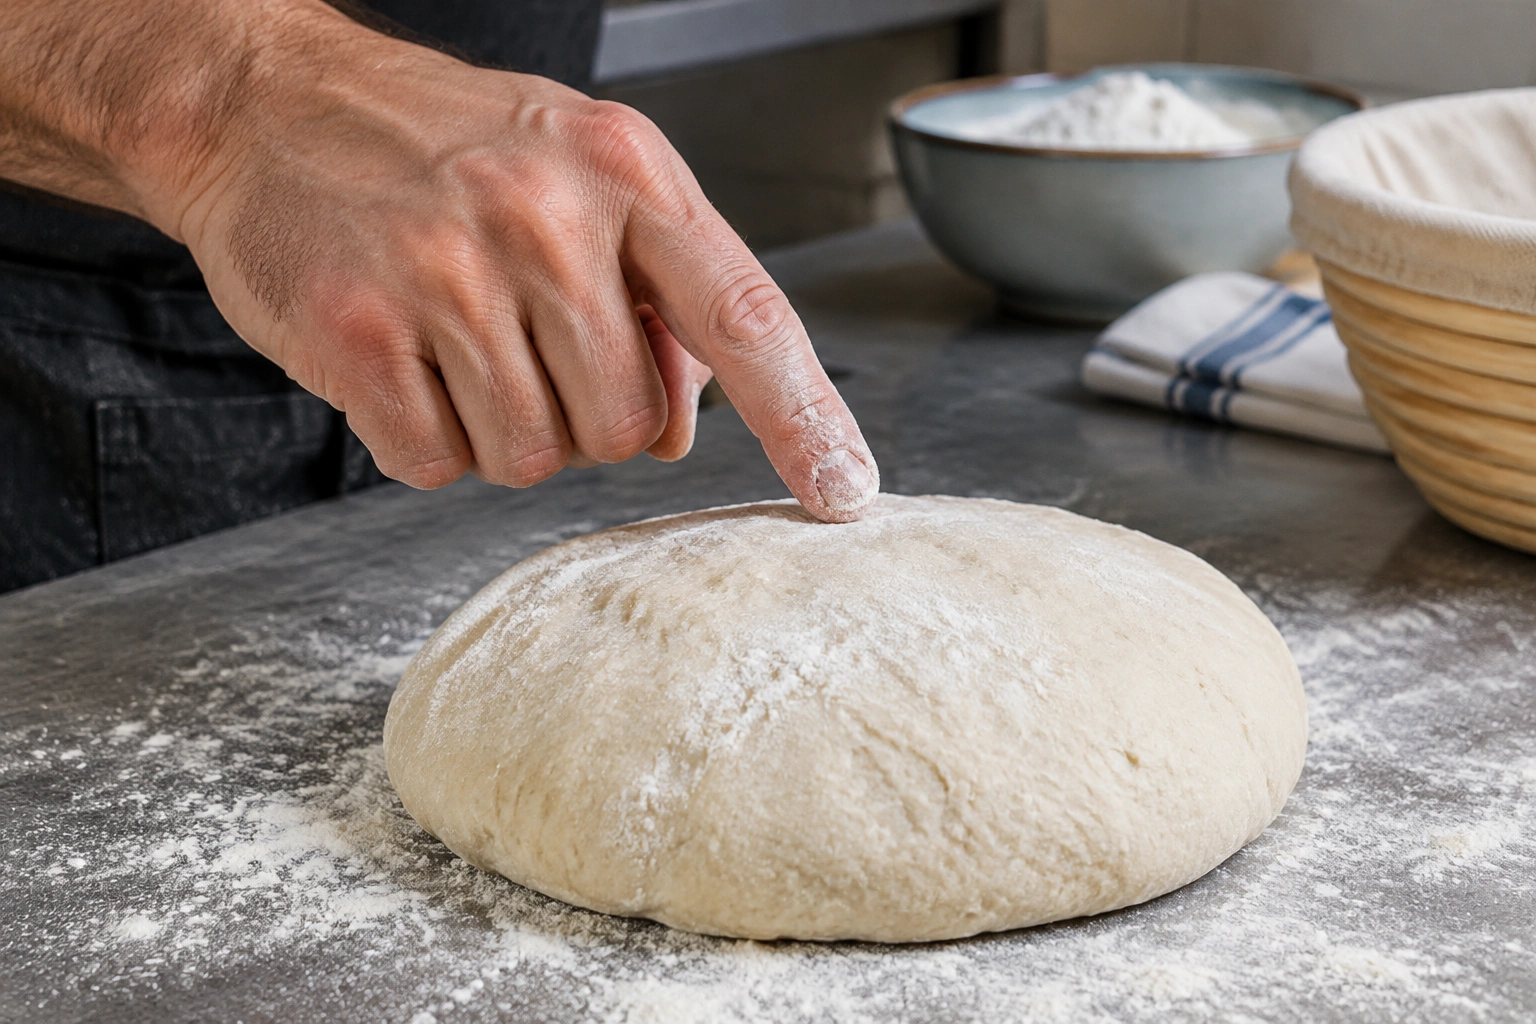
Press one finger into the dough’s surface.
Use the pad of your forefinger, not the tip of your nail. Aim for a small, controlled touch rather than a deep jab. -
Poke just enough to leave a clear indentation.
You want a visible impression, but not a collapse. Think “gentle press,” not “push through.”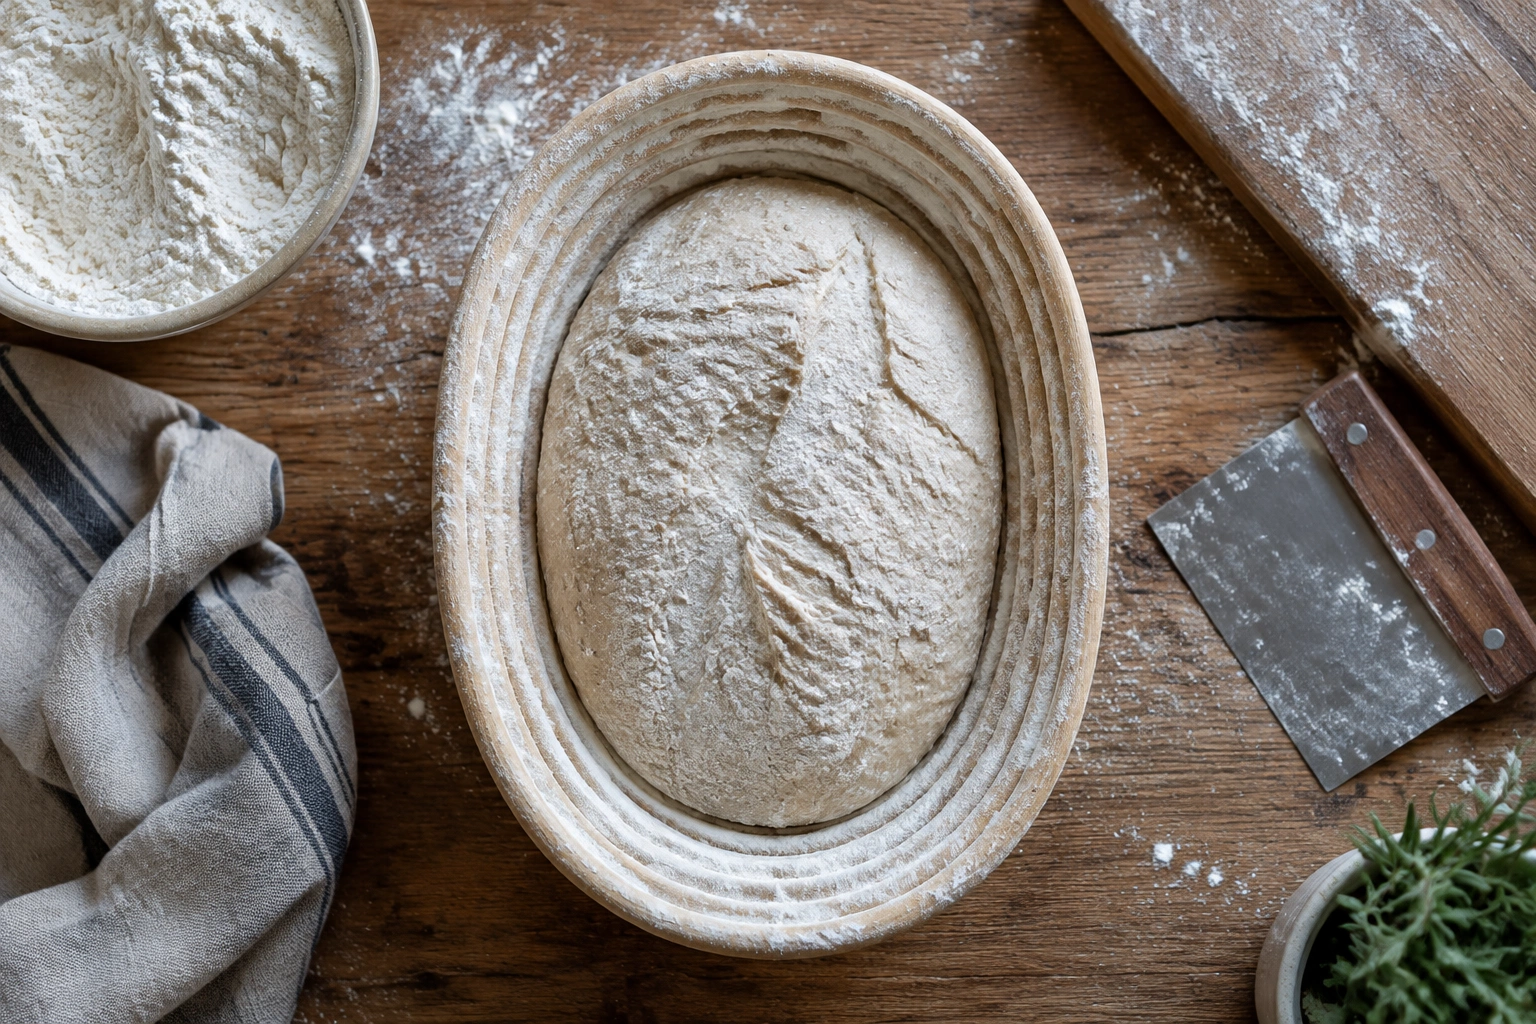
A proofed loaf in a banneton is ready for a gentle check. -
Watch the dough for a few seconds.
The key is not just the indentation itself, but how quickly the dough springs back. -
Read the result in context.
Compare what you see with the dough’s volume, softness, and overall look.
A useful rule of thumb: if you’re leaving a deep dent with very little pressure, the dough may already be delicate. If you have to press hard to see anything at all, it may still need more proofing.
How to Read the Results: Quick, Slow, or No Spring-Back
The poke test usually gives you one of three main responses.
| Dough response | What it usually means | What the dough feels like | Next step |
|---|---|---|---|
| Springs back quickly | Underproofed | Tight, elastic, resistant | Keep proofing |
| Springs back slowly and leaves a slight dent | Properly proofed | Puffy, airy, relaxed but still resilient | Bake soon |
| Does not spring back | Overproofed | Fragile, slack, weak structure | Bake immediately if salvageable |
A quick rebound usually means the dough is still too tight. A slow rebound is the sweet spot: the dough should keep a slight indentation for a moment, then gently recover. If it barely moves at all, the structure may be too far gone.
Underproofed, Properly Proofed, or Overproofed: How to Tell the Difference
The poke test is most useful when you combine it with feel.
Underproofed dough
- feels tight and springy
- resists gentle pressure
- rebounds quickly
- often looks less expanded than expected
Properly proofed dough
- feels soft, airy, and elastic
- gives slightly under a finger
- rebounds slowly
- usually looks visibly expanded and relaxed
Overproofed dough
- feels fragile or slack
- may seem overly soft and weak
- barely springs back
- can lose shape easily when handled
The trade-off here is simple: a very strong dough can fool beginners into thinking it’s ready because it looks neat and holds shape. But if it springs back too fast, it still needs time. On the other hand, a very delicate dough can seem “done” because it’s soft, but softness alone doesn’t mean readiness. The rebound tells you whether the structure still has useful strength.
If you’re also learning to judge gluten development, the windowpane test pairs nicely with this skill because it helps you understand the dough’s structure before proofing even begins.
How Dough Type Changes the Poke Test
Not all doughs answer the same way.
Lean doughs
Lean doughs, like basic flour-water-yeast-salt formulas, usually give the clearest poke test results. Their structure is simpler, so the spring-back is easier to read. If a lean dough springs back quickly, that’s often a strong sign it needs more proofing.
Enriched doughs
Doughs with butter, milk, eggs, or sugar often feel softer and less springy, even when they are not overproofed. Brioche and milk bread, for example, can feel more delicate than a lean country loaf. That means you should be more cautious about assuming “soft” equals “ready.”
With enriched doughs, the finger often senses a cushiony, plush surface that gives easily but still has some body underneath. The indentation may close more slowly than in lean dough, and the dough may feel tender even when it still needs time. If the dough feels soft but also holds a little structure and stays domed, that can be normal; if it feels loose, weak, and almost puffy to the point of collapse, it may be going too far.
High-hydration doughs
Very wet doughs can be harder to judge because they naturally feel looser and more fragile. The surface may seem tacky, and the indentation can spread or blur instead of staying neatly defined. Under your finger, a high-hydration dough often feels airy and extensible rather than firm, so a shallow poke can look less dramatic than it would in a drier dough. In this case, the poke test is best used as one clue among several, not the only clue.
Flour type
Flour also changes the feel. Stronger bread flours usually give the dough more structure, so the poke may feel springier and the indentation may snap back more decisively. Softer flours can make the dough feel more tender and less resistant, even when proofing is on track. Whole grain doughs can also feel denser or less elastic because bran interrupts the gluten network, so the finger may sense more resistance and a less uniform rebound.
Temperature
Temperature can change the poke test as much as the formula does. Warm dough usually feels softer, more relaxed, and quicker to respond. Cool dough feels firmer and slower, and cold dough straight from the refrigerator can seem more resistant than it really is. If the dough is chilled, the indentation may hold longer simply because the dough is cold, not because it is overproofed. If it’s warm, the surface may rebound faster or feel more fragile than expected. When in doubt, let temperature settle before making a final call.
Sourdough
The poke test is widely used for sourdough final proof, especially in bannetons. Because sourdough fermentation can be slower and more variable, the test is helpful—but it still shouldn’t be used in isolation. A sourdough loaf that looks lively, airy, and jiggly may still need more time if the poke rebounds too quickly.
For a general reference on the method, The Perfect Loaf’s dough poke test guide is an optional resource that covers the same broad outcomes.
Use the Poke Test with Other Proofing Cues
Think of the poke test as one part of a small decision system.
Use it alongside:
- volume increase: has the dough expanded noticeably?
- surface look: does it appear smooth, airy, and slightly domed?
- feel: does it seem light and elastic, or tight and resistant?
- jiggle: does the dough wobble slightly when the pan or banneton is moved?
These cues help when the poke test is ambiguous. For example, a dough may spring back slowly but still look dense and underexpanded. In that case, it may need a little more time. Or it may look beautifully puffed but still rebound too quickly, which tells you the interior hasn’t relaxed enough yet.
The best bakers learn to read the whole loaf, not just one signal.
Common Mistakes That Make the Poke Test Misleading
A few small errors can throw off the result.
Poking too hard
A hard press can deflate the dough and damage the surface, especially if it is already delicate. That can make a properly proofed loaf seem worse than it is.
Testing too early
If you use the poke test before final proof, you may get a misleading “underproofed” result simply because the dough is not supposed to be ready yet.
Using the same expectations for every dough
A lean sandwich loaf and a rich brioche will not feel identical. Expecting them to behave the same way leads to bad calls.
Ignoring temperature
Cold dough often feels firmer and slower to respond. Dough straight from refrigeration can make the reading less reliable, so give it a little time if needed before judging.
Handling the dough too much
Repeated poking, lifting, or repositioning can disturb the structure. One careful test is usually enough.
Troubleshooting Ambiguous Results
Sometimes the poke test seems to disagree with the clock or the dough’s appearance. That’s normal.
If the dough springs back quickly, but it looks puffy
It probably needs more proofing. The surface may look inflated, but the internal structure may still be too tense.
If the dough feels very soft, but the poke test is unclear
Check the overall shape and volume. Softness alone can be misleading, especially in enriched or high-hydration doughs.
If the dough barely springs back, but the loaf still looks strong
Use caution. A strong-looking exterior can hide a weak interior. If the dough is also very fragile when moved, it may be overproofed even if it still looks impressive.
If the dough is cold from the refrigerator
Let it sit briefly and reassess. Cold dough can respond sluggishly, which may make you think it is more proofed than it really is.
When signals conflict, use this order: temperature and dough type first, visual cues second, poke test third, and the clock last. In other words, don’t trust the timer over what the dough is actually doing. If the dough is cold, enriched, or unusually wet, the poke test may need to be read more cautiously. If the dough is warm, expanded, and the indentation rebounds slowly, that is a stronger sign it is ready than the elapsed time alone.
Practical Examples of the Poke Test in Real Bread Dough
A sandwich loaf in a pan
You press lightly and the dough springs back almost immediately. That usually means the loaf needs more time. Even if the pan is nearly full, the interior may still be too tight for a good bake.
A banneton-proofed country loaf
You poke the surface and the indentation slowly softens and partly fills in. That’s the kind of response most bakers are hoping for: the dough is relaxed, but not weak.
A rich milk bread or brioche
The dough feels very soft and plush, but the poke test is slow and gentle rather than snappy. That can be normal. In enriched dough, slower rebound does not automatically mean overproofing.
A high-hydration dough
The dough looks airy, but the indentation is hard to interpret because the surface is so delicate. In this case, the poke test should be paired with visual rise and jiggle. If the loaf is expanded and the indentation recovers slowly, it is probably close to ready.
Final Decision: Bake Now or Proof Longer
Here’s the simplest way to decide:
- Quick spring-back: proof longer
- Slow spring-back with a slight indentation left behind: bake soon
- No spring-back and a fragile feel: bake immediately if the dough is still structurally usable
That’s the heart of the poke test. It doesn’t replace experience, but it gives you a practical way to read the dough instead of relying on the clock alone.
The more you use it, the more you’ll notice that proofed dough has a distinct feel: soft but not weak, airy but not collapsed, responsive but not tense. Once you can recognize that balance, timing your bake becomes much less of a guessing game.
FAQs
Can I use the poke test on every bread dough?
You can use it on many yeast doughs, but it is most reliable at final proof. It is less useful during bulk fermentation and less definitive with very enriched or very wet doughs.
How deep should I poke the dough?
You only need a gentle indentation. The goal is to press just enough to read the dough’s response, not to punch into it.
Should I flour my finger first?
A light dusting helps keep the finger from sticking and reduces the chance of tearing the surface. You can also lightly dust the dough surface.
What if the dough springs back halfway?
That usually suggests the dough is close, but not always fully ready. Read it with the rest of the cues: if the loaf also looks puffy and relaxed, it may be ready soon. If it still seems tight, give it more time.
Can the poke test tell me if my sourdough starter is active?
No. The poke test is for judging proofed dough, especially final proof. It does not measure starter strength directly.
Why did my dough pass the poke test but still bake poorly?
Because the poke test is only one clue. Dough temperature, shaping, hydration, and overall fermentation all affect the final result. If the dough looked ready but still baked poorly, another factor may have been off.
Is the poke test reliable for sourdough and yeasted dough equally?
It can be useful for both, but sourdough often needs more context because fermentation can be slower and more variable. Lean yeasted doughs often give clearer readings.
What should proofed dough feel like before baking?
It should feel soft, airy, and resilient enough to hold shape, with a slow rebound when gently pressed. That balance is what you’re looking for.
When should I consult a master baker?
If your dough repeatedly behaves unpredictably across different formulas, temperatures, or proofing setups, a master baker can help you diagnose whether the issue is fermentation, shaping, hydration, or dough strength.