
Why Is My Bread Crumbly? A Baker’s Guide to Fixing Dry, Fragile Loaves

A crumbly loaf can be disappointing, especially when the crust looks promising and the aroma says “success,” but the slices fall apart in your hand. The good news is that crumbly bread is usually a diagnosis problem, not a mystery. Once you know whether the issue began in mixing, proofing, or baking, the fix becomes much more straightforward.

In most cases, bread turns crumbly because the dough did not build enough structure, lost too much moisture, or both. That can happen when there is too much flour, not enough water, weak gluten development, a proofing mistake, or an overbaked loaf. Flour proteins need water to form gluten, and that gluten network is what helps bread hold together instead of breaking into dry fragments. Busby’s Bakery explains the protein-to-gluten connection well, and it is one of the most useful ideas to keep in mind while troubleshooting.
If you want the fastest route to a better loaf, think in stages: first check the dough’s hydration and feel, then assess gluten development, then review proofing, and finally look at baking time and temperature. That order matters because a dough can look “done” long before it is actually ready to bake.
Quick Diagnosis: Where Did the Bread Go Wrong?
Before changing three things at once, use the finished loaf and the dough’s behavior to narrow down the likely cause.
| Likely cause | What the dough or loaf looked like | What the crumb feels like | Best next move |
|---|---|---|---|
| Too much flour / too little water | Dough felt stiff, tight, or dusty; you kept adding flour to make it manageable | Dry, sandy, fragile slices | Reduce added flour next time; hold back some flour and let the dough hydrate |
| Weak gluten development | Dough tore easily, resisted stretching poorly, or never became smooth and elastic | Loose, weak structure; slices break apart | Mix or knead longer, or add folds and resting time |
| Underproofed dough | Loaf stayed dense, tight, and sometimes split oddly in the oven | Tighter crumb that tears instead of bending | Give the dough more time before baking |
| Overproofed dough | Dough looked very puffy, fragile, or collapsed a bit before baking | Weak, delicate crumb that slices poorly | Shorten proofing and watch for volume and spring-back |
| Overbaked loaf | Crust got dark, loaf felt light and dry, or the crumb seemed brittle | Dry, crumbly, and sometimes a little chalky | Pull the loaf earlier next time and confirm doneness with temperature |
How to Tell the Difference: Dry Dough vs. Weak Gluten vs. Proofing Problems
When bread turns crumbly, the clues are often visible before the loaf goes into the oven.
- Dry dough usually feels stiff, firm, or leathery and may resist stretching because there simply is not enough moisture. The shaped loaf may look compact and the crumb can bake up dry and sandy.
- Weak gluten can feel soft or wet enough, but the dough tears easily, won’t hold tension, or spreads instead of standing tall. The baked loaf may look low or uneven and slice apart with little resistance.
- Underproofed dough often looks tight and underexpanded. It springs back quickly when pressed, may split in the oven, and usually has a dense crumb.
- Overproofed dough looks very puffy, fragile, or slightly collapsed. It may barely spring back when poked, lose shape during baking, and finish with a weak, delicate crumb.
- Overbaked bread often has a darker crust, a lighter-feeling loaf, and a crumb that seems dry or brittle once cooled.
A useful clue: if the dough itself felt dry and hard to work with, the problem likely started before proofing. If the dough felt fine but the finished loaf is dry and fragile, baking or cooling may be the bigger issue.
What You Need Before Troubleshooting
You do not need a bakery full of equipment, but a few tools make diagnosis much easier:
- A kitchen scale, so you can see whether you are adding extra flour without realizing it
- Measuring cups and spoons, if that is how your recipe is written
- An instant-read thermometer, which helps confirm doneness without guessing
- Your recipe notes, especially flour brand, flour type, and any changes you made
- A notebook or phone note for tracking dough feel, proofing time, and bake time
Many crumbly-loaf problems begin with flour creep: a little extra flour on the bench, a little extra in the bowl, then a little more during shaping. Each step seems harmless, but together they can dry out the dough enough to weaken the final crumb.
Step 1: Check Hydration and Flour Ratio
If the dough felt stiff, dry, or difficult to bring together, hydration is the first place to look. Bread dough needs enough water for flour proteins to absorb and form gluten. When there is too much flour relative to liquid, the dough can bake into a loaf that tastes fine but breaks apart when sliced.
A common mistake is adding flour during kneading just because the dough feels sticky. Sticky dough is not automatically bad dough. In many bread styles, especially sandwich loaves and enriched doughs, a slightly tacky dough is normal early on. If you keep dusting in flour instead of letting the dough rest and develop, you can end up with a dry crumb.
What to do next time
- Hold back some flour at the beginning and add only if the dough truly needs it.
- Let the dough rest a few minutes before deciding it is too wet. Resting gives flour time to absorb water.
- If you use whole wheat flour, expect to need more hydration than with white flour because whole grains absorb more water and can produce a more fragile structure if the dough is not adjusted.
A practical rule: if the dough feels firm enough to shape easily but still has a little give when pressed, you are usually in safer territory than a dough that feels stiff and leathery. When in doubt, aim for slightly softer rather than drier, because a loaf that is a touch sticky is usually easier to strengthen than one that has already been overloaded with flour.
For a deeper look at how hydration affects handling and crumb, see this guide to bread dough hydration.
Step 2: Evaluate Gluten Development
If the dough had enough water but still tore easily, the issue may be weak gluten development. Gluten is the network that gives bread its stretch and its ability to hold gas during fermentation and baking. Without enough development, the loaf can rise unevenly and then fall apart when sliced.
This is where underkneading or under-mixing often shows up. The dough may look rough, feel slack, or resist stretching without becoming smooth. In contrast, properly developed dough usually feels more elastic and cohesive. It does not have to be perfectly silky to work, but it should be able to stretch without ripping immediately.
Signs the dough needs more development
- It tears instead of stretching
- It looks shaggy and uneven after mixing
- It cannot hold a shape well
- It feels weak when you try to shape it into a tight loaf
The trade-off
More kneading can improve structure, but too much handling can make some doughs harder to work with and may warm the dough more than you want. That is why many bakers use a mix of kneading and resting. Resting gives flour time to hydrate, and gentle folds can strengthen dough without forcing it.
If your dough is still rough after mixing, give it a short rest and then revisit it. Often the dough will feel noticeably more cooperative after hydration has had time to do its work.
For sticky dough that seems impossible to handle, this related guide on bread dough too sticky can help you tell the difference between normal tackiness and a dough that genuinely needs adjustment.
Step 3: Review Proofing Time and Dough Strength
Proofing problems can produce crumbly bread in different ways, so it helps to compare underproofed and overproofed dough.
Underproofed dough
Underproofed dough has not risen enough to build a light, even crumb. It may still bake into a loaf, but the interior often feels tight and resistant. Slices can tear because the structure is dense rather than flexible. In the oven, underproofed dough often shows strong oven spring, but the loaf may split unevenly or end up with a dense, compressed interior.
Overproofed dough
Overproofed dough has gone too far. The gluten structure weakens, the dough may look very puffy, and it can deflate or lose strength before it reaches the oven. That often leads to a fragile loaf that slices poorly. In the oven, overproofed dough usually has little oven spring and may bake up shorter, flatter, or more fragile than expected.
How to tell the difference
- If the loaf is dense, tight, and underexpanded, underproofing is more likely.
- If the loaf looked airy but collapsed or felt fragile, overproofing is more likely.
- If the dough springs back quickly and strongly when you press it, it likely needs more time.
- If the dough springs back slowly and only partly, it is often close to ready.
- If the dough barely springs back and leaves an indentation, it may be overproofed.
Before you bake: the poke test and visual cues
The poke test is one of the most practical ways to judge proofing. Gently press the dough with a floured finger:
- Underproofed: the indentation springs back quickly, sometimes almost immediately.
- Properly proofed: the indentation springs back slowly and incompletely, leaving a slight mark.
- Overproofed: the indentation stays in place or the dough deflates around it.
A properly proofed loaf usually looks expanded but still supported. It should appear airy and slightly rounded, not slack or collapsed. Depending on the recipe, it may have risen close to the top of the pan or increased noticeably in volume while still holding its shape.
Proofing is one of the trickiest steps because the dough can look “almost ready” from the outside while still being under- or over-fermented inside. That is why volume alone is not enough. You want a dough that is expanded but still strong enough to hold its shape.
Step 4: Check Baking Time and Temperature
Even a well-made dough can become crumbly if it is baked too long or too hot. Overbaking drives out moisture, and once the crumb dries too much, slices start to fracture instead of bending cleanly.
A loaf can also look finished on the outside before the inside has the right balance of moisture and structure. That is where an instant-read thermometer is useful. It gives you a more objective check than crust color alone. If you routinely bake until the crust is deeply colored and the loaf feels very light, you may be drying the crumb more than you intend.
Signs the loaf may be overbaked
- The crust is darker than usual
- The crumb feels dry and brittle
- Slices break apart rather than bending
- The loaf seems lighter than expected for its size
Better baking decisions
- Check the loaf a little earlier than your usual finish time if your oven runs hot.
- Use temperature as a guide instead of color alone.
- If your loaf bakes dry often, compare your oven’s actual behavior with the recipe rather than assuming the recipe is wrong.
A longer bake may improve crust color, but it can also cost you moisture. That trade-off is especially important with lean sandwich bread, where tenderness matters as much as browning.
Step 5: Match the Flour and Recipe to the Bread Style
Not all breads are meant to behave the same way.
Bread flour vs. all-purpose flour
Bread flour usually gives stronger structure because it is designed for better gluten development. All-purpose flour can still make good bread, but if the loaf is already fragile, switching to bread flour may help. The trade-off is that bread flour can produce a slightly chewier texture, which is great for many loaves but not always ideal if you want a very soft crumb.
Whole wheat flour
Whole wheat flour often needs more water and more care. It can make bread taste deeper and feel more rustic, but it can also produce a more crumbly loaf if the recipe does not account for its behavior. More whole wheat means more bran and germ in the dough, which can affect how much water the flour absorbs and how easily gluten develops. That is a practical reminder that flour choice changes the loaf, not just the flavor.
Enriched doughs
Fat, sugar, and eggs tend to soften bread and change the crumb, but they also change how gluten develops and how much hydration the dough needs. Fat can coat flour and make gluten form more slowly. Sugar can draw in moisture and make the dough feel softer or stickier. Eggs add liquid and fat at the same time, which can change both the dough’s feel and its final structure. If an enriched dough comes out crumbly, it may need a different mixing approach, a different hydration level, or both—not just “more balance.”
Common Mistakes That Make Bread Crumbly
Here is the short version of the most common culprits:
- Adding extra flour during kneading or shaping
- Using too little water for the flour type
- Stopping mixing or kneading before the dough has enough structure
- Letting the dough proof too little or too much
- Baking until the loaf is drier than intended
- Cutting the bread before it has cooled
- Using a flour that is too weak for the style of bread
- Using too much whole wheat flour without adjusting hydration
- Expecting a lean loaf and an enriched loaf to behave the same way
If you want one pattern to remember, it is this: a crumbly loaf usually has a structure problem, a moisture problem, or both.
How to Fix Crumbly Bread Dough Before Baking
If you catch the problem before the loaf goes into the oven, you still have room to improve it.
If the dough is too dry
Add water in very small amounts and mix until absorbed. Do not flood the dough all at once. You are looking for a dough that becomes more supple, not soupier.
If the dough is underdeveloped
Give it more kneading or a rest-and-fold cycle. If the dough is resisting, a short rest can make the next round of handling more effective.
If the dough seems overproofed
You may be able to gently reshape it and shorten the next proof, but once structure is significantly weakened, the loaf may not fully recover. That is why proofing cues matter before the dough reaches that stage.
If the dough is too flour-heavy
Stop adding flour during shaping. Use lightly oiled hands or a bench scraper instead of continuing to dust the surface.
How to Rescue Already-Baked Crumbly Bread
If the loaf is already baked, the goal shifts from fixing the structure to making the bread more usable.
- Let it cool fully before judging the crumb. Slicing warm bread is a common reason it seems crumbly, because the interior has not fully set yet.
- Slice with a sharp serrated knife and use a gentle sawing motion instead of pressing down.
- Toast slices if they are too fragile for soft sandwich use.
- Repurpose the loaf for croutons, breadcrumbs, strata, or bread pudding if the slices will not hold together well.
If the bread is only slightly dry, storing it properly after cooling may help preserve what moisture is left. But if the crumb is already brittle, repurposing is usually the most satisfying move.
How to Prevent Crumbly Bread Next Time
A simple prevention checklist goes a long way:
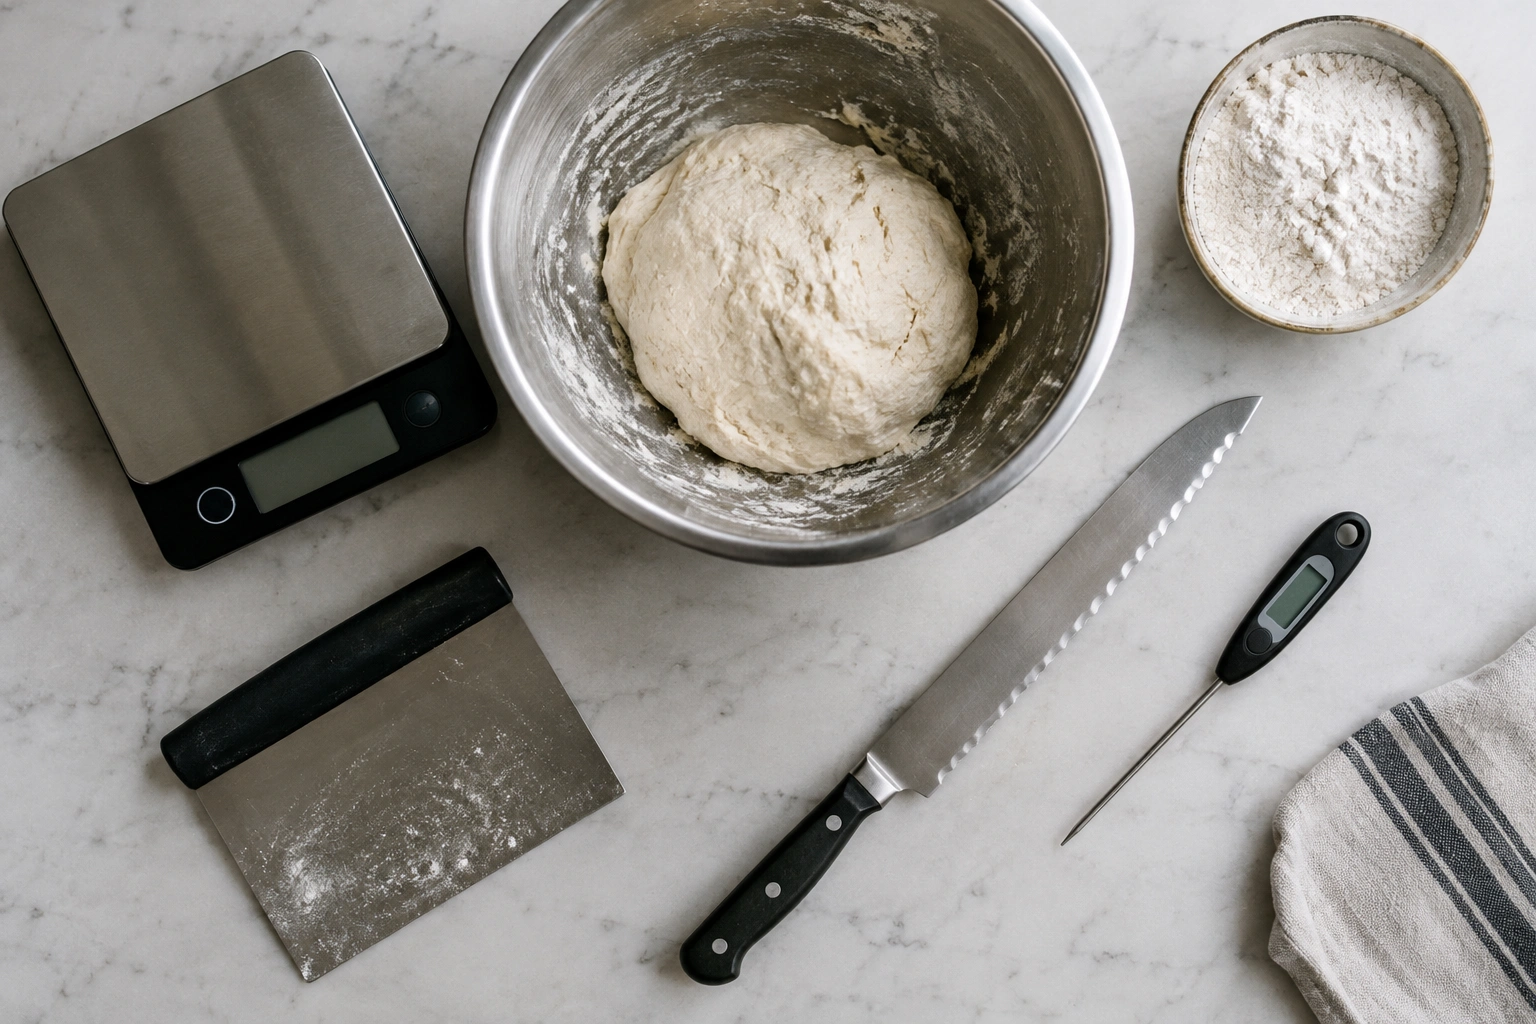
- Measure flour carefully, ideally by weight.
- Avoid adding flour just because dough feels sticky at first.
- Give the dough enough time to hydrate and develop.
- Watch for gluten strength, not just elapsed kneading time.
- Proof until the dough is expanded but still strong.
- Bake only until done, not until overly dark and dry.
- Cool the loaf completely before slicing.
- Match the flour to the bread style you want.
If you bake the same recipe in a different climate or with a different flour brand, be ready to adjust. Flour absorption varies, and a recipe that works in one kitchen may need a little more water or a little less flour in another.
Practical Examples by Bread Type
Sandwich bread
If a sandwich loaf is crumbly, the first suspects are usually too much flour, underkneading, or overbaking. Sandwich bread should slice cleanly, so a dry or weak crumb stands out quickly.
Whole wheat bread
Whole wheat loaves often need more hydration and more attention to structure. If the loaf feels hearty but falls apart, the recipe may not be giving the flour enough water or enough gluten support.
Enriched bread
If a milk bread, brioche-style loaf, or other enriched bread is crumbly, check the balance of fat, sugar, and eggs. These ingredients soften the crumb, but they also change how the dough develops, so the formula needs to be built for that style.
When to Consult a Master Baker
If you have already adjusted flour, water, kneading, proofing, and bake time—and the loaf still breaks apart consistently—bring the full recipe and your process notes to a master baker or experienced instructor. A second set of trained eyes can often spot a pattern you have missed, especially if the issue appears only with one flour, one oven, or one style of loaf.
Frequently Asked Questions
Is crumbly bread always underproofed?
No. Underproofing can cause a tight, fragile crumb, but overproofing, overbaking, weak gluten, and too much flour can also make bread crumble.
Can too much flour really make bread crumbly?
Yes. Extra flour can dry out the dough and reduce the moisture available for a cohesive crumb.
Does whole wheat bread crumble more easily?
It can, especially if the recipe does not add enough hydration or structure to account for the flour.
Why does my bread fall apart when I slice it?
The loaf may be too dry, not fully cooled, or lacking enough internal structure from gluten development or proofing.
Can overbaking make bread crumbly?
Yes. Overbaking can dry the crumb and make slices break apart more easily.
How do I know if my dough needs more kneading?
If it tears easily, feels rough, and does not stretch into a cohesive mass, it likely needs more development or a rest before further kneading.
Should I switch from all-purpose flour to bread flour?
If your loaves are repeatedly crumbly and the recipe is meant for yeast bread, bread flour may help because it usually supports stronger structure. The trade-off is a chewier texture.
Why does warm bread seem more crumbly?
Bread that has not cooled fully can seem fragile and may tear more easily when sliced. Letting it cool completely gives the crumb time to set.
If you approach crumbly bread like a troubleshooting map instead of a single mistake, the problem becomes much easier to solve. Most of the time, the answer is not “your bread failed.” It is simply that one part of the process asked too much of the dough, and the next bake only needs a better balance.