Baking soda and vinegar can quickly freshen a washer by reducing odor, soap film, and light buildup. Use them in the right sequence, follow the manual, and wipe the damp parts after the cycle.
If your washer smells stale or looks a little grimy, baking soda and vinegar can help with a fast refresh. This method is best for light residue, odors, and routine maintenance, as long as you use it the right way.
- Best use: Routine cleaning for odors, residue, and light buildup.
- Method matters: Use baking soda and vinegar in sequence, not pre-mixed.
- Safety first: Check the washer manual before using vinegar.
- Most important follow-up: Wipe the gasket, dispenser, door, and lid dry.
- Know the limit: Heavy mold or drainage issues need deeper service.
Why Baking Soda and Vinegar Are Used in Washer Cleaning
Baking soda and vinegar are popular because they target the kind of buildup most washers get from everyday use. Baking soda can help loosen odor-causing residue and freshen surfaces, while vinegar can help cut through soap film and mineral haze.
This is similar to how people use these ingredients in other cleaning jobs, like the baking soda and vinegar reaction explained simply or even clean drains with vinegar and baking soda. The key is not the dramatic fizz itself, but the cleaning action before and after the reaction settles.
What each ingredient actually helps with: odors, residue, and light buildup
Baking soda is mildly alkaline, so it can help neutralize acidic odors and support light scrubbing. Vinegar is acidic, which makes it useful against some mineral deposits and detergent film.
Neither ingredient is a miracle fix for heavy mold or serious mechanical problems. Think of them as a maintenance clean, not a deep restoration.
In a washer, the biggest odor problem is often trapped moisture mixed with detergent residue, not dirt alone. That is why drying habits matter as much as cleaning products.
Why this method is popular for front-loaders, top-loaders, and high-efficiency machines
This approach is common because it is simple, low-cost, and easy to fit into a regular laundry routine. It can work for front-loaders, top-loaders, and many HE machines when used carefully and according to the owner’s manual.
People also like it because it reaches the drum during a hot cycle, then lets you wipe the parts that trap grime by hand. For routine care, that combination is often more useful than a quick spray alone.
What You Need Before You Start
Before you begin, check your washer manual. Manufacturer guidance matters because some machines have sensitive seals, special coatings, or cleaning-cycle instructions that should come first.
Measuring baking soda and vinegar safely for a standard cleaning cycle
Use a moderate amount rather than pouring in extra. For many standard home washers, a common starting point is about 1/2 cup of baking soda and 1 to 2 cups of vinegar, but your machine size and manual may call for something different.
More is not always better. Too much product can leave residue, create unnecessary foam, or make rinsing less effective.
Optional tools: microfiber cloth, soft brush, toothbrush, and gloves
A microfiber cloth helps wipe away loosened film without scratching. A soft brush or old toothbrush is useful for detergent drawers, lid edges, and gasket folds where grime hides.
Gloves are optional, but they are smart if you have sensitive skin or if the washer has visible residue that you do not want on your hands.
Washer types and materials to check before using this method
Check whether your washer has rubber door gaskets, stainless steel parts, electronic touch panels, or special dispensers. These features are common and usually fine with gentle cleaning, but the exact care instructions can vary by brand and model.
If the manual warns against vinegar, follow that guidance. Manufacturer instructions should always outweigh general cleaning advice.
Do not mix cleaning products with bleach, ammonia, or other chemicals. That can create dangerous fumes or damage machine parts.
How to Clean a Washer with Baking Soda and Vinegar Step by Step
The safest method is to clean the drum and then wipe the parts that trap moisture. If you want a faster laundry-room reset, this sequence usually gives the best result without overcomplicating the job.
Remove all clothing, lint, and loose debris. Check pockets and the drum so nothing gets tossed into the cycle.
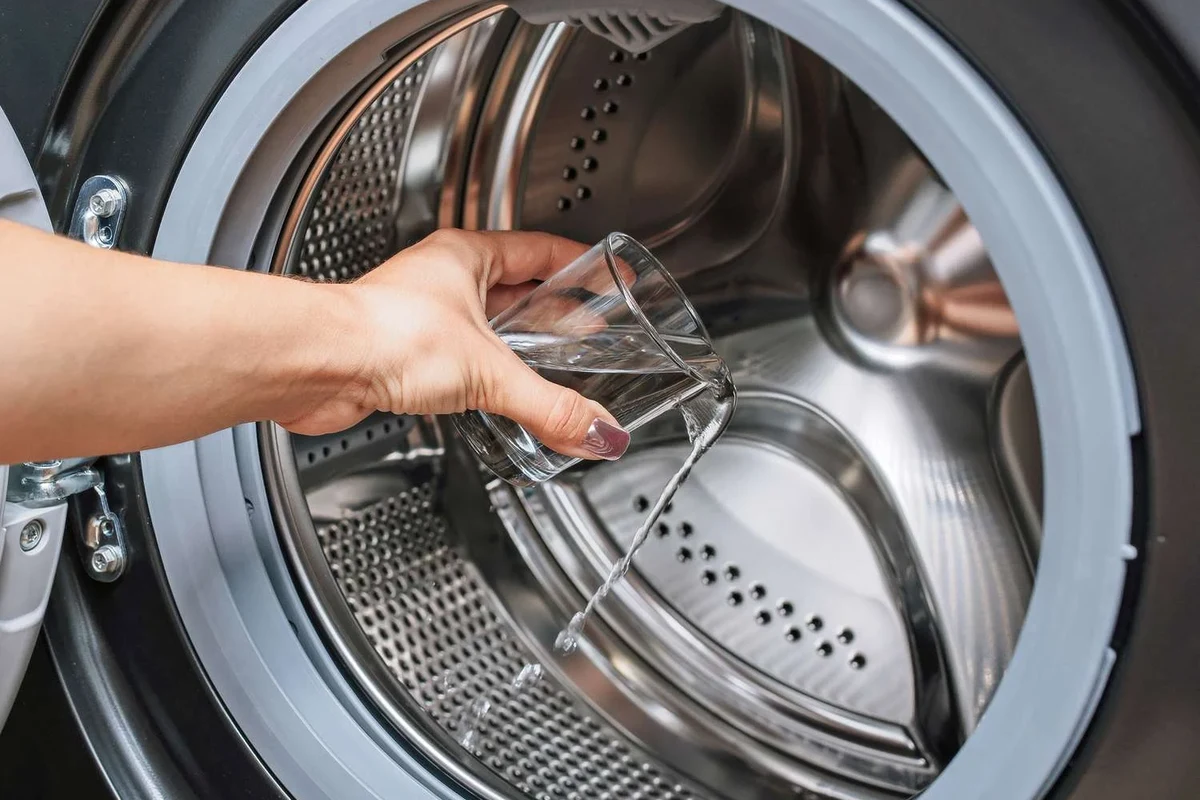
Pour the baking soda directly into the empty drum. This helps it spread through the wash water instead of clumping in a drawer.
Pour vinegar into the detergent dispenser if your manual allows it, or into the drum if that is the recommended method. Do not combine it with bleach or other cleaners.
Choose the hottest safe cycle for your machine. A long cycle helps loosen residue, but always stay within the washer’s temperature limits.
When the cycle ends, wipe the drum, gasket, lid, door, and dispensers so moisture does not sit and cause new odor.
Cleaning the drum: where to place the baking soda and vinegar
Place the baking soda in the empty drum so it can move with the wash water. Vinegar can go in the drum or dispenser depending on the model, but the manual should guide that choice.
If your washer has a detergent drawer that tends to hold residue, clean that area separately with a cloth and a little warm water. For many machines, that drawer is where the smell starts.
Running the hottest safe cycle for your machine
Heat helps loosen soap film and softens oily residue. Use the hottest cycle your washer allows for a cleaning run, but do not exceed what the manufacturer recommends for the tub, hoses, or seals.
If your machine has a dedicated tub-clean or self-clean cycle, use it. That setting is often designed to move more water through the right areas.
Wiping gaskets, dispensers, lids, and doors after the cycle ends
Once the cycle finishes, open the door or lid and let the inside air out. Then wipe the gasket folds, the underside of the lid, the door glass, and the detergent area.
This step matters because leftover moisture can undo the whole cleaning job. In front-loaders especially, the rubber seal can hold water long after the cycle ends.
If you notice a white film after cleaning, that may be leftover mineral residue or too much product. Run an extra rinse cycle and wipe the surfaces dry.
How to Clean Front-Load, Top-Load, and HE Washers Differently
All washers benefit from regular cleaning, but the trouble spots are not the same. The best method depends on where moisture and residue tend to collect in your machine.
Front-load washer concerns: door gasket mold, trapped moisture, and detergent drawer buildup
Front-loaders are more likely to trap water in the rubber door gasket. That fold can hold lint, detergent film, and damp air, which is why odors often start there first.
Clean the gasket by hand after the cycle, and pull it back gently to check hidden folds. Also wipe the detergent drawer, since powder and liquid residue often accumulate there.
Top-load washer considerations: agitator areas, tub rings, and lid edges
Top-load washers usually need attention around the tub ring, the top edge of the basket, and the lid seam. If your machine has an agitator, check around its base where buildup can settle.
A soft brush can help loosen grime in these spots. A quick wipe after each load also helps more than many people expect.
HE washer limitations and what not to overuse
HE machines use less water, so they are more sensitive to excess product. Using too much baking soda or vinegar can leave residue because there is less water to rinse it away.
Stick to moderate amounts and avoid repeating the process too often. If your washer has a specific HE cleaning recommendation, follow that first.
- Simple and affordable
- Good for light odors and residue
- Works as routine maintenance
- Not strong enough for heavy mold
- Can leave residue if overused
- May not suit every washer model
Common Mistakes That Make Washer Cleaning Less Effective
Most washer-cleaning problems come from timing, quantity, or skipping the hidden spots. A careful routine usually works better than a stronger one.
Mixing baking soda and vinegar too early instead of using them in the right sequence
If you mix them together before they reach the washer, they mostly neutralize each other and lose cleaning strength. You may still see fizz, but the useful cleaning action is reduced.
Use them in sequence and let the wash cycle do the work. That is one reason this method is often explained alongside other home-cleaning techniques, such as baking soda vinegar cleaning ovens, where timing also matters.
Using too much vinegar or baking soda and leaving residue behind
Extra product can create the opposite of a fresh washer. You may end up with powdery film, a sharp vinegar smell, or a rinse that feels incomplete.
Use enough to support cleaning, not enough to overwhelm the rinse cycle. If the washer still smells after one cycle, repeat the process once rather than doubling the amount.
Skipping the filter, dispensers, or rubber seals where buildup hides
The drum may look clean while the problem sits in the filter, drawer, gasket, or lid edge. Those are the places where lint, detergent, and moisture collect.
If your machine has a removable filter, check the manual for safe removal and cleaning. If not, wipe the accessible areas carefully and let them dry fully.
Even though this is a laundry task, treat the washer like an appliance with electrical parts. Keep liquids away from control panels and unplug the machine only if the manufacturer says that is safe for maintenance.
Safety, Compatibility, and When This Method Is Not Enough
Baking soda and vinegar are useful for routine care, but they are not the right answer for every washer problem. If the machine has serious mold, drainage trouble, or a mechanical fault, cleaning alone will not solve it.
When to avoid vinegar based on manufacturer guidance or sensitive parts
Some manufacturers caution against vinegar because repeated acid exposure can affect rubber seals, hoses, or certain finishes over time. That does not mean vinegar is always unsafe, but it does mean the manual matters.
If your washer uses special sensors, coated drums, or unusual materials, verify compatibility before using any acidic cleaner.
Signs of heavy mold, drainage issues, or mechanical problems that need deeper service
If the washer smells musty again almost immediately, leaks water, drains slowly, or leaves visible black buildup in the seal, the issue may be deeper than surface residue. Persistent odor can also point to a clogged drain path or a hidden moisture problem.
In those cases, a deeper cleaning, part replacement, or professional service may be needed. Home cleaning should not be used to cover up a machine that is failing.
How to prevent damage to stainless steel, rubber, and electronic controls
Use soft cloths instead of abrasive pads on stainless steel and glass. Wipe rubber seals gently so they do not tear, and keep moisture off control buttons and touch panels.
If you want to understand why ingredient behavior matters in cleaning, the same basic chemistry shows up in other home care uses like baking soda in laundry. The lesson is consistent: the right amount helps, but overdoing it can create new cleanup work.
How Often to Clean Your Washer and How to Keep It Fresher Longer
For most homes, regular maintenance is more effective than occasional deep cleaning. A washer that stays dry and is used with the right detergent amount usually needs less effort later.
Recommended cleaning frequency for households with heavy laundry use
Heavy-use households may benefit from a cleaning cycle about once a month. Lighter-use homes may be fine with less frequent cleaning, especially if the washer is dried after each use.
If you wash sweaty gym clothes, towels, or bedding often, odor can build faster. In that case, monthly attention is a practical starting point.
Practical habits: leaving the door open, drying the gasket, and using the right detergent amount
Leave the door or lid open after laundry when possible so moisture can escape. Wipe the gasket and detergent drawer dry, especially in front-loaders.
Also use the correct detergent amount for your machine and load size. Too much detergent is one of the fastest ways to create the film that causes odor later.
Example maintenance routine for busy homes and laundry rooms
After the last load of the day, wipe the seal, leave the door open, and check the drawer for drips. Once a month, run a cleaning cycle with baking soda and vinegar if your manual allows it.
If you want to compare this with other routine cleaning habits, the same maintenance mindset applies to other baking-soda cleaning tasks, including simple baking soda cleaning tricks. Small, regular steps usually beat one big cleanup.
Final Verdict: Is Baking Soda and Vinegar the Fastest Way to Clean a Washer?
For quick maintenance, yes, this can be one of the fastest simple ways to freshen a washer. It is especially useful when the problem is odor, light residue, or a little soap film.
Best use cases for this method versus commercial washer cleaners
Baking soda and vinegar are a good fit if you want a low-cost routine clean and your washer manual allows it. Commercial washer cleaners may be better when you want a product designed specifically for the machine’s cleaning cycle or when the manufacturer recommends a certain formula.
When to choose a deeper clean or professional repair instead
If the smell returns quickly, the gasket has visible mold, or the washer drains poorly, move beyond a surface clean. Those signs suggest a deeper issue that may need service rather than another rinse cycle.
Simple recap of the safest, most effective cleaning approach
Use baking soda and vinegar in the right sequence, follow the washer manual, run the hottest safe cycle, and wipe every damp surface afterward. That combination gives you the best chance of a fresh washer without unnecessary wear.
For routine maintenance, how to clean washer with baking soda and vinegar is a practical, beginner-friendly method when used carefully. For heavy buildup or recurring odor, pair it with better drying habits and, if needed, manufacturer-approved cleaners or professional service.
Frequently Asked Questions
A common starting point is about 1/2 cup of baking soda and 1 to 2 cups of vinegar, but the correct amount depends on your washer model and manual. Use moderate amounts so residue does not build up.
It is better not to mix them early because they neutralize each other before they can help clean. Add them in the washer in the recommended sequence instead.
It can be safe for many front-loaders if the manufacturer allows vinegar and the amounts are kept moderate. Pay special attention to the door gasket and dry it after the cycle.
Many households do well with a monthly cleaning cycle, especially with heavy laundry use. Lighter-use homes may need it less often if they keep the washer dry between loads.
A lingering smell can mean hidden buildup, a clogged filter, or a drainage problem. If the odor returns quickly, the washer may need a deeper clean or professional service.
Some manufacturers caution against vinegar because it may affect rubber or sensitive parts over time. Check your owner’s manual before using it and follow the brand’s guidance.
