Baking soda for a splinter may help only with tiny, shallow splinters by softening the skin around them. If the splinter is deep, painful, or infected, skip home treatment and get professional care.
Baking soda for a splinter is a common home remedy that some people still try because it is simple, low-cost, and easy to mix in the kitchen. It may help with very small, shallow splinters, but it is not a fix for deep, painful, or infected skin injuries.
- Best use: Tiny, visible splinters that sit close to the skin surface.
- Main limit: Deep, painful, or infected splinters should not be treated at home.
- Safer approach: Use a thin paste briefly, then remove only if the tip is clearly visible.
- Common mistake: Digging after the skin swells usually makes the injury worse.
- Aftercare: Wash, cover, and watch the area for 24 to 48 hours.
What Baking Soda Does for a Splinter and Why People Still Use It in 2026
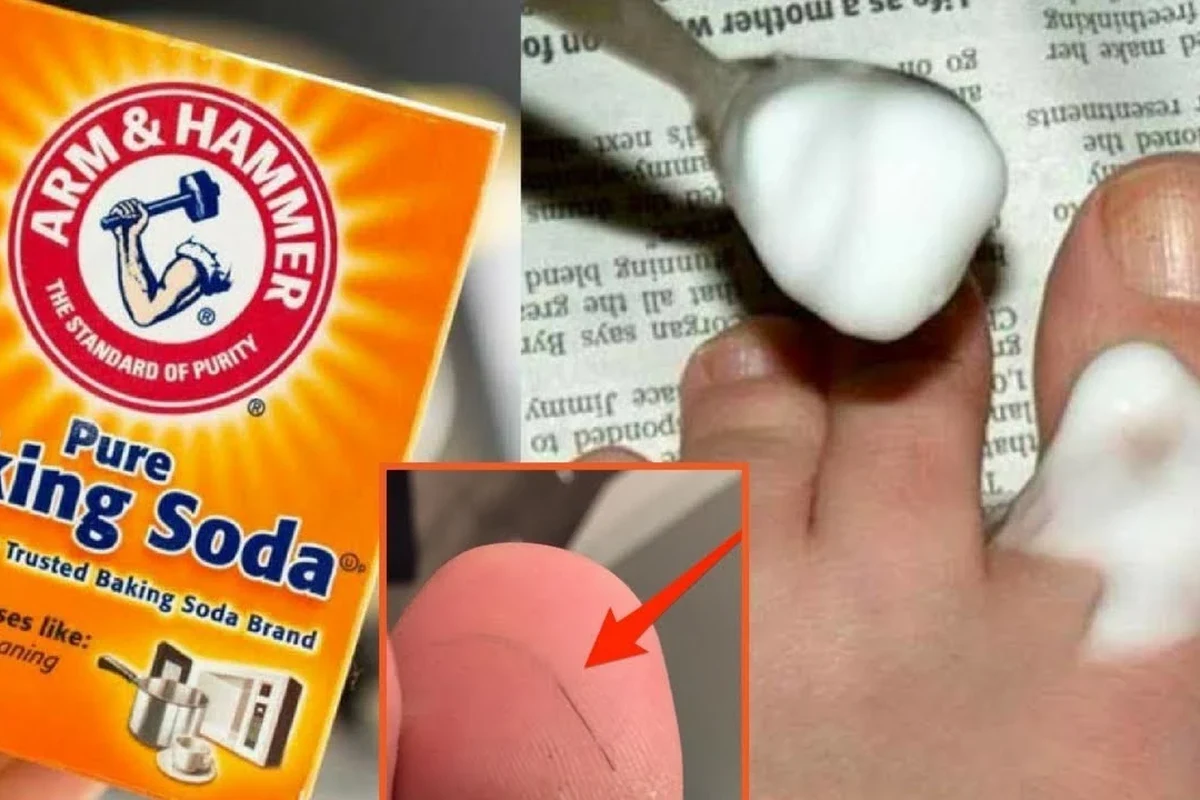
The idea behind baking soda for a splinter is that the paste may soften the outer layer of skin and help the splinter edge work closer to the surface. In practical terms, that can make a tiny fragment easier to grab with clean tweezers instead of forcing it out with a needle.
This method is still popular because baking soda is familiar, inexpensive, and already in many homes. It also fits the same “gentle first step” mindset people use for other household fixes, such as the baking soda trick that actually works or simple cleaning uses like baking soda for shoes cleaning.
How the paste-and-soak method is supposed to work on the skin
The paste is usually made with baking soda and a little water. When applied to the area, it can dry slightly and may draw moisture from the skin’s top layer, which can make the surface around a tiny splinter swell a little.
That swelling is the part people hope will push the splinter closer to the top. It is a mild effect, not a guaranteed extraction method, and it works best when the splinter is already near the surface.
Baking soda is alkaline and reacts with moisture, but it does not “pull out” a splinter in a dramatic way. Any benefit usually comes from softening the skin and making the object easier to see and grasp.
When a splinter is a good candidate for home care versus removal
Home care makes the most sense when the splinter is tiny, shallow, clean, and easy to see. If the tip is already visible, a careful attempt at removal is usually more reasonable than trying to treat a deep fragment through the skin.
If the splinter is large, deeply embedded, dirty, or causing strong pain, skip the DIY approach. In those cases, baking soda is unlikely to help enough, and trying too hard can make the injury worse.
Step-by-Step Baking Soda Method for Easy Splinter Removal
If you decide to try baking soda for a splinter, keep the process simple and gentle. The goal is to soften the skin a little and make safe removal easier, not to dig or scrub at the area.
- Wash your hands and the skin around the splinter.
- Check that the splinter is shallow and visible.
- Make sure tweezers are clean and in good condition.
- Do not use this method near the eye or on infected skin.
Mixing the right paste consistency for small, shallow splinters
Mix a small amount of baking soda with just enough water to form a thick paste. It should look spreadable, similar to a soft frosting, not runny like batter.
If the paste is too wet, it will slide off and dry unevenly. If it is too dry, it may not stay in contact with the skin long enough to do anything useful.
There is no exact kitchen-style measurement that works for every splinter. Skin thickness, splinter size, and how deep the fragment sits will affect whether the paste does anything at all.
Applying, covering, and waiting the correct amount of time
Spread a small layer of paste directly over the splinter area. Cover it with a bandage or gauze so it stays in place, then wait for a short period rather than leaving it on all day.
A brief wait is usually safer than overdoing it, because prolonged moisture can irritate skin. If the area starts burning, itching, or looking red, remove the paste and wash the skin.
Do not leave any home remedy on broken skin for a long time if the area becomes more irritated. Skin that is already tender can swell further, which may make the splinter harder to remove and increase the risk of infection.
How to check whether the splinter has risen enough to remove safely
After the waiting period, remove the covering and rinse the area gently with clean water. If the splinter tip is more visible or closer to the surface, use clean tweezers to lift it out in the same direction it entered.
Stop if you cannot see the end clearly. Pulling blindly can break the splinter into smaller pieces, which often makes the problem harder instead of easier.
Use good lighting and steady hands. A splinter removal attempt goes badly when people rush, use dirty tools, or keep digging after the skin starts to swell.
Best Situations for Using Baking Soda on a Splinter
Baking soda is most believable as a helper, not a miracle fix, for tiny splinters that sit close to the skin surface. It is more of a softening step than a true extraction method.
Wood, cactus, and tiny surface splinters that may respond well
Very fine wood slivers, cactus spines, and small plant fragments are the kinds of splinters people most often try to treat this way. These materials are often thin enough that a little skin softening may help expose the end.
By contrast, larger metal fragments or deeply embedded glass pieces usually need a different approach. The material matters because some splinters bend, some break, and some stay rigid and sharp.
Fingers, toes, and other areas where the skin is thick enough for the method
Fingers and toes are common places to try this method because the skin is thick enough to tolerate mild soaking and covering. These areas also make it easier to see the splinter once the top layer softens.
It is less useful on very thin or sensitive skin, where even mild irritation can cause more discomfort than help. If the skin is delicate, a simpler and gentler removal method is usually better.
Examples of when the technique is more likely to help than tweezers alone
If the splinter is almost visible but the skin has closed over it slightly, baking soda may help bring it back into view. That can be useful when tweezers keep slipping off the surface.
It may also help when the skin is dry and tight, which can make a tiny fragment feel “stuck” even though it is not deeply embedded. In that case, softening the top layer can improve your odds of removing it cleanly.
Common Mistakes That Make Splinter Removal Harder
Most splinter problems get worse because of impatience, not because the remedy itself is dangerous. The biggest mistake is treating a small skin issue like a digging project.
Using too much baking soda or leaving the paste on too long
A thick pile of paste is not better than a thin, even layer. Too much baking soda can dry the skin too aggressively and make the area irritated, cracked, or sore.
Leaving it on for too long can also backfire by keeping the skin damp and swollen. That swelling can hide the splinter end instead of exposing it.
Trying to dig out a deep splinter after the skin swells
Once the skin is puffy, digging is more likely to tear the surface. That can push the splinter deeper or leave a small wound that takes longer to heal.
If the fragment does not move after one careful attempt, it is usually better to stop. Repeated poking with a needle or pin raises the chance of infection and scarring.
The splinter still will not come out after the paste.
Do not keep scraping the skin. Clean the area, reassess the depth, and use a different method or get medical help if the splinter is painful or deeply seated.
Skipping handwashing, sterilization, or proper aftercare
Clean hands matter because a tiny puncture wound can still become infected. Wash the skin before and after removal, and use clean tweezers instead of tools that have been sitting in a drawer.
Aftercare matters too. Even a successful removal can leave a small opening that needs basic cleaning and protection while it closes.
Safety Limits: When Baking Soda Should Not Be Used
Some splinters are not good candidates for any home remedy. If the situation looks risky, it is better to stop early than to turn a minor injury into a bigger one.
Signs of infection, swelling, redness, pus, or worsening pain
If the area is getting redder, warmer, more swollen, or more painful, treat that as a warning sign. Pus, red streaks, or increasing tenderness suggest the skin may already be infected.
In that situation, home removal is not the right focus. The splinter may need professional care, and the wound may need a medical evaluation.
Deep splinters near the eye, face, nail bed, or sensitive tissue
Never try to use baking soda near the eye or on delicate facial tissue. The paste can irritate sensitive skin, and any wrong movement can cause more damage.
Splinters under the nail or in very sensitive tissue are also harder to handle safely. These areas often need a more precise removal method than a paste can provide.
Situations that call for urgent medical care instead of home remedies
Get medical help if the splinter is deep, the bleeding will not stop, the object is large, or the person has reduced feeling in the area. A splinter lodged in the foot, hand, or near a joint may also need professional removal if movement is affected.
If you are unsure whether the wound is minor, err on the side of caution. Official wound-care guidance from recognized medical sources is always more reliable than guesswork for puncture injuries.
Other Home Removal Options Compared With Baking Soda
Baking soda is only one option. Depending on the splinter, another method may be simpler, faster, or safer.
Warm water soaking, tape, tweezers, and needle methods
Warm water soaking is often the gentlest first step because it softens skin without adding extra ingredients. Tape can help lift out a very tiny surface fragment, while tweezers work best when one end is already visible.
A needle is usually reserved for careful lifting of a shallow tip, not for digging. If you are comparing methods, a good general rule is to choose the least invasive option that can still do the job.
- Simple and inexpensive
- May help tiny surface splinters rise
- Uses common household supplies
- Not reliable for deep splinters
- Can irritate skin if overused
- May delay proper care when the wound is serious
Which removal method works best for different splinter sizes and materials
Small, shallow, visible splinters are usually easiest with tweezers after cleaning or soaking. Tiny fragments that are almost out may respond to baking soda if the skin is dry and tight.
Longer wood splinters, cactus spines, and anything under the nail often need more precision. Glass, metal, and deeply embedded pieces are less predictable and may need professional removal.
Why some remedies are safer or more effective than baking soda
Warm water and soap are safer because they clean the area without adding much irritation. Tweezers are more effective when the end is visible because they remove the object directly instead of hoping the skin changes enough to expose it.
If you want a broader look at how baking soda behaves in household reactions, our guide to the baking soda and vinegar reaction explains why some kitchen mixtures fizz but do not necessarily solve a skin problem.
Aftercare and Prevention: What to Do Once the Splinter Is Out
Once the splinter is removed, the job is not quite finished. Good aftercare lowers the chance of irritation and helps the skin close cleanly.
Cleaning the area, applying ointment, and covering the skin
Wash the area with soap and water, then dry it gently. If you normally use a basic ointment for minor cuts, apply a thin layer and cover the spot with a clean bandage if it will rub against clothing or shoes.
Keep the covering clean and change it if it gets wet or dirty. The skin should look calmer, not more irritated, over the next several hours.
Watching for delayed irritation or infection over the next 24 to 48 hours
Check the area again later the same day and the next day. Redness that spreads, swelling that increases, or pain that gets worse instead of better can mean the splinter was not fully removed or the wound has become infected.
If a tiny dark spot remains and the skin stays tender, do not keep picking at it. That is a good time to seek professional help rather than making the wound larger.
Practical prevention tips for kitchens, workshops, and outdoor activities
Wear gloves when handling rough wood, gardening materials, or broken containers. In kitchens and workshops, keep surfaces smooth and tools in good repair so you are less likely to get tiny fragments in your skin.
After outdoor work, wash hands and inspect fingers, toes, and nails if something sharp brushed against you. Prevention is much easier than removal, whether you are handling a pastry bench, a craft table, or a garden bed.
Final Recommendation: Is Baking Soda for a Splinter Worth Trying?
Baking soda for a splinter is worth trying only when the splinter is tiny, shallow, visible, and not showing signs of infection. Think of it as a mild helper for softening the skin, not as a guaranteed extraction method.
Best-use recap for readers deciding whether to try the method at home
If the splinter is on a finger or toe, close to the surface, and easy to monitor, a short paste-and-cover attempt may be reasonable. If it helps bring the tip up, remove it gently with clean tweezers and stop as soon as the fragment is out.
If you want to compare this with other everyday ingredient uses, our article on using baking soda instead of baking powder safely shows how important it is to match the ingredient to the job.
When to stop home treatment and seek professional removal
Stop home treatment if the splinter is deep, the pain is worsening, the skin is red or swollen, or the fragment is near the eye, nail bed, or another sensitive area. Those are the situations where baking soda is not the right tool.
When in doubt, choose safety over persistence. A careful, clean removal done at the right time is better than several rounds of digging, swelling, and irritation.
This article is for general information only and does not replace medical advice. If a splinter seems serious, infected, or hard to remove, contact a qualified healthcare professional.
Frequently Asked Questions
It may help with very small, shallow splinters by softening the skin around them. It is not reliable for deep, painful, or infected splinters.
Use it only for a short period and stop if the skin becomes irritated. Leaving it on too long can dry or swell the skin and make removal harder.
No, deep splinters are not a good match for this method. Deep or painful splinters often need tweezers, a medical tool, or professional care.
Clean the area, try warm water soaking, and use clean tweezers if the tip is visible. Choose the least invasive method that can safely lift the splinter out.
Watch for increasing redness, swelling, warmth, pus, or worsening pain. If those signs appear, stop home treatment and seek medical advice.
Wash the area with soap and water, apply a thin layer of ointment if appropriate, and cover it with a clean bandage. Keep watching the area for 24 to 48 hours for delayed irritation or infection.
