
How to Use a Potato Ricer for Smooth, Fluffy Mashed Potatoes

A potato ricer is one of those simple tools that can make a weeknight side dish feel much more polished. If you want mashed potatoes that are smooth, light, and free of hard lumps, this tool does the job with far less effort than repeated mashing. It also helps keep the texture from turning heavy or gluey, which is a common problem when potatoes are worked too much.
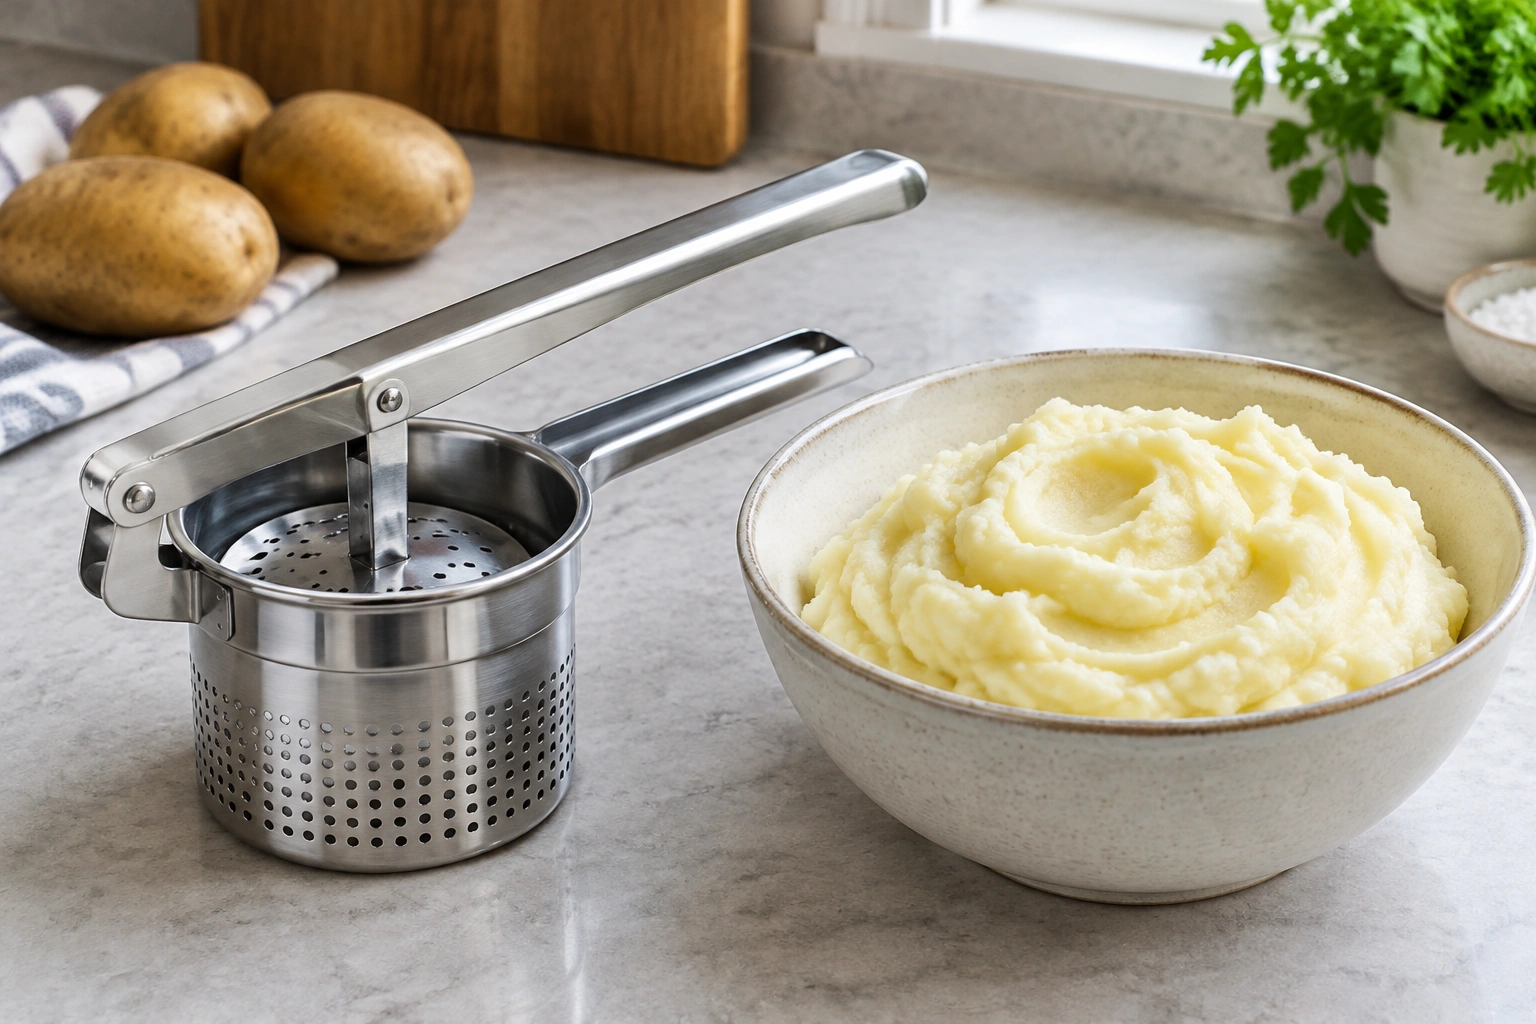
The basic idea is straightforward: cooked potato goes into a chamber, then a plunger pushes it through small holes. That action breaks the potato into fine, even strands instead of smashing it into a dense paste. A ricer is especially useful when the goal is a smooth finish rather than rustic mash. It is best for smooth, fluffy mashed potatoes and less suitable for ultra-rustic mash or recipes where a coarse texture is the point.
For busy home cooks, that matters because the tool gives you consistency. You can make a large holiday batch or a simple family dinner side without having to keep stopping to mash out lumps. It also works well when you want a more elegant texture for dishes that need a soft, airy base.
What a Potato Ricer Does Best
A potato ricer shines when you want mashed potatoes that are smooth but still light. It is not the best tool for chunky, rustic potatoes with visible skins and big pieces. If that is your goal, a masher is usually more appropriate.
The practical advantage is texture control. A ricer separates the potato into fine pieces instead of pressing and smearing it around the bowl. That separation is one reason many cooks prefer it for a fluffier result. If you have ever ended up with mashed potatoes that feel dense or gummy, the ricer is often the fix.
For a home cook, the real question is not whether the ricer is “better” in every case. It is whether you want a soft, uniform mash. If yes, this tool earns its spot in the drawer.
Pick the Potato Type That Matches Your Goal
Potato variety changes the final texture more than many people expect. Russet potatoes and Yukon Gold potatoes are the two most common choices for ricing, but they behave a little differently.
Here is the simplest decision rule:
- Choose russets if you want the fluffiest, lightest mash.
- Choose Yukon Golds if you want a creamier, richer result.
Russets are higher in starch, which is why they often give mashed potatoes a lighter feel. Yukon Golds tend to make a denser, creamier mash with a buttery flavor that many families like for everyday dinners. Neither is wrong; they just lead to different textures.
Quick comparison: russet vs. Yukon Gold
| Potato type | Texture after ricing | Best use case | Trade-off |
|---|---|---|---|
| Russet | Fluffier, lighter | Classic mashed potatoes, holiday sides | Can feel drier if under-seasoned |
| Yukon Gold | Creamier, more velvety | Rich everyday mash, buttery side dishes | Usually less airy than russets |
If you are cooking for picky eaters, Yukon Golds can be a safer middle ground because they taste naturally rich without needing much extra help. If you want the mashed potatoes to feel especially light on the plate, russets usually win.
Prepare the Potatoes Before Ricing
The prep work matters because a ricer is most efficient when the potatoes are already cooked evenly and not overly wet. A few small choices here make the whole process easier.
Peel or leave the skins on?
If you want a smooth, uniform mash, peel the potatoes before ricing. The tool will not remove skins, so leaving them on gives you a more rustic result with visible pieces. That can be good in some recipes, but it is not the cleanest choice for silky mashed potatoes.
How to cut the potatoes
Cut the potatoes into even chunks before cooking so they soften at about the same rate. You do not need tiny pieces, but oversized chunks can cook unevenly, which leaves you with some pieces that are too firm and others that are breaking down too much.
A practical approach is to cut them into similarly sized pieces, then cook until they are just tender enough to be pierced easily with a fork. That “just tender” stage matters because potatoes that are undercooked resist the ricer, while potatoes that are falling apart can hold excess water and become messy.
Hot, warm, or cooled?
Rice the potatoes while they are still hot or very warm. That is when they pass through the tool most easily. Once they cool, they stiffen and become harder to press, which can make the process feel like work instead of a quick kitchen task.
Be careful here: hot potatoes are easier to rice, but they also mean the tool and the food can burn your hands. Keep a towel nearby and work steadily.
How to Use a Potato Ricer Step by Step
The best way to use a potato ricer is to work in small batches and avoid forcing the tool.
1. Set up a bowl first
Place a large mixing bowl under the ricer before you begin. This sounds obvious, but it saves you from juggling a hot tool and hot potatoes at the same time.
2. Load a small amount
Fill the basket only partway. Do not pack it full. A smaller load presses through more easily, and you will spend less effort squeezing the handles.
This is one of the biggest mistakes people make: overfilling the basket and then trying to muscle the potatoes through. That usually leads to strain and uneven output.
3. Position the tool over the bowl
Hold the ricer steady so the holes are centered over the bowl. If the tool shifts while you press, potato can fall outside the bowl and make cleanup more annoying.
4. Press gently and evenly
Close the handles with steady pressure. You do not need to crush the potatoes. Let the tool do the work. If the potatoes are cooked properly and the basket is not overloaded, they should pass through without much resistance.
If you feel strong resistance, stop and check the load. The issue is usually too much potato in the basket, potatoes that are too cool, or pieces that are still undercooked.
5. Reload and repeat
Empty the basket between batches and continue until all the potatoes are riced. Small, repeated batches are much easier than trying to do everything at once.
6. Add butter, milk, or seasoning after ricing
For the smoothest texture, rice the potatoes first, then stir in your butter, milk, cream, salt, and pepper. Adding liquid before the potatoes are fully riced can make the texture harder to control.
Common Ricing Problems and How to Avoid Them
A potato ricer is simple, but a few mistakes can make it frustrating.
Problem: the ricer clogs
This often happens when the potatoes are too wet or the basket is overfilled. If the cooked potatoes are holding a lot of water, they may mash into a sticky mass instead of passing cleanly through the holes. Drain them well after cooking and let excess steam escape briefly before ricing.
Problem: the mash turns gummy
A ricer helps reduce gumminess compared with aggressive mashing, but the texture can still suffer if the potatoes are overworked after ricing. Once they are through the tool, stir only until the butter and milk are incorporated.
Problem: the handle feels hard to squeeze
That usually means one of three things: the potatoes are too cool, the pieces are too large, or the basket is too full. Fix the cause instead of forcing the handles harder.
Problem: the result is too wet
This is usually a potato issue, not a tool issue. If the potatoes were boiled too long or left sitting in water, they can pick up excess moisture. A ricer cannot correct that. Better to cook them just until tender and drain them well.
Potato Ricer vs. Masher vs. Food Mill
If you are deciding whether the ricer is worth keeping, compare it to the other common tools.
| Tool | Texture | Effort | Best use case |
|---|---|---|---|
| Potato ricer | Smooth, fluffy, even | Moderate, but easy in small batches | Lump-free mashed potatoes, smooth vegetable puree |
| Potato masher | Rustic, chunkier | Low to moderate | Casual mash with more texture |
| Food mill | Smooth and more refined | More setup and cleanup | Larger batches or very fine purees |
A masher is faster if you want a rough, home-style side dish. A food mill can handle similar jobs, but it usually feels like more equipment than you need for a simple potato side. For most home kitchens, a ricer sits in the sweet spot: simple, effective, and easy to use for smaller batches.
If your goal is smooth mashed potatoes for a holiday meal, the ricer is the most direct tool. If you want a rustic side with skins and texture, skip it.
Other Foods You Can Rice
A potato ricer is not just for potatoes. It can also work with other cooked foods that are soft enough to press through the holes without forcing. Not every soft food is a good fit, though, and very fibrous or watery ingredients may clog the tool or produce uneven results.
Good candidates
- Sweet potatoes: useful when you want a smooth puree for a side dish or baking.
- Cauliflower: helpful for a smoother cauliflower mash.
- Butternut squash or pumpkin: can be riced into a soft puree for recipes that need a fine texture.
These ingredients vary in moisture and fiber, so results are not always identical to potatoes.
When it works less well
Very stringy, watery, or fibrous foods may not pass through cleanly. If you have to force the tool, it is usually not the right match. The ricer works best with foods that are already soft and relatively uniform.
How to Clean and Store the Ricer
Cleanup is easier if you do it right away. Once potato bits dry in the holes or hinge area, they take more effort to remove.
Rinse the tool soon after use, then wash it with warm soapy water. Pay attention to the small holes and the hinge area, where food tends to hide. A soft brush or sponge usually works better than a stiff scrubber, especially on metal surfaces.
If your ricer has a lot of tiny holes, hold it up to the light after washing to make sure the openings are clear. Then dry it completely before storing it. That helps prevent residue buildup and keeps the tool ready for the next use.
If the handles fold or the basket opens, check those moving parts before putting it away. Food trapped in the joints can make the tool harder to use later.
Quick Troubleshooting Checklist
Use this as your last-minute guide before you start pressing potatoes:
- Use peeled potatoes if you want a smooth finish.
- Cook potatoes until just tender, not falling apart.
- Drain them well so they are not overly wet.
- Rice them while they are hot or very warm.
- Load the basket in small batches.
- Press with steady, gentle pressure.
- Stir in butter and milk after ricing.
- Clean the tool soon after use.
If the potatoes resist the ricer, check the batch size and temperature first. Those two factors solve most problems.
Frequently Asked Questions
What is a potato ricer used for?
It is used to turn cooked potatoes into a smooth, fluffy texture with fewer lumps than a masher usually leaves.
Do I need to peel potatoes before using a ricer?
If you want smooth mashed potatoes, yes. Leaving the skins on gives a more rustic result.
Should potatoes be hot before ricing?
Yes, hot or very warm potatoes are easier to press through the tool.
Can I use a potato ricer for sweet potatoes?
Yes, many cooks do. It can also work for other soft cooked vegetables like cauliflower, squash, or pumpkin.
Is a potato ricer better than a masher?
For smooth, fluffy potatoes, usually yes. For chunky or rustic mash, a masher is the better fit.
How much potato should I put in at once?
Only a small amount. The basket should not be packed full, or pressing becomes much harder.
A potato ricer is one of the simplest ways to improve mashed potatoes without adding more work to your kitchen routine. Once you learn the rhythm—small batches, hot potatoes, gentle pressure—it becomes a dependable tool for family dinners, holiday sides, and other soft purees.