
How to Bake Bread in a Loaf Pan for a Soft, Evenly Baked Loaf

If you’ve ever wanted a sandwich-style loaf with a neat shape, tender crumb, and slices that behave themselves, a loaf pan is your best friend. It turns loose dough into a predictable shape, helps the loaf rise upward instead of spreading outward, and makes everyday bread easier to slice for toast, sandwiches, and French toast.
But loaf-pan baking has its own logic. A loaf pan changes how the dough bakes, especially when it comes to proofing, browning, and doneness. That means the same dough may need a different fill level, a different bake time, or even a different pan material to bake well.
In this guide, I’ll walk you through the decisions that matter most: choosing the right pan, judging how much dough to use, shaping and proofing in the pan, baking with or without a cover, and checking doneness so you don’t end up with a gummy center or a loaf that collapses after baking.
What Changes When You Bake Bread in a Loaf Pan
A loaf pan does more than hold dough. It changes the loaf’s final shape, the way it expands, and the crust you get at the end. That’s why a recipe that works beautifully as a free-form loaf may need a little adjustment in a pan.
A pan loaf usually bakes into a softer-sided, more uniform shape. That’s ideal for sandwich bread, milk bread, brioche-style loaves, and many enriched doughs. The walls of the pan support the dough as it rises, so the loaf can climb higher without spreading. It also means the sides and bottom are in direct contact with the pan, which can encourage a more even, enclosed bake.
There’s no rule saying an artisan-style dough cannot go into a loaf pan, but you usually need to change the baking approach—especially time and temperature. Breadtopia notes that artisan-style bread can be baked in a loaf pan, but the method should be adjusted rather than copied exactly from a hearth-bread recipe. That’s the key idea: the dough may stay the same, but the environment changes. Breadtopia’s loaf-pan FAQ is a useful reminder of that distinction.
A quick decision framework
Choose a loaf pan if you want:
– A sandwich-friendly loaf with straight sides
– A softer crust
– More controlled rise
– Easier slicing and portioning
Choose a free-form bake if you want:
– A crustier exterior
– A more open, rustic shape
– More exposed surface area for browning
If your goal is a tidy, sliceable loaf for daily use, the pan is not a compromise. It’s the right tool.
Choose the Right Loaf Pan Size and Material
The pan is not just a container; it’s part of the recipe. Size determines how much dough the loaf can comfortably hold, and material affects browning, release, and bake speed.
Here’s a practical comparison to help you choose.
| Pan type | Typical use | Baking behavior | Best for | Trade-off |
|---|---|---|---|---|
| Standard metal loaf pan | Everyday sandwich bread | Heats quickly, browns efficiently | Lean and enriched loaves | Can brown faster on the sides and bottom |
| Glass loaf pan | Home use, visible browning | Heats more slowly, often bakes more gently | Loaves where you want careful browning | May need timing adjustments and can be unforgiving if overbaked |
| Ceramic loaf pan | Attractive presentation | Slower, more even heat feel | Softer crusts and decorative serving | Usually less flexible for quick release |
| Pullman-style covered pan | Square sandwich loaves | Lid controls height and shape | Uniform slices, very even sandwich bread | Requires a different proof target and careful fill level |
A simple sizing rule helps: for a standard 9 x 5-inch loaf pan, use roughly 700 to 900 g of dough; for a mini loaf pan, about 300 to 450 g; and for a Pullman pan, aim for the dough to fill about half to two-thirds of the pan before proofing, depending on the lid and recipe. In all cases, the dough should have room to rise without overflowing.
If you’re baking a standard sandwich loaf, a 9 x 5-inch pan is a common starting point. One recipe source places dough in a lightly greased 9 x 5-inch loaf pan and lets it rise until it fills the pan and just barely crowns over the top before baking. That gives you a helpful visual target for a classic loaf-pan loaf. The Practical Kitchen’s sandwich bread method is a good example of this approach.
For pan material, metal is usually the easiest place to begin because it gives predictable browning and is widely used for bread pans. USA Pan describes its bread and loaf pans as designed to bake evenly with a good rise and golden crust, which matches what most home bakers want from a reliable loaf pan. USA Pan’s bread and loaf pans are a good reference point for the kind of performance to look for.
Tools and Ingredients You’ll Want Ready
You do not need a long list of specialty gear, but a few tools make loaf-pan bread much easier to manage.
Essential tools
- Loaf pan
- Mixing bowl
- Bench scraper or spatula
- Kitchen scale or measuring cups
- Clean towel or plastic wrap for proofing
- Wire rack
- Oven mitts
Helpful extras
- Instant-read thermometer
- Parchment paper
- Foil for tenting the top if needed
- Pastry brush for pan greasing
- Cooling rack with good airflow
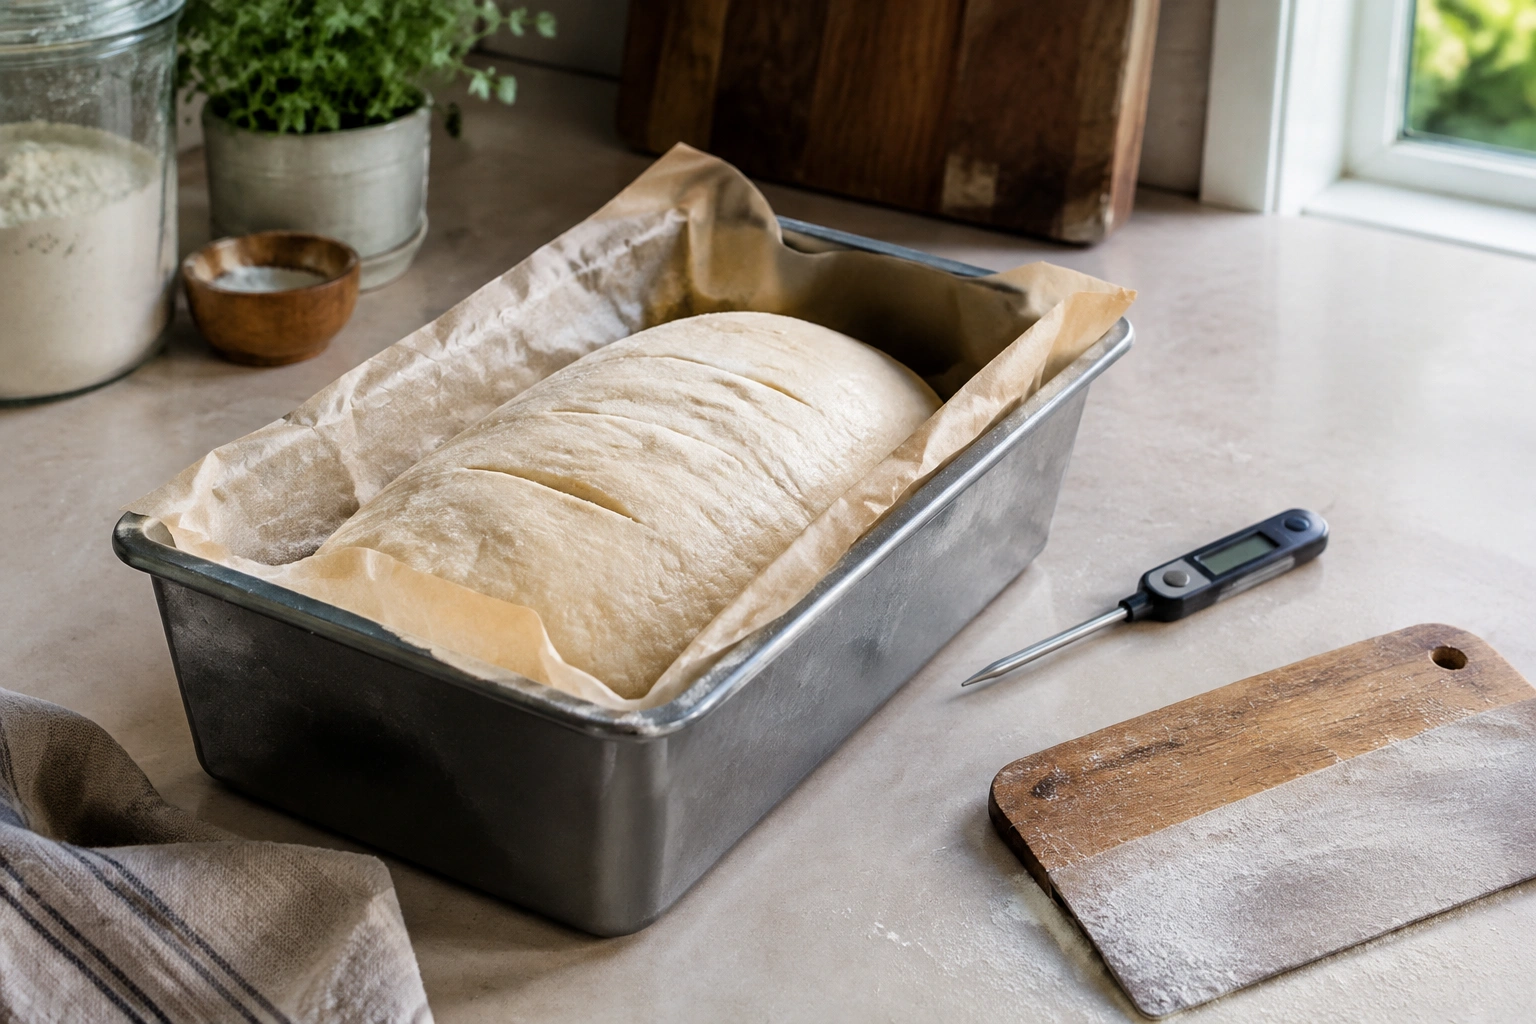
The thermometer is especially useful because loaf-pan bread can look done before the center is fully baked. A recipe source for sandwich bread bakes at 350°F for 30 to 35 minutes, or until the internal temperature reaches 195°F. That gives you a strong doneness cue to pair with visual checks rather than relying on color alone. The Practical Kitchen’s bake-time guidance is one of the clearest examples of this.
How Much Dough Should Go in the Pan
This is where many loaf-pan failures begin. Too much dough and the loaf mushrooms, overflows, or collapses. Too little and you get a squat loaf with a weak shape and a dry crust ratio.
The quickest rule is this: fill the pan so the dough has room to rise, then stop proofing when it reaches the right target for that pan.
Practical fill rule by pan size
- Standard 9 x 5-inch pan: about 700 to 900 g dough, or enough dough to reach roughly 1/2 to 2/3 of the pan before proofing
- Mini loaf pan: about 300 to 450 g dough, or roughly 1/2 to 2/3 full before proofing
- Pullman pan: usually about 1/2 full to start, then proof to just below the lid line or to the recipe’s target height
Quick checklist for deciding if you have the right amount
- Check the pan size first.
- Estimate dough weight or divide the dough evenly if making multiple loaves.
- Start with the dough around halfway to two-thirds full.
- Proof until it rises to the top edge or just above it for an open pan.
- For a Pullman pan, proof to the lid target, not to a dome.
A common sandwich-bread target is to let the dough rise until it fills the pan and just barely crowns over the top before baking. That’s a useful benchmark for an open loaf pan because it leaves room for oven spring without inviting overflow.
A simple way to think about fill level
- Underfilled pan: The loaf may bake up short and dense-looking, even if the crumb is fine.
- Properly filled pan: The loaf rises upward, usually with a gentle dome.
- Overfilled pan: The loaf can spill over, compress at the sides, or sink after proofing.
If you’re converting a recipe, the pan should match the dough amount as closely as possible. A dough that works in a free-form boule may need a different quantity or pan size when moved into loaf-pan baking. If the recipe makes two free-form loaves, you may need to divide it differently for two pans or choose a larger pan for one loaf.
Prepare the Pan for Easy Release
Loaf-pan bread should come out cleanly, but it won’t if the pan is left untreated.
For most bread, a light greasing is enough. Some bakers also line the bottom or use a parchment sling for extra security. That’s especially helpful if you’re using a pan with a sticky finish, a glass pan, or a dough enriched with sugar, milk, or butter.
Greasing alone gives the loaf more direct contact with the pan, which can help the sides brown and set well. Lining makes removal easier, but it can slightly reduce browning where the parchment touches the dough. That’s a worthwhile trade-off if sticking has been a problem.
Practical release strategy
- Metal pan in good condition: Light grease is often enough.
- Older pan or sticky dough: Grease plus parchment.
- Glass or ceramic pan: Grease generously and consider parchment for the bottom.
- Pullman pan with lid: Grease carefully, including corners and lid contact points.
The vessel matters because the final shape is dictated by the pan, and baked goods usually need some treatment to prevent sticking. That’s a basic baking truth, but it matters more with bread because you’re asking the loaf to hold its structure while still hot and delicate.
Shape the Dough for a Loaf Pan
A loaf pan does not need dramatic shaping, but the dough should still be organized. The goal is to build enough surface tension to support rise without making the dough so tight that it tears or fights the pan.
A reliable shaping method
- Gently degas the dough after the first rise.
- Flatten it lightly into a rectangle.
- Fold the sides inward if needed.
- Roll it into a log that fits the pan length.
- Pinch the seam closed.
- Place it seam-side down in the pan.
That log shape helps the dough rise evenly and avoids thin spots that can bake unevenly. If the dough is very soft or enriched, keep the shaping gentle. Overhandling can squeeze out gas that should have helped the loaf rise.
For a Pullman-style pan, shape the dough into a neat log that fits the square profile more snugly. Because the lid controls the final height, the dough has less room to dome, so a clean, even shape matters more than an open pan.
Proof the Dough in the Pan
This is the stage where loaf-pan bread often goes wrong. Underproofed dough bursts, overproofed dough collapses, and both can look deceptively similar from a distance.
The best cue is visual and tactile, not just time.
What properly proofed dough looks like
- It has expanded noticeably in the pan
- The top is rounded or just approaching the rim
- It feels airy but still springy when gently touched
- A light fingertip press springs back slowly, not instantly
For a standard open loaf pan, a common target is for the dough to fill the pan and just barely crown over the rim before baking. That’s the point where the dough usually has enough strength to rise in the oven without spilling over too much.
Signs of overproofing
- The dough rises very high, then starts to look fragile
- It may wobble when the pan is nudged
- The surface can appear wrinkled, slack, or deflated
- It may collapse slightly when you touch it
If you catch overproofing early, bake immediately. If the dough has already lost structure, it may still bake, but the loaf may come out flatter and more delicate.
Bake the Bread: Temperature, Time, and Covering Options
Because loaf pans vary, bake time should be treated as a range, not a fixed promise. Pan size, material, dough richness, and oven accuracy all matter.
A practical benchmark from a sandwich-bread recipe is 350°F for 30 to 35 minutes, with doneness checked by internal temperature at 195°F. That is a useful starting point for a standard loaf in a standard metal pan. The Practical Kitchen’s bread formula uses that range successfully.
Steam is usually unnecessary for loaf-pan bread; use it only if you specifically want a softer crust in the first minutes of baking, and even then it is optional rather than required.
Open pan vs. covered pan
Open pan
– Produces a more domed top
– Gives you a more traditional loaf shape
– Makes it easier to watch browning
– Usually results in a softer crust than hearth bread, but more exposed top browning
Covered Pullman-style pan
– Produces a square, even loaf
– Controls height and shape
– Helps create very uniform slices
– Can reduce top browning because the lid limits exposure
If the top is browning too quickly before the center is done, tent it loosely with foil. That is usually a better fix than lowering the temperature too late in the bake.
A practical baking approach
- Preheat fully before loading the loaf
- Place the pan in the center of the oven
- Bake until the loaf is well colored and the center is done
- Use foil only if the top darkens too fast
For enriched doughs like brioche or milk bread, the crust may brown faster because of sugar and dairy. That means you may need to watch color more closely and rely on internal temperature rather than appearance alone.
How to Tell When Loaf-Pan Bread Is Done
This is the step that separates a good-looking loaf from a truly finished one.
Use more than one cue
A fully baked loaf usually gives you a combination of:
– Deep golden crust
– Firm sides that feel set, not soft and wet
– Slight pull away from the pan edges
– Internal temperature near the recipe target, often around 195°F for sandwich bread
– A hollow or dry sound when tapped, though this is less reliable than temperature
If the top looks done but the center is still underbaked, the loaf may collapse or feel gummy after cooling. That’s especially common in enriched loaves, which can brown early while the interior lags behind.
An instant-read thermometer is the cleanest way to remove guesswork. It does not replace visual judgment, but it gives you a concrete check before you pull the loaf from the oven.
Cool, Unmold, and Slice Without Damaging the Loaf
Once the loaf comes out, resist the urge to slice immediately. Bread is still setting as it cools, and the steam inside needs time to redistribute.
A practical method for sandwich bread is to let the pan cool on a wire rack for about 10 to 15 minutes, then carefully turn the loaf out and cool it completely on the rack before slicing. That cooling window gives the bread enough structure to release cleanly without trapping too much steam in the pan. The Practical Kitchen’s cooling step is a solid practical guide here.
Why cooling matters
If you slice too soon:
– The crumb can compress
– Steam can make the center gummy
– The loaf may seem underbaked even if it is not
Set the loaf on a wire rack so air can circulate around the sides and bottom. If you leave it in the pan too long, condensation can soften the crust and make sticking more likely.
Common Mistakes and How to Fix Them
The loaf stuck in the pan
Likely causes:
– Pan not greased enough
– Loaf cooled too long in the pan
– Sticky enriched dough
Fix:
– Grease more thoroughly next time
– Line with parchment if needed
– Unmold after the short cooling window, not hours later
The loaf overflowed
Likely causes:
– Too much dough
– Overproofing
– Pan too small
Fix:
– Use less dough or a larger pan
– Watch the proof level more closely
– Stop proofing when the dough is just at the right height for the pan
The center is dense or gummy
Likely causes:
– Underbaking
– Slicing too soon
– Underproofing or overproofing
Fix:
– Bake to temperature, not just color
– Cool fully before slicing
– Recheck proofing next time
The top browned too quickly

Likely causes:
– Oven runs hot
– Pan is dark metal
– Dough is enriched and browns faster
Fix:
– Tent with foil
– Check oven accuracy
– Watch the loaf earlier in the bake
The loaf rose oddly or collapsed
Likely causes:
– Weak shaping
– Overproofing
– Pan too full
Fix:
– Shape the dough into a tighter log
– Bake sooner if the dough is nearing the rim
– Use a pan size that matches the dough quantity
Practical Examples: Adapting Different Doughs
Standard sandwich bread
This is the easiest fit for a loaf pan. A soft white or wheat sandwich dough usually benefits from the pan’s support and comes out with a tender, sliceable crumb.
Enriched doughs like brioche or milk bread
These doughs often bake beautifully in loaf pans because they are soft and delicate. The pan helps them hold shape, but they can brown faster, so doneness checks matter more. A covered pan can be especially useful if you want a square sandwich loaf.
Artisan-style dough
You can bake many artisan-style formulas in a loaf pan, but expect a different result. The loaf will usually be more uniform and less crusty than the free-form version. That is not a flaw; it is simply a different style of bread.
Quick Troubleshooting Guide
- Too short: Use more dough or a smaller pan.
- Too tall and overflowing: Use less dough or stop proofing earlier.
- Sticky release: Grease better and unmold sooner.
- Pale sides: Check pan material and oven placement.
- Dark top, pale center: Tent with foil and bake longer.
- Gummy slices: Cool completely and bake to internal temperature next time.
FAQ
How much dough should go into a loaf pan?
For a standard 9 x 5-inch loaf pan, a good starting point is about 700 to 900 g of dough. Mini loaf pans usually take about 300 to 450 g, and Pullman pans are often filled about halfway to two-thirds full before proofing.
Should I grease, line, or do both?
For most metal pans, light greasing is enough. If the pan is old, sticky, glass, ceramic, or the dough is enriched, use grease plus parchment for easier release.
Do I need steam for loaf-pan bread?
Usually no. Steam is generally unnecessary for standard loaf-pan bread; use it only if you specifically want a softer crust early in the bake.
How do I know when the dough is proofed enough in the pan?
For an open loaf pan, the dough should rise close to the rim and often just barely crown over the top. For a Pullman pan, proof to the lid target rather than a dome.
What temperature should loaf-pan bread reach when done?
A common target for sandwich bread is about 195°F in the center, though the exact target can vary by recipe.
When to Consult a Master Baker
If your loaf keeps failing even after you’ve adjusted pan size, proofing, and bake time, the issue may be in the formula itself rather than the method. Very wet doughs, highly enriched doughs, and recipes with unusual flours can all behave differently in a loaf pan. A master baker can help you evaluate the dough strength, hydration, and fermentation timing so you’re not trying to solve a formula problem with pan technique alone.
For most home bakers and culinary students, though, the solution is usually simpler than it seems: choose the right pan, proof to the right height, bake until the center is truly done, and let the loaf cool before slicing.
That’s the real rhythm of loaf-pan bread. Once you understand it, the pan becomes a tool for consistency, not a limitation.