Tenderizer baking soda works best on thin, quick-cooked meat because it changes the surface pH and helps proteins stay softer. Use a small amount, rest briefly, then cook hot and fast to avoid off flavors or mushy texture.
Tenderizer baking soda is a simple kitchen trick that can make meat feel noticeably softer and juicier when you use it the right way. The key is to apply a small amount, give it just enough time to work, and cook the meat promptly so the texture stays pleasant.
- Best use: Thin slices, stir-fry beef, chicken strips, and some ground meat.
- Main rule: Use a very small amount to avoid soapy or spongy results.
- Cooking fit: Works best with high heat and short cooking times.
- Food safety: Keep raw meat refrigerated and prevent cross-contamination.
- Better choice sometimes: Thick cuts, seafood, and long marinades usually need another method.
What Tenderizer Baking Soda Actually Does to Meat
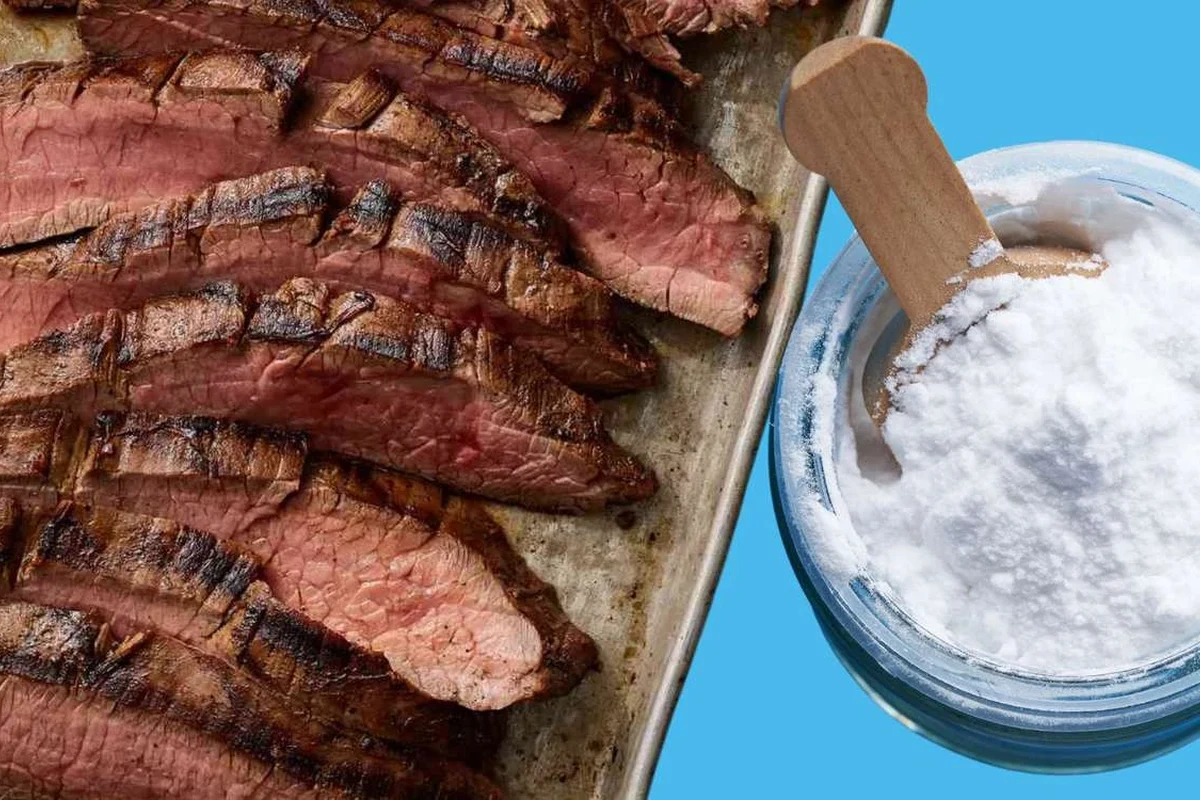
Baking soda works as a tenderizer by changing the surface of the meat, not by “cooking” it or fully breaking it down. Used correctly, it can help lean, fast-cooking proteins stay more tender in the pan.
How baking soda changes surface pH and protein behavior
Baking soda is alkaline, so it raises the pH on the meat’s surface. That shift makes some proteins less eager to bond tightly during cooking, which can reduce the chance of a dry, tough bite.
In practical terms, the outside of the meat holds onto moisture a little better and can stay softer after high-heat cooking. This is why the technique is popular for stir-fries and quick sautés, where meat spends only a short time in the pan.
Baking soda tenderizing is mostly a surface effect. That means thin pieces respond better than thick cuts, because the treatment does not penetrate deeply in a short time.
Why the effect is different from salt, marinades, or enzymatic tenderizers
Salt tenderizes in a different way. It helps proteins retain moisture and can improve seasoning throughout the meat, especially in brines or dry-salt methods.
Marinades add flavor and can soften the surface, but their main job is not the same as baking soda. Enzymatic tenderizers, such as those made with papaya or pineapple, use natural enzymes to break down proteins more aggressively, which can be useful but also easier to overdo.
If you already use good moisture control for chicken in quick-cooking methods, think of baking soda as another tool in the same family of texture fixes: useful, but best when matched to the right cut and cooking style.
Best Cuts and Real-World Uses for Baking Soda Tenderizing
Tenderizer baking soda shines when the meat is cut small or cooked fast. It is especially helpful when you want a silky texture in a hot pan or wok.
When it works best: thin slices, stir-fry beef, chicken strips, and ground meat
Thinly sliced beef for stir-fry is one of the best candidates because the surface area is high and the cooking time is short. Chicken strips, small cubes, and quickly browned ground meat can also benefit when the goal is a softer bite rather than a long braise.
In these cases, the meat often goes from raw to done in minutes, so the surface treatment remains relevant through the whole cook. That is where baking soda can make the biggest difference in tenderness and juiciness.
If you are cooking in an air fryer or other rapid-heating appliance, remember that dry heat can intensify surface browning. For broader appliance context, see our guide on why air fryers need preheating when fast, even heat matters.
When to avoid it: thick steaks, delicate seafood, and long marinating situations
Thick steaks are usually not the best match because baking soda mainly affects the outside. A large steak needs a different approach, such as dry brining, careful cooking, or mechanical tenderizing if appropriate.
Delicate seafood can become soft or oddly textured if treated too aggressively. Long marinating situations are also risky, because the meat may take on a soapy, slippery, or mushy feel before it reaches the pan.
Do not use baking soda as a universal tenderizer. For thick cuts, very delicate proteins, or extended holding times, another method is usually safer and gives a better texture.
How Much Tenderizer Baking Soda to Use Without Ruining Texture
More is not better here. The right amount is usually small enough that you barely notice it before cooking, yet enough to change the surface behavior of the meat.
Practical measurement ranges by meat type and cut size
For home cooking, a light dusting is often enough for thin slices. Many cooks start with about 1/4 teaspoon per pound of meat, then adjust based on the cut size, how thin it is sliced, and how long it will rest before cooking.
For ground meat, use even less than you think you need, because the mixture is already broken up and can turn soft quickly. If you are unsure, begin at the low end, because it is easier to add seasoning later than to fix over-softened meat.
If you are new to the method, test it on a small batch first. Different brands, cut thicknesses, and cooking methods can change the final texture more than people expect.
Why overuse leads to spongy, soapy, or overly soft results
Too much baking soda pushes the surface pH too high, which can create a slippery or spongy texture. It can also leave a faint soapy taste that becomes obvious once the meat is cooked.
That off flavor is one of the main reasons this technique gets a bad reputation. In many failed batches, the problem is not the idea itself but an oversized dose or too much resting time.
Step-by-Step Method for Tenderizing Meat with Baking Soda
The method is simple, but the order matters. A careful workflow keeps the meat tender without leaving an odd taste behind.
Dry coating vs. diluted slurry methods
A dry coating is best when you want direct contact and are working with sliced meat. Sprinkle the baking soda lightly over the meat and toss just enough to coat the surface evenly.
A diluted slurry is useful when you want more control. Mix the baking soda with a small amount of water, then coat the meat evenly so the alkaline effect spreads without clumping in one spot.
Timing, resting, rinsing, and pat-dry workflow before cooking
After coating, let the meat rest briefly so the surface chemistry can do its job. The exact time depends on thickness and cut size, but short rests are usually safer than long ones for beginners.
Once the rest is complete, rinse only if needed to remove excess baking soda, then pat the meat very dry. Dry surfaces brown better, which matters if you want a good sear instead of steamed meat.
Use a small amount of tenderizer baking soda and distribute it evenly over the meat.
Let the meat sit only long enough for the surface to change, not so long that the texture turns soft.
Remove extra residue, then pat dry so the pan can brown the meat properly.
How to pair the method with browning, searing, or wok cooking
This method works best with high heat and short cooking times. A hot skillet, wok, or grill pan gives you the browning you want before the meat has time to overcook.
If you are using a wok-style stir-fry, cook in batches so the pan stays hot. Crowding the pan can lower the temperature and hide the benefits of the tenderizer.
Flavor, Browning, and Doneness: What Changes in the Pan
Using baking soda changes more than texture. It can affect color, browning speed, and how seasoning tastes on the finished meat.
How baking soda affects Maillard browning and surface color
Because baking soda raises surface pH, it can speed up Maillard browning. That often means deeper color and faster browning in the pan, especially on thin cuts.
This can be helpful, but it also means the meat may look done sooner than it actually is. Watch the whole cooking process, not just the surface color.
How to season after tenderizing so the meat still tastes balanced
Because baking soda can leave a slight alkaline note, season thoughtfully after tenderizing. Salt, pepper, garlic, soy sauce, ginger, or other bold flavors can help restore balance.
For best results, do not rely on baking soda alone. Treat it as a texture aid, then build flavor with the same care you would use in any stir-fry or pan-seared dish.
Doneness cues for different proteins after treatment
Chicken should still be cooked to a safe internal temperature as recommended by USDA guidance. Beef, pork, and other proteins should be cooked to the doneness you prefer, but treat color as only one clue, not the final answer.
After baking soda treatment, meat may brown quickly while the center is still catching up. Use a thermometer when possible, especially for poultry and mixed dishes.
Common Mistakes, Troubleshooting, and Food Safety
Most problems come from too much baking soda, too much time, or uneven coating. A few simple corrections can save the batch.
Fixing off flavors, mushy texture, and uneven tenderizing
If the meat tastes soapy, you likely used too much or let it sit too long. Next time, reduce the amount and shorten the rest time.
If the texture is mushy, the meat may have been coated unevenly or left in contact with the baking soda for too long. Mix more thoroughly and use a lighter hand, especially with small pieces.
Some pieces are tender while others still feel firm.
The coating was uneven. Toss the meat more thoroughly or use a slurry so the surface treatment spreads more consistently.
Preventing contamination, over-resting, and unsafe room-temperature handling
Keep raw meat refrigerated until you are ready to treat it. After the baking soda step, do not leave it sitting out for long periods at room temperature.
Use clean hands, utensils, and bowls, and wash anything that touched raw meat before reusing it. If you are working with poultry, follow standard food safety guidance and avoid cross-contamination with ready-to-eat foods.
Never use the same cutting board or tongs for raw and cooked meat unless they have been washed thoroughly first. This matters just as much with baking soda tenderizing as it does with any other raw-meat prep.
How to store treated meat before cooking or freezing
If you are not cooking right away, keep the treated meat refrigerated in a covered container. Do not let it sit out to “finish tenderizing” for hours.
Freezing is possible, but quality depends on the cut and how evenly the baking soda was applied. If you freeze it, label the package so you remember it was already treated and can cook it without repeating the process.
When to Choose Baking Soda vs. Other Tenderizing Methods
Baking soda is not the only way to improve texture. The best choice depends on the meat, the flavor you want, and how much time you have.
Comparison with salt brining, yogurt, buttermilk, vinegar, and commercial tenderizers
Salt brining is often better when you want moisture retention and deeper seasoning throughout the meat. Yogurt and buttermilk are useful for gentle acid-based tenderizing, especially in marinated chicken, while vinegar can be effective but easier to overdo because it is sharper and more aggressive.
Commercial tenderizers may contain enzymes or other ingredients designed for specific results, but they vary by brand and should be used according to the label. If you want a broader comparison of kitchen tools and heat methods, our article on whether air fryers toast bread shows how cooking method changes texture just as much as ingredients do.
- Fast and inexpensive
- Works well for thin, quick-cooked meat
- Can improve browning
- Easy to overuse
- Poor choice for thick cuts
- Can cause off flavors if left too long
Best use cases for home cooks in 2026 kitchens
For home cooks, the best use cases are still the same: quick stir-fries, sliced chicken, ground meat dishes, and any recipe where tenderness on the surface matters most. It is especially helpful when you need a fast fix without waiting for a long marinade.
In modern kitchens with induction burners, powerful air fryers, and fast preheating ovens, the food often cooks quickly enough that a small texture boost can make a real difference. That said, the method is still best treated as a precision tool, not a default habit.
Final Verdict: Is Tenderizer Baking Soda Worth Using?
Yes, tenderizer baking soda is worth using when the cut is thin, the cook time is short, and you want a softer bite without adding a lot of extra ingredients. It is less useful for thick cuts or delicate proteins, where another method will usually give a cleaner result.
Decision guide for choosing the right amount, method, and cut
Choose a light coating for sliced beef, chicken strips, or ground meat. Choose a slurry if you want more even coverage, and keep the rest time short enough that the texture stays pleasant.
If you are unsure, start with the smallest practical amount and cook a test portion first. That approach is more reliable than trying to correct an overtreated batch later.
Practical recap for getting juicy, tender meat without trial-and-error
The simplest formula is this: use a small amount, coat evenly, rest briefly, cook hot and fast, and season well afterward. That process gives you the best chance of juicy, tender meat without the soapy taste that comes from overdoing it.
When used with care, tenderizer baking soda is a smart pantry technique that fits neatly into everyday cooking. It is not magic, but it is one of the most effective low-cost texture fixes for the right kind of meat.
Frequently Asked Questions
Start with a very small amount, often around 1/4 teaspoon per pound for thin cuts, then adjust by meat type and thickness. Use less for ground meat and delicate proteins.
Rinsing can help remove excess baking soda and reduce off flavors if you used a dry coating. After rinsing, pat the meat dry so it browns well.
Keep the rest time short and matched to the cut size. Thin slices need less time than thicker pieces, and long resting can make the texture mushy.
Yes, it can work well on thin chicken pieces, stir-fry beef, and ground meat. It is usually not the best choice for thick steaks or delicate seafood.
Soapy flavor usually means too much baking soda or too long a rest time. Use a lighter hand and season the meat well after tenderizing.
Yes, when you handle the meat like any raw protein: keep it refrigerated, avoid cross-contamination, and cook poultry to USDA-recommended safe temperatures. Do not leave treated meat at room temperature for long periods.
