
Under-Proofed Dough: How to Spot It, Fix It, and Bake with Confidence

If you’ve ever pulled a loaf from the oven and thought, “It looked ready… so why is the crumb so tight?”—under-proofed dough may be the culprit.
Proofing is the stage where yeast produces gas and the dough expands enough to bake into a light, open loaf. When that stage is cut short, the dough can go into the oven before it has built enough internal gas and relaxation. The result is often a loaf that looks energetic in the oven but bakes up dense, uneven, or oddly split.
The good news: under-proofed dough is often easier to recover from than over-proofed dough, but not always—severely under-proofed dough can still be hard to correct, and some over-proofed dough can sometimes be partially salvaged depending on the formula.

What Under-Proofed Dough Is
Under-proofed dough is dough that has not fermented long enough before baking. In plain terms, the yeast has not had enough time to produce enough gas, and the gluten network has not relaxed enough to trap that gas well.
That matters because bread structure is a balance of three things:
- Gas production from yeast
- Gluten strength to hold the gas
- Proper fermentation time so the dough expands and becomes airy
When proofing ends too early, the dough can still be strong and elastic, but it hasn’t reached the point where it bakes into an open, well-aerated crumb. In many cases, the loaf will still rise in the oven, but that rise is often irregular rather than balanced.
A helpful way to think about it: under-proofed dough is not “weak” in the same way over-proofed dough is. It is often still tight, springy, and full of stored potential—but that potential has not been developed far enough yet.
How to Tell If Dough Is Under-Proofed
The most reliable diagnosis comes from combining appearance, touch, and behavior. One clue alone can mislead you.
What it looks like
Under-proofed dough often appears:
- Smaller or less expanded than expected
- Tighter on the surface
- Less puffy than properly proofed dough
- Smooth and firm rather than airy and slightly jiggly
In shaped loaves, it may look neatly formed but not especially relaxed. In a banneton, it may seem to hold itself very firmly. That can feel reassuring, but firmness alone does not mean readiness.
What it feels like
A dough that is under-proofed often feels:
- Dense to the touch
- Resistant when pressed
- Taut rather than pillowy
- Strong, with less visible air underneath the skin
This is one reason beginners sometimes mistake “firm” for “ready.” But firmness can also come from low hydration, too much bench flour, or a dough that was under-mixed. So the feel should be read alongside the other signs.
What the poke test tells you
The poke test is useful near the end of the final proof, but it has limits. Some doughs spring back quickly even when they are close to ready, and others may hold an indentation for reasons that have more to do with dough type than proofing alone. Use it as one clue, not the verdict.
Press a floured fingertip gently into the dough and watch the indentation.
A common sign of under-proofing is that the dough springs back very quickly or completely. In other words, the dough is still so elastic that it wants to snap right back into place.
That said, the poke test is not a perfect standalone test. It works best when you pair it with:
- Visible expansion
- Surface feel and relaxation
- The recipe’s dough type and hydration level
During bulk fermentation, repeated poking can damage fragile dough or give you false confidence. Use it sparingly and only when the dough is already near the expected end of proofing.
What it may do in the oven
Under-proofed dough can open up quickly when scored, and it may show strong oven spring. But that does not guarantee a balanced loaf. Depending on the formula and how under-proofed it is, the expansion may be uneven, with a burst on one side, a blowout, or a crumb that is open in some places and tight in others.
Under-Proofed vs Properly Proofed vs Over-Proofed Dough
Here’s the fastest way to sort out the three states.
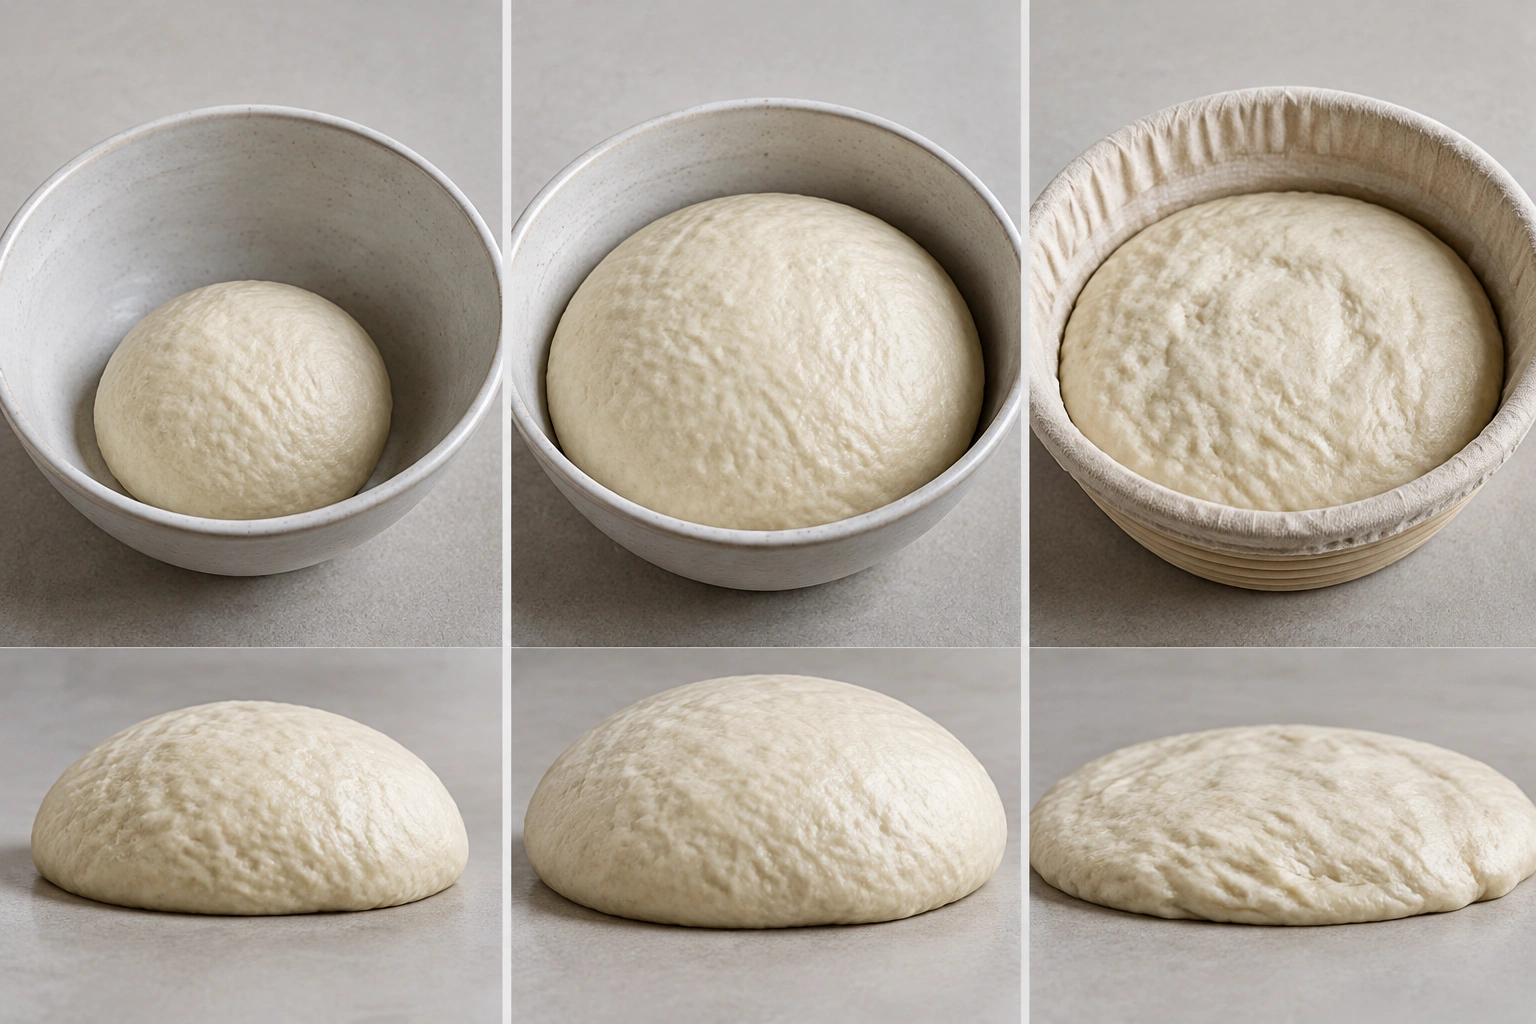
| Dough state | Look | Feel | Poke test | Likely baking result |
|---|---|---|---|---|
| Under-proofed | Tight, less expanded, often very structured | Dense, springy, resistant | Springs back quickly or completely | Strong oven spring, but often tight or uneven crumb |
| Properly proofed | Puffy, relaxed, slightly airy | Light, elastic, gently responsive | Indentation returns slowly and partially | Balanced rise, good oven spring, more even crumb |
| Over-proofed | Very fragile, over-expanded, sometimes sagging | Weak, overly soft, fragile | Indentation may stay or dough may collapse | Limited oven spring, flatter loaf, weaker structure |
The biggest trap is assuming that more oven spring always means better proofing. Under-proofed dough can spring hard because it still has a lot of elastic tension. Properly proofed dough springs in a more controlled way because it has developed enough gas and relaxation to expand evenly.
For a deeper look at crumb problems that can come from proofing issues, see our guide on why you get a big hole under the bread crust.
Why Dough Becomes Under-Proofed
Under-proofing usually comes down to one of a few practical causes.
1) The dough simply needed more time
This is the most common reason. Fermentation is not a clock-based event; it is a living process. If the dough was baked because the timer rang, not because it looked and felt ready, it may be under-proofed.
2) The kitchen was too cool
Cool ambient temperature slows yeast activity. A dough that proofed beautifully in a warm kitchen may lag badly in a cold one. This is especially noticeable in winter or in kitchens with drafts.
A cooler environment does not mean the dough is doomed—it usually just means it needs longer.
3) The dough temperature started too low
If the mixed dough begins cold, proofing starts slowly. That can happen when water is cold, ingredients are chilled, or the mixing bowl sits in a cool room. Dough temperature matters because yeast works more slowly when the dough itself is cold, not just the room around it.
4) The formula is naturally slower
Enriched doughs, such as brioche, often proof more slowly than lean doughs because fat, sugar, and eggs can slow fermentation. High-hydration doughs can also be harder to read because they may look active before they are truly expanded enough.
5) Too much flour changed the dough’s behavior
Adding excess flour during mixing or shaping can make dough feel stiff and dense. That can mimic under-proofing, even if fermentation is reasonably far along. If the dough feels tight but also dry or heavy, the issue may be handling, not just time.
6) Gluten was not developed enough
Weak gluten can make a dough behave like it is under-proofed because it cannot trap gas efficiently. If the dough tears easily or lacks stretch, the problem may be incomplete gluten development rather than fermentation alone.
If you suspect that may be the issue, our article on under-kneaded dough can help you separate the two.
How to Test Whether Your Dough Is Ready to Bake
Use this checklist instead of relying on the clock alone.
Step 1: Look at the dough’s overall expansion
Ask whether the dough has visibly expanded and relaxed. It should look fuller and less tight than when it was first shaped. Exact rise targets vary by formula, so use the recipe as your first guide rather than assuming one universal percentage works for every dough.
Step 2: Check the surface and shape
A ready dough usually looks gently aerated, not rigid. If the surface is still very taut and the loaf feels like it is “holding its breath,” it may need more time.
Step 3: Use the poke test near the end
Press gently. If the indentation springs back immediately, the dough is likely still under-proofed. If it returns slowly and leaves a slight mark, it is closer to ready. If it barely springs back at all, be cautious—at that point you may be moving toward over-proofing, depending on the dough.
Step 4: Judge the dough type
This is where many bakers go wrong. A high-hydration dough, a lean sandwich loaf, and a rich brioche do not behave the same way. A dough that seems “too soft” may actually be ready, while one that feels firm may still need more time because it is enriched or cool.
Step 5: Think about the proofing environment
If the room is cold, the dough may simply be behind schedule. If it is warm, proofing may be moving faster than expected. The environment matters enough that timing should always be read in context.
For a broader look at hydration and how it changes handling, you may also find our guide on bread dough hydration useful.
What to Do If Your Dough Is Under-Proofed
If the dough is only slightly under-proofed, the fix is usually straightforward.
Quick decision guide
- Slightly under-proofed: Keep proofing and check again soon. Look for a little more expansion, a softer surface, and slower spring-back.
- Clearly under-proofed: Give it more time in a warmer spot if needed, then recheck every so often until it looks relaxed and aerated.
- Severely under-proofed: Be cautious about baking right away. If the dough is still very tight and resistant after extra time, the issue may be formula-related, and the loaf may not improve much without more fermentation.
What to do next
-
Give it more time.
Return it to proof and check again after a reasonable interval based on the dough’s temperature and your formula. For a slightly under-proofed dough, that may mean a short extra rest rather than a full reset. -
Move it to a warmer spot if needed.
A slightly warmer environment can help the dough finish proofing more predictably. Avoid extremes; you want steady fermentation, not a hot rush. -
Recheck the dough, not just the clock.
Look for more expansion, a softer feel, and a slower spring-back response. Readiness usually shows up as a dough that feels lighter, looks more relaxed, and no longer snaps back right away. -
If shaping disturbed the dough, let it relax.
Sometimes dough feels “under-proofed” when it is actually just tense from shaping. A short rest can help it settle before you decide whether it truly needs more proofing. -
If it still seems very tight, inspect the formula.
If the dough remains dense after extra time, the issue may be weak gluten or too much flour rather than fermentation alone.
If the dough is dramatically under-proofed, extending the proof is usually the best move. Restarting is rarely necessary unless the formula or handling has gone seriously off track.
What Happens If You Bake Under-Proofed Dough Anyway
You can bake it, but you should know what to expect.
Slightly under-proofed dough may still bake acceptably, especially in rustic loaves where a more assertive oven spring and chewier texture are not a problem. But if the dough is clearly tight and unexpanded, baking early usually leads to a less balanced loaf.
Under-proofed dough often gives a burst of oven spring because it still has a lot of internal tension. That can sound appealing, but the loaf may not expand evenly. The crumb can end up tight in some areas and more open in others, and the texture may feel heavy rather than tender.
In some breads, the crumb can also seem gummy or undercooked in dense sections, though that is not caused by under-proofing alone. It can also come from formula, hydration, shaping, or baking issues.
If the dough is already in the oven, there is usually nothing meaningful you can do to fix proofing itself at that point. Post-bake, you can only work with the loaf you have—there is no way to continue proofing or fully correct the structure after baking. The real salvage step is pre-bake: give the dough more time before it goes into the oven.
How to Prevent Under-Proofing in Future Bakes
Prevention is mostly about reading the dough more carefully and controlling the environment.
Use time as a guide, not a verdict
A recipe schedule is a starting point. The dough itself gets the final say. If your kitchen is cooler than the recipe assumes, the dough may need longer.
Track dough temperature
Dough temperature strongly influences fermentation speed. If your dough is consistently slow, check whether your water, flour, or room is keeping it colder than expected.
Learn your dough styles
Lean doughs, enriched doughs, and high-hydration doughs all proof differently. Once you bake the same style a few times, you’ll start noticing the difference between “genuinely under-proofed” and “just different.”
Avoid over-flouring during shaping
Extra bench flour can make dough feel stiffer than it really is. Use only what you need to prevent sticking.
Watch for structure, not just size
A dough can look larger and still be under-proofed if it hasn’t relaxed enough. Aim for a dough that feels aerated and responsive, not merely bigger.
Keep notes
Write down room temperature, dough temperature if you measure it, how long the dough took, and what the loaf looked like after baking. Those notes are often more useful than memory alone.
Common Mistakes That Make Dough Seem Under-Proofed
Sometimes the dough is not under-proofed at all.
Confusing dense dough with weak gluten
A dough that tears easily or feels stiff may be under-kneaded, not under-proofed. If the gluten network is weak, the dough may never trap gas well, even if you wait longer.
Trusting the poke test too early
The poke test is best near the end of final proof. Used too soon, it can tell you very little.
Expecting every dough to behave the same
Enriched doughs often move more slowly. High-hydration doughs can feel slack and airy before they are fully ready. A stiff dough may need a different proofing approach than a soft one.
Baking because the dough “looks bigger”
Bigger is not always better. A dough can expand without developing the internal balance needed for a good crumb.
Practical Examples of Under-Proofed Dough
Sandwich loaf
A sandwich loaf that has risen only a little after final proof and springs back instantly when poked is a classic under-proofed case. If baked immediately, it may produce a tight crumb that slices poorly.
Pizza dough
Pizza dough that feels tight and resists stretching may need more time to ferment and relax. If you force it too early, it can shrink back during shaping and bake into a less tender crust.
Brioche
Brioche in a cool kitchen often proofs more slowly than expected. Because it is enriched, it may look less dramatically puffy than lean dough, so the baker has to rely more on feel and formula than on size alone.
High-hydration dough
A high-hydration dough can look lively and jiggly but still be under-proofed if it hasn’t expanded enough internally. The surface may appear active while the structure inside remains underdeveloped.
When to Consult a Master Baker
If your dough keeps confusing you—especially if the same formula alternates between tight, gummy, and collapsed results—it may be worth asking a master baker or experienced instructor to review your process. A second set of trained eyes can help identify whether the real problem is proofing, gluten development, shaping, hydration, or dough temperature.
That kind of guidance is especially useful when you are working with a formula that has several variables at once, such as enriched dough or a high-hydration artisan loaf.
Final Thoughts
Under-proofed dough is usually a timing-and-temperature problem, not a failure. Once you learn the signs—quick spring-back, dense feel, limited expansion, and uneven baking behavior—you can make better decisions in real time.
The real skill is not memorizing a single proofing time. It is learning to read the dough in front of you. When you can do that, you’ll know when to wait, when to bake, and when a loaf just needs a little more patience.