Baking soda paste can help reduce the look of light scratches and scuffs on some hard surfaces, but it will not fix deep gouges or cracks. Test first, rub gently, and stop if the finish starts to look dull or cloudy.
Baking soda paste for scratches can help soften light scuffs on some household surfaces, but it is not a true repair for deep damage. Used carefully, it can be a low-cost first step before you reach for a commercial polish or professional repair.
- Best use: Light surface scuffs, haze, and residue on sturdy finishes.
- Main limit: Deep scratches, chips, and cracks need a different repair.
- Safe method: Use a smooth paste, soft cloth, and very light pressure.
- Surface care: Spot-test first and rinse away all residue after use.
- Stop early: If the finish clouds or dulls, switch to another fix.
Baking Soda Paste for Scratches: What It Can and Cannot Fix
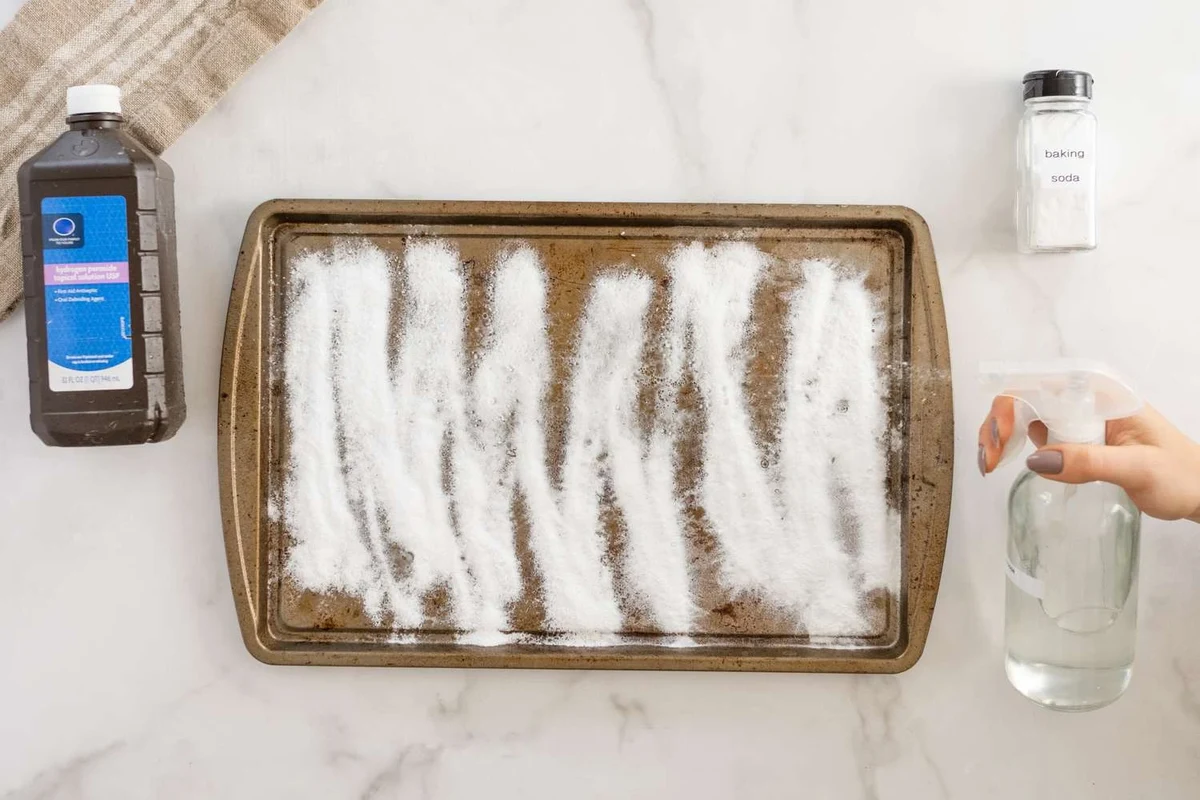
Baking soda paste works because baking soda is a very mild abrasive. When mixed with water, it creates a fine paste that can gently rub away surface haze, smudges, and some shallow marks without the harshness of stronger cleaners. That is why it shows up in cleaning advice for kitchens, appliances, and other smooth surfaces, much like the method used in baking soda vinegar cleaning ovens.
It is important to separate surface marks from real scratches. A light scuff or transfer mark may improve because the paste removes residue around the mark, while a deep gouge, crack, or chip will not be filled in by baking soda. If the surface is already cut through the finish, rubbing harder usually makes the damage more obvious.
How the paste works as a mild abrasive on surface marks
The paste acts like a soft polishing agent. The tiny particles in baking soda help loosen grime and level out very shallow discoloration, especially when the mark is really a film on top of the surface rather than a cut into it.
That is why the result can look better after a gentle wipe even if the scratch itself is still there. You are often improving the surrounding surface, which reduces contrast and makes the mark less noticeable.
Scratch types it may improve versus deep damage it cannot repair
Baking soda paste may help with light scuffs, water spots, utensil smears, and faint rub marks on durable finishes. It may also reduce the look of some surface haze on glass, ceramic, or stainless steel when used correctly.
It cannot repair deep scratches, gouges, etched glass, peeled paint, or cracked coatings. If your fingernail catches strongly in the mark, the damage is usually beyond what a paste can fix.
Do not use baking soda paste as a cure-all on delicate coatings, anti-glare screens, or surfaces with a factory finish that can be dulled by abrasion. When in doubt, check the manufacturer’s care instructions first.
Best Surfaces to Test Before You Rub
Before applying any paste, test a small hidden area. Even mild abrasives can leave a dull spot if the finish is soft, painted, or coated.
Glass, stainless steel, ceramic, plastic, and painted finishes
Baking soda paste is most often tried on glassware, stainless steel sinks or appliances, ceramic cookware, hard plastic, and some painted household finishes. On these surfaces, the paste may help remove light scuffs or residue if the material is sturdy and the rubbing is gentle.
For stainless steel, always follow the grain direction so you do not create crosswise haze. For glass and ceramic, use the lightest pressure possible and stop as soon as the mark stops improving.
Surfaces to avoid because the paste can worsen the damage
Avoid using the paste on soft plastics, glossy painted cabinets, polished stone, coated screens, and specialty finishes unless the care guide specifically allows mild abrasion. These surfaces can become cloudy or visibly scratched if rubbed too hard.
Also avoid anything already peeling, flaking, or cracked. A paste may lift more finish, which turns a small flaw into a larger one.
If you are unsure, test in a corner that is normally hidden. A good test spot is one you can inspect in bright light after the area dries.
How to Make Baking Soda Paste the Right Way
The paste should be smooth, spreadable, and not sandy. A gritty mix can behave more like scrub powder than a gentle polish.
Simple ingredient ratio for a usable paste
A practical starting point is about 3 parts baking soda to 1 part water. Add the water slowly so you can stop when the texture becomes thick enough to cling without running.
If you need a larger batch, keep the same ratio. Consistency matters more than exact volume for this kind of DIY cleaning task.
Adjusting thickness for vertical, flat, or delicate surfaces
For vertical surfaces, make the paste thicker so it stays in place. For flat surfaces, a slightly looser paste spreads more evenly and is easier to wipe away.
For delicate finishes, keep the paste on the smoother side and use less pressure. If it feels too dry or sandy, add a few drops of water; if it feels watery, add a little more baking soda.
Why water quality, cloth choice, and grain direction matter
Clean water helps avoid extra residue, especially on glass and stainless steel. A soft microfiber cloth or a damp cotton cloth is usually safer than rough paper towels, which can add tiny scratches of their own.
On brushed metal, always move with the grain. On any polished surface, straight, light strokes are safer than circular scrubbing because they are less likely to leave visible swirl marks.
If your paste dries out during use, it can become more abrasive. Remake it if needed instead of adding lots of extra pressure to a stiff, crumbly mix.
Step-by-Step DIY Scratch Removal Method
This method is best for light marks. Work slowly and check the surface often so you do not over-polish one spot.
Cleaning the area before applying the paste
Start by washing away loose dirt, grease, or crumbs. If you skip this step, trapped particles can act like sandpaper and create more fine scratches.
Rinse or wipe the area clean, then dry it lightly so the paste can work on the mark itself instead of on surface grime. This is especially important on kitchen appliances and cookware, where oil residue can hide the true condition of the finish.
Gentle rubbing technique and how long to work the mark
Apply a small amount of paste to the cloth, not directly to the surface. Rub with light, even pressure for short intervals, then pause to check the mark in good light.
Work in the direction of the grain on metal, and use small straight strokes on glass or ceramic. If there is no improvement after a brief try, stop rather than scrubbing harder.
Wiping, rinsing, and checking results without overdoing it
Once the mark looks better, wipe away the paste with a clean damp cloth. Then dry the area completely so you can see whether the scratch is truly reduced or just hidden by moisture.
If residue remains, rinse again and dry again. Leaving baking soda behind can create white streaks or a chalky film that makes the surface look dull.
Baking soda is mildly alkaline, which helps it lift greasy residue. That cleaning action can make a light surface mark look less visible even when the underlying scratch has not changed.
Common Mistakes That Make Scratches Look Worse
Most problems come from trying to make the paste do too much. Scratch removal is usually about restraint, not force.
Using too much pressure or the wrong applicator
Pressing hard can turn a small scuff into a larger dull patch. Rough scrub pads, abrasive sponges, and stiff brushes are especially risky on shiny or coated surfaces.
Use a soft cloth and let the paste do the work. If the material is delicate, even a microfiber cloth should be used with a very light hand.
Mixing the paste too thin or too gritty
A thin mix can slide around and leave streaks, while a gritty mix can scratch instead of polish. The goal is a smooth paste that spreads evenly and rinses cleanly.
If it feels sandy between your fingers, it is probably too dry for a safe first attempt. Add water gradually until the texture softens.
Trying to fix deep gouges with a surface polish
Deep damage needs a different solution. A paste may make the area look slightly cleaner, but it will not rebuild missing material or restore a damaged coating.
That is one reason it helps to understand the difference between cleaning and repair. For more on how baking soda behaves in DIY mixtures, see baking soda and vinegar reaction explained simply, which shows how baking soda behaves in common household uses.
Keep the area dry before plugging in appliances or using electrical equipment again. Moisture around outlets, cords, or appliance seams can create safety risks.
When Baking Soda Paste Helps Most in Real-World Use
This DIY method is most useful when the damage is light and the surface is sturdy. It is a practical first try before you spend money on specialty products.
Light scuffs on kitchen appliances and cookware
Stainless steel refrigerator doors, sink basins, and some cookware often show fingerprints, rub marks, and light scuffs that respond well to gentle cleaning. In those cases, the paste may improve appearance without special tools.
Cookware with a durable exterior finish can also benefit, but avoid aggressive rubbing on nonstick interiors or any coated surface unless the manufacturer says it is safe. The same caution applies to many cleaning methods used in the kitchen, including baking soda in laundry benefits and other general-purpose uses: the result depends on the material.
Minor marks on glassware, counters, and household finishes
On glassware, ceramic counters, and hard plastic items, baking soda paste may reduce the look of light rub marks, cloudy residue, or utensil streaks. The key is to work gently and stop early.
For counters and decorative finishes, check the care instructions first. Some materials look hard but have a coating that scratches easily.
Practical examples of before-and-after expectations
Before-and-after results are usually subtle rather than dramatic. A light scuff may become less noticeable, while a deep line will likely remain visible but cleaner around the edges.
Think of the paste as a surface softener, not a magic eraser. If the mark is only a transfer stain or haze, you may see a clear improvement; if it is a true cut in the material, the change will be limited.
- Low cost and easy to mix
- Can reduce the look of light surface marks
- Uses common kitchen supplies
- May dull soft or coated finishes
- Will not repair deep scratches
- Can leave residue if not rinsed well
Safety, Cleanup, and Surface Care After Treatment
Good cleanup matters as much as the rubbing itself. Residue left behind can make a surface look hazy and lead you to think the scratch is still there.
Spot-testing, ventilation, and protecting coatings
Always spot-test first, especially on painted or coated finishes. If you are working near cleaners or other products, keep the area ventilated and avoid mixing chemicals unless the label says the combination is safe.
For food-contact surfaces, make sure the area is rinsed and dry before use. If you are cleaning cookware or prep surfaces, check that no powder remains in seams or corners.
How to remove residue and prevent dulling or streaking
Use a clean damp cloth to remove the paste, then follow with a dry cloth to prevent streaks. On stainless steel, a final wipe with the grain can help the finish look more even.
If the surface still looks dull after cleaning, stop and reassess. You may be seeing abrasion from the cloth or a finish that does not tolerate polishing well.
When to stop and choose a commercial scratch repair product
Stop if the surface starts to look cloudy, chalky, or uneven. That is a sign the material may be too soft for baking soda paste.
Choose a commercial scratch repair product when the item is valuable, the finish is specialty-coated, or the damage is more than a light scuff. For major damage, replacement or professional refinishing is often the smarter choice.
- Test a hidden spot first
- Use a soft cloth and light pressure
- Rinse and dry after every attempt
- Scrubbing hard to force results
- Using abrasive pads on glossy finishes
- Trying to fix cracks or deep gouges with paste
Final Verdict: Is Baking Soda Paste Worth Trying for Scratches?
Yes, baking soda paste for scratches is worth trying when the mark is light, the surface is sturdy, and you want a low-cost first attempt. It is especially useful when the problem may be surface residue, haze, or a shallow scuff rather than true structural damage.
It is not the right solution for deep gouges, cracked coatings, or delicate finishes that scratch easily. In those cases, replacement, refinishing, or a purpose-made repair product is usually the safer and more effective choice.
Use baking soda paste as a gentle test, not a heavy repair method. If the surface improves quickly and stays smooth, it was a smart DIY fix; if not, stop before the finish gets worse.
Best use cases for a low-cost first attempt
This method makes the most sense for light kitchen scuffs, faint marks on hard household surfaces, and situations where you want to try the simplest option first. It is cheap, easy to mix, and easy to stop if it is not working.
Situations where replacement, refinishing, or professional repair is smarter
If the item is expensive, highly visible, coated, or already deeply damaged, a more specialized repair is usually better. When the finish is compromised, polishing alone rarely restores the original look.
For more long-term baking and kitchen guidance, it also helps to keep ingredient knowledge current, such as checking whether pantry items are still usable through resources like does baking soda expire and when to replace. That kind of habit keeps both your baking and cleaning routines more reliable.
Frequently Asked Questions
It may improve the look of very light surface scuffs or residue on glass. It will not repair deep scratches or etched damage.
A simple starting point is about 3 parts baking soda to 1 part water. Adjust slowly until the paste is smooth and spreadable.
It can be used carefully on some stainless steel surfaces, but always rub with the grain and test first. Avoid heavy pressure, which can leave dull streaks.
The paste may have been too gritty, too dry, or rubbed with too much pressure. Residue can also leave a chalky film if it is not rinsed away well.
Only if the paint or coating is durable and the manufacturer’s care instructions allow mild abrasion. Glossy or delicate finishes can dull quickly.
Stop if the damage is deep, the surface starts to cloud, or the mark does not improve after a gentle try. Specialty coatings and valuable items often need a dedicated repair product or professional help.
